

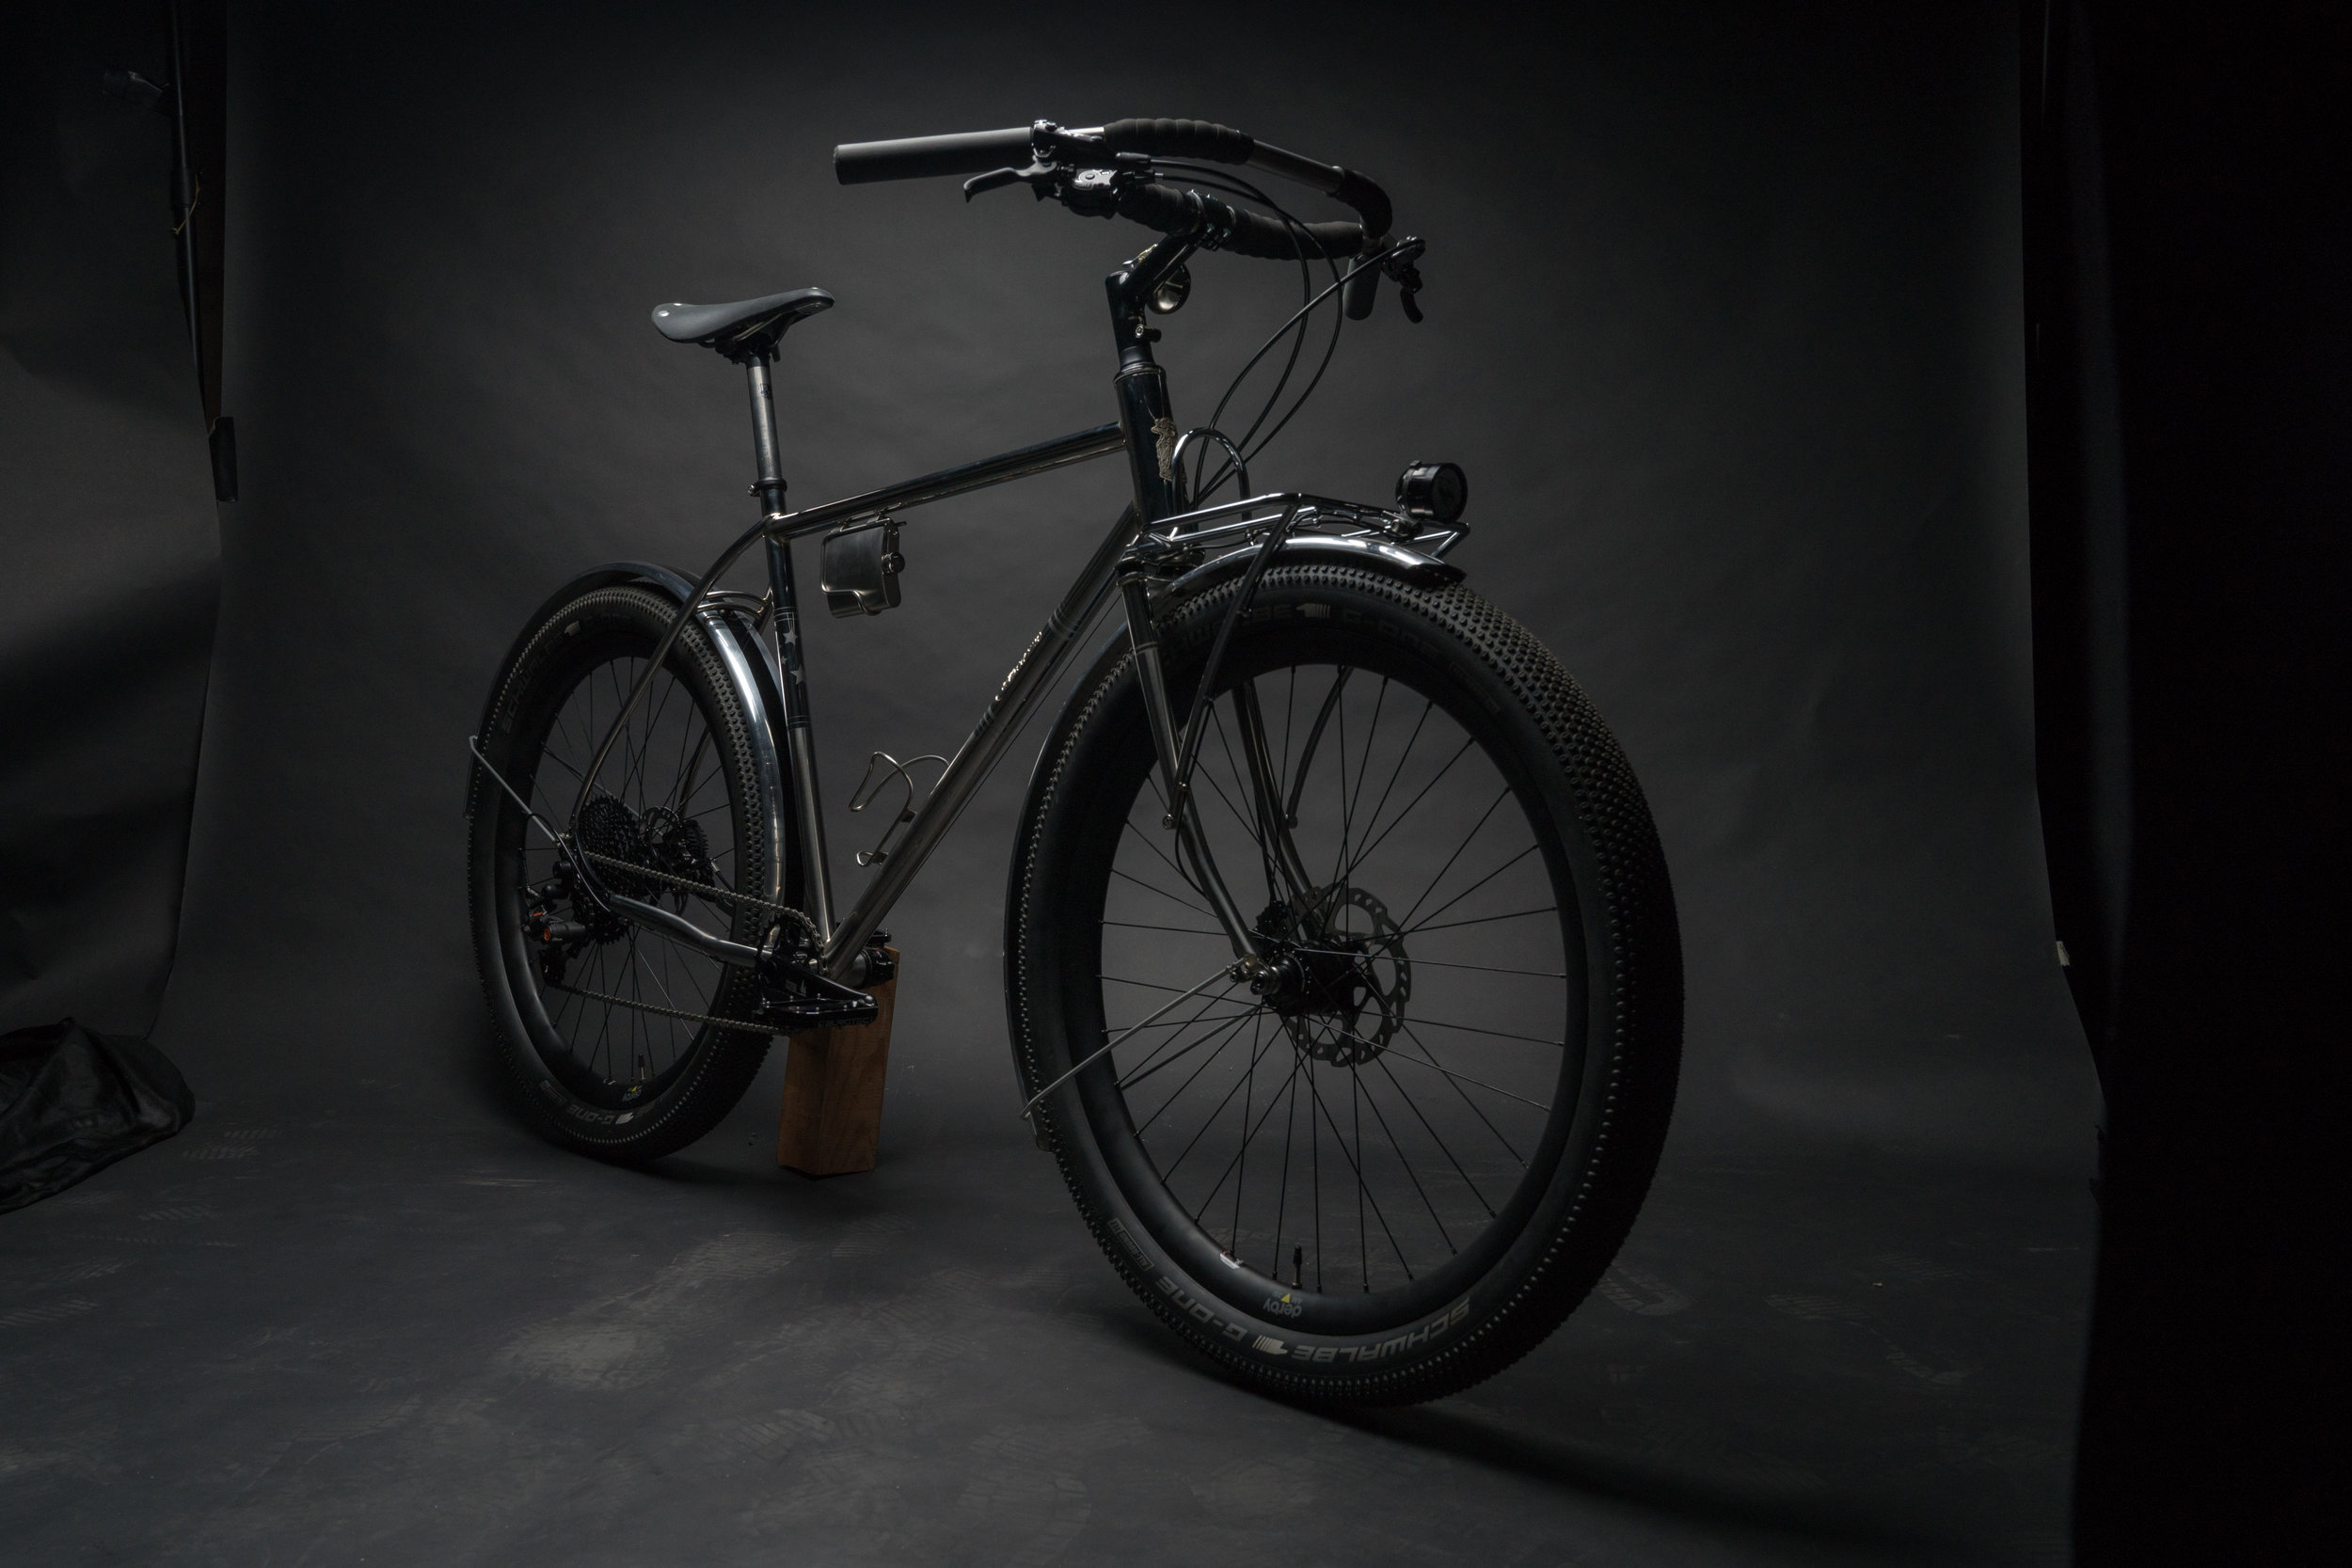
A lot of bikes I build have details that are unique; one-off design features that may or may not be visible at a glance. And then there are, periodically, bikes I build that are striking at a distance, and just seem to light up as you come in for a closer look. This is one of those bikes.

A lot of people have come through the shop over the past eight or nine months, and seen this bike at various stages in the build process. Without seeing it first hand, or building a stainless steel bike for yourself, it's hard to fathom the time and labor involved in its construction and in the finish work. I may build a stainless bike once every five or so years. It's not an easy material to work with, both physically, and spiritually.

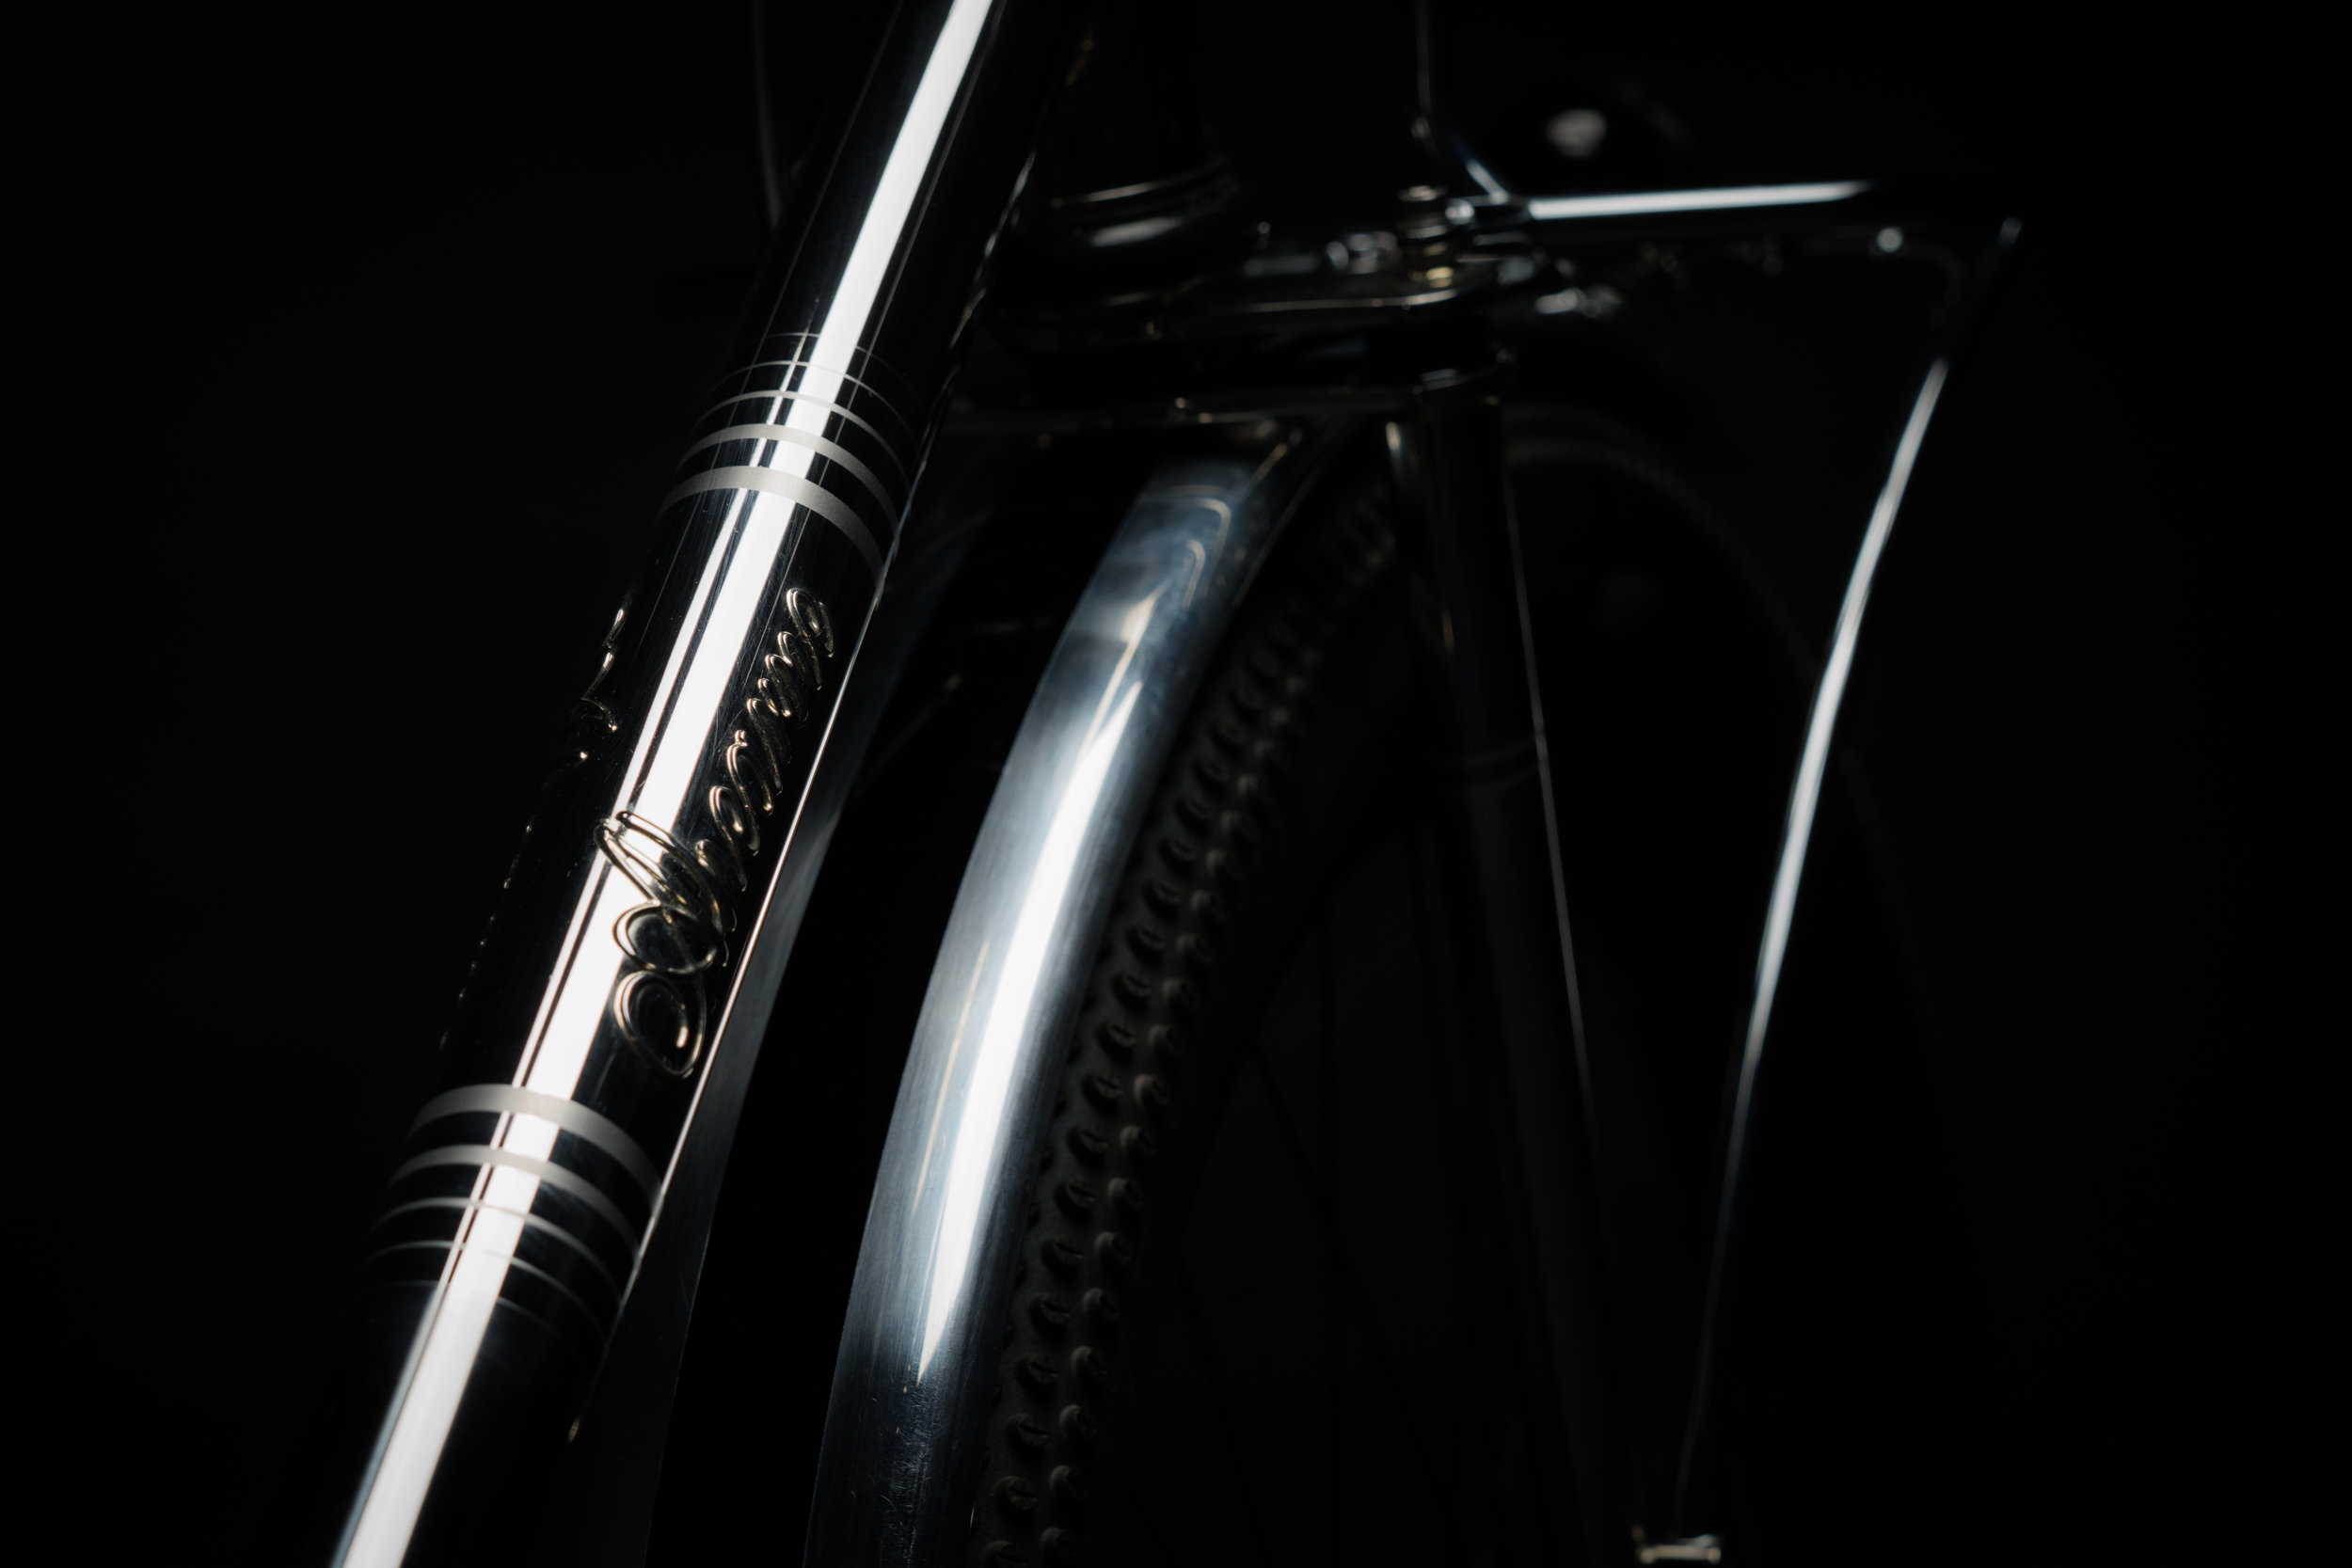
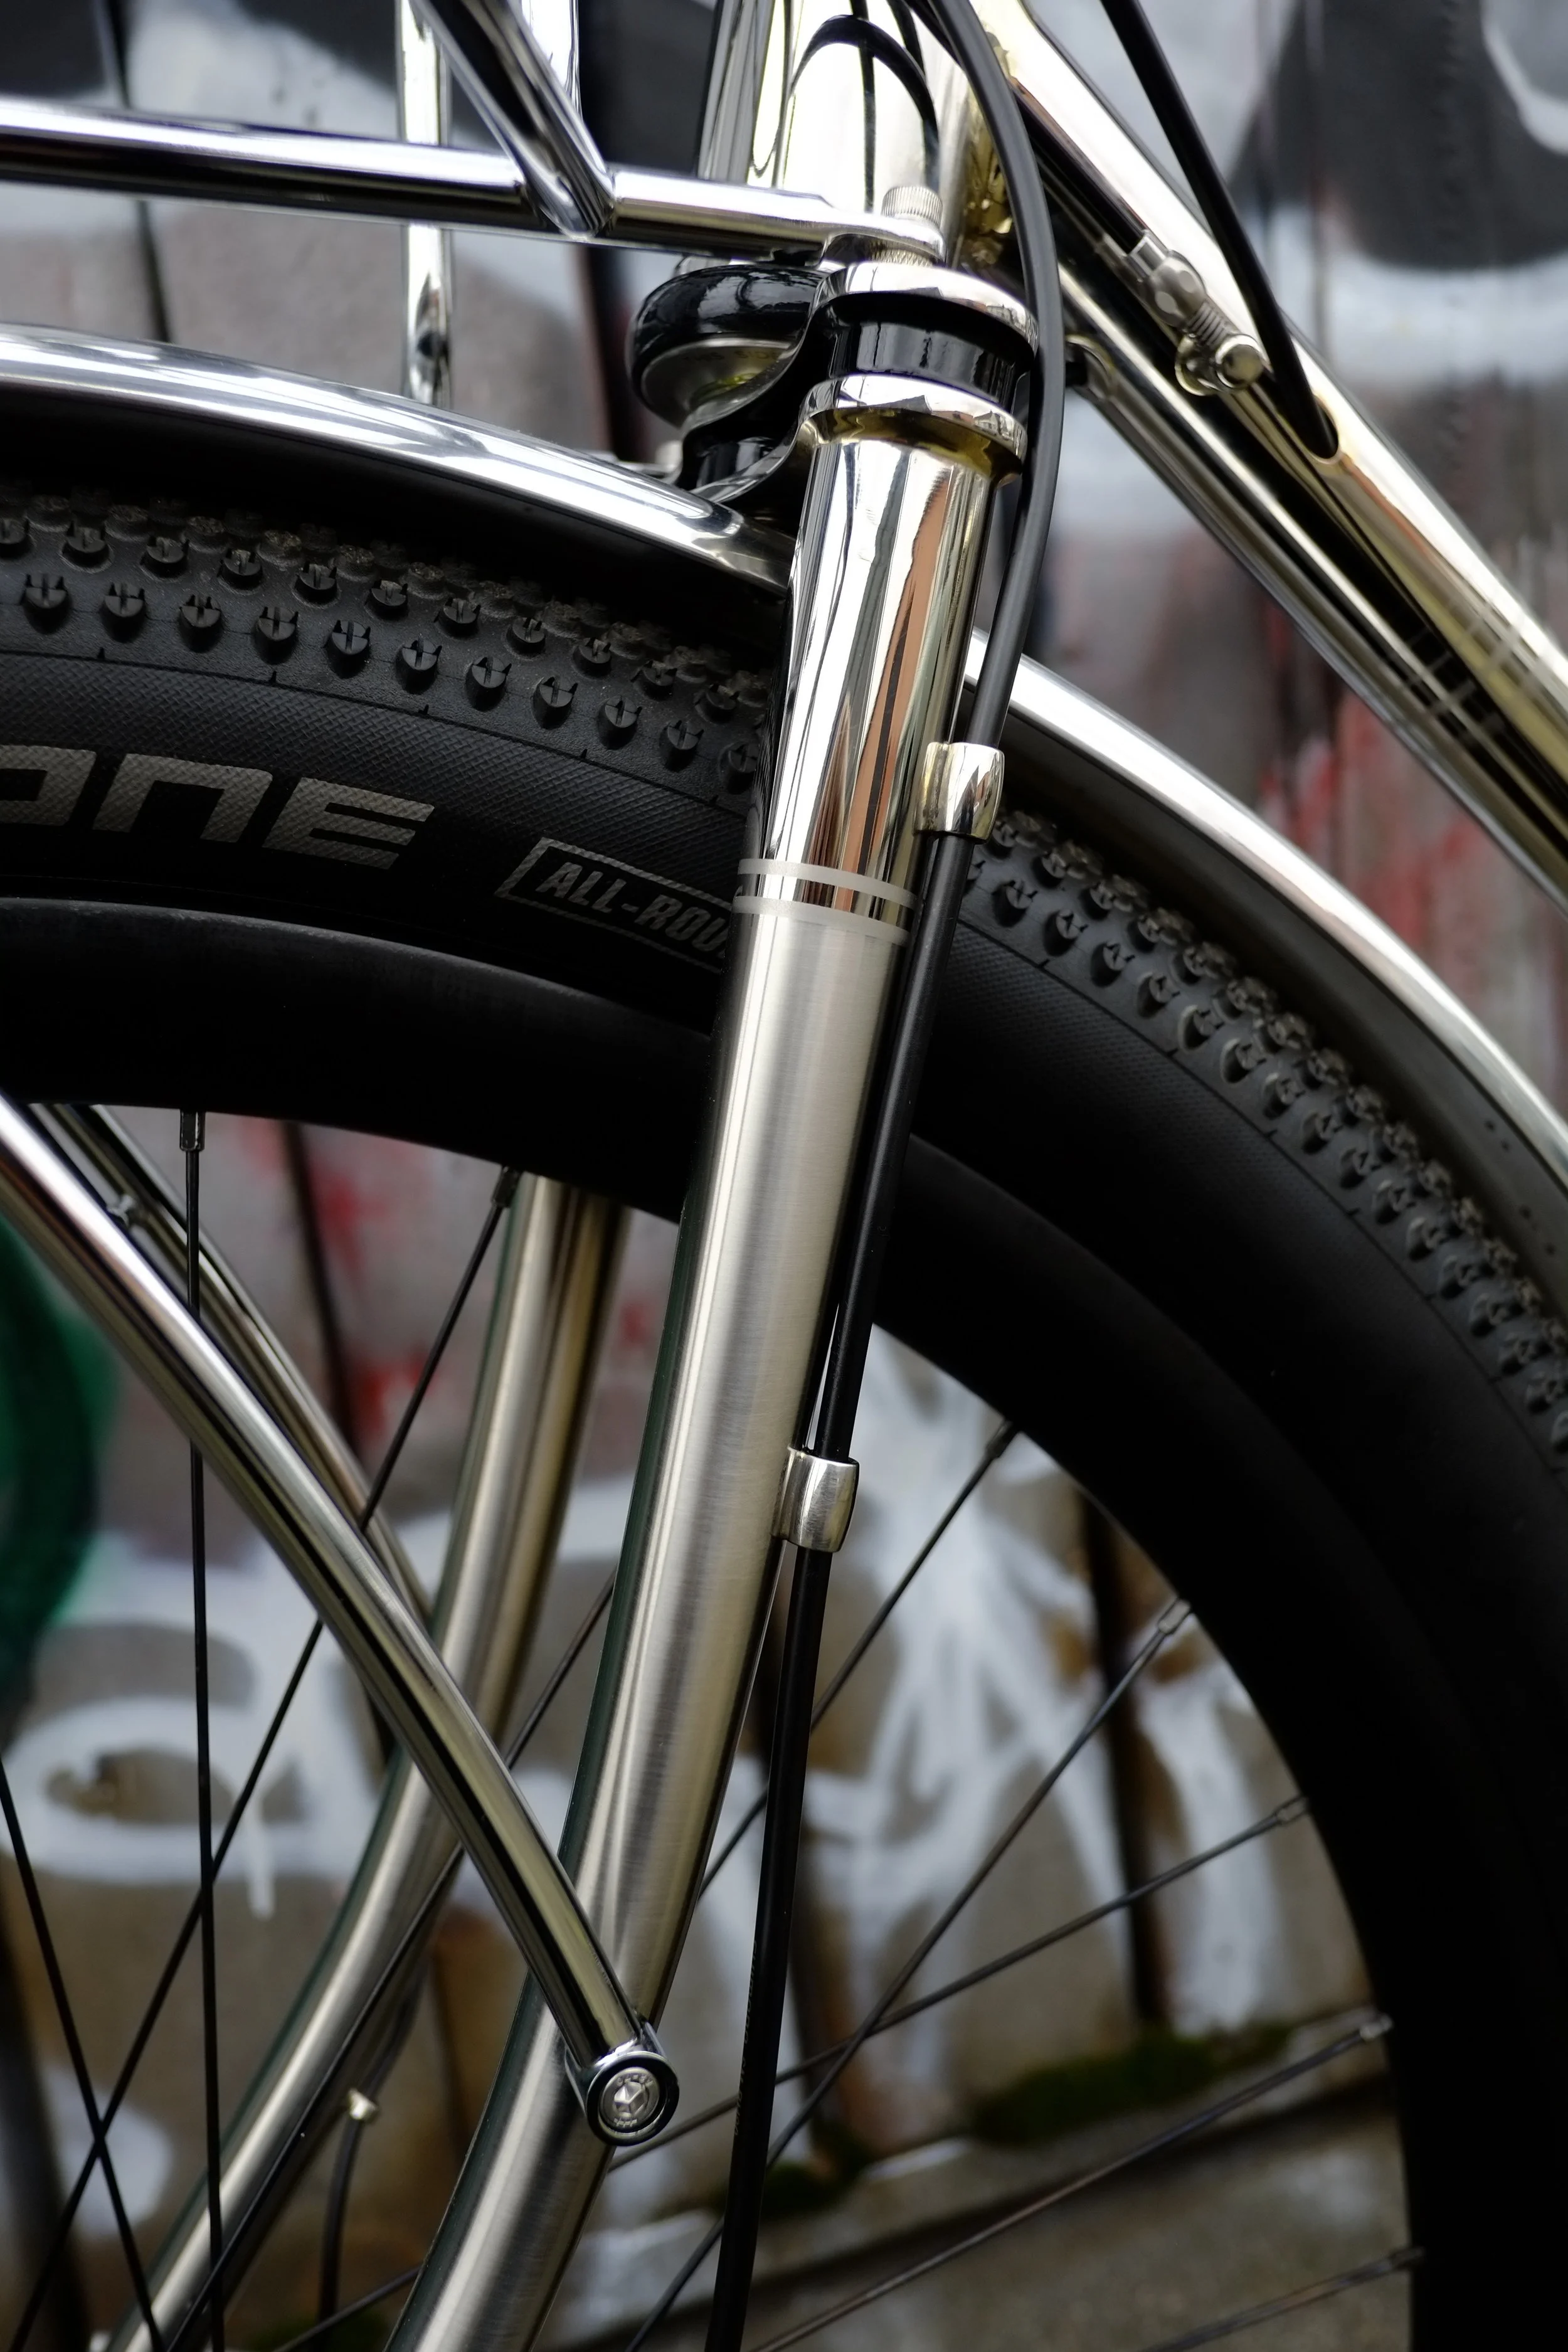
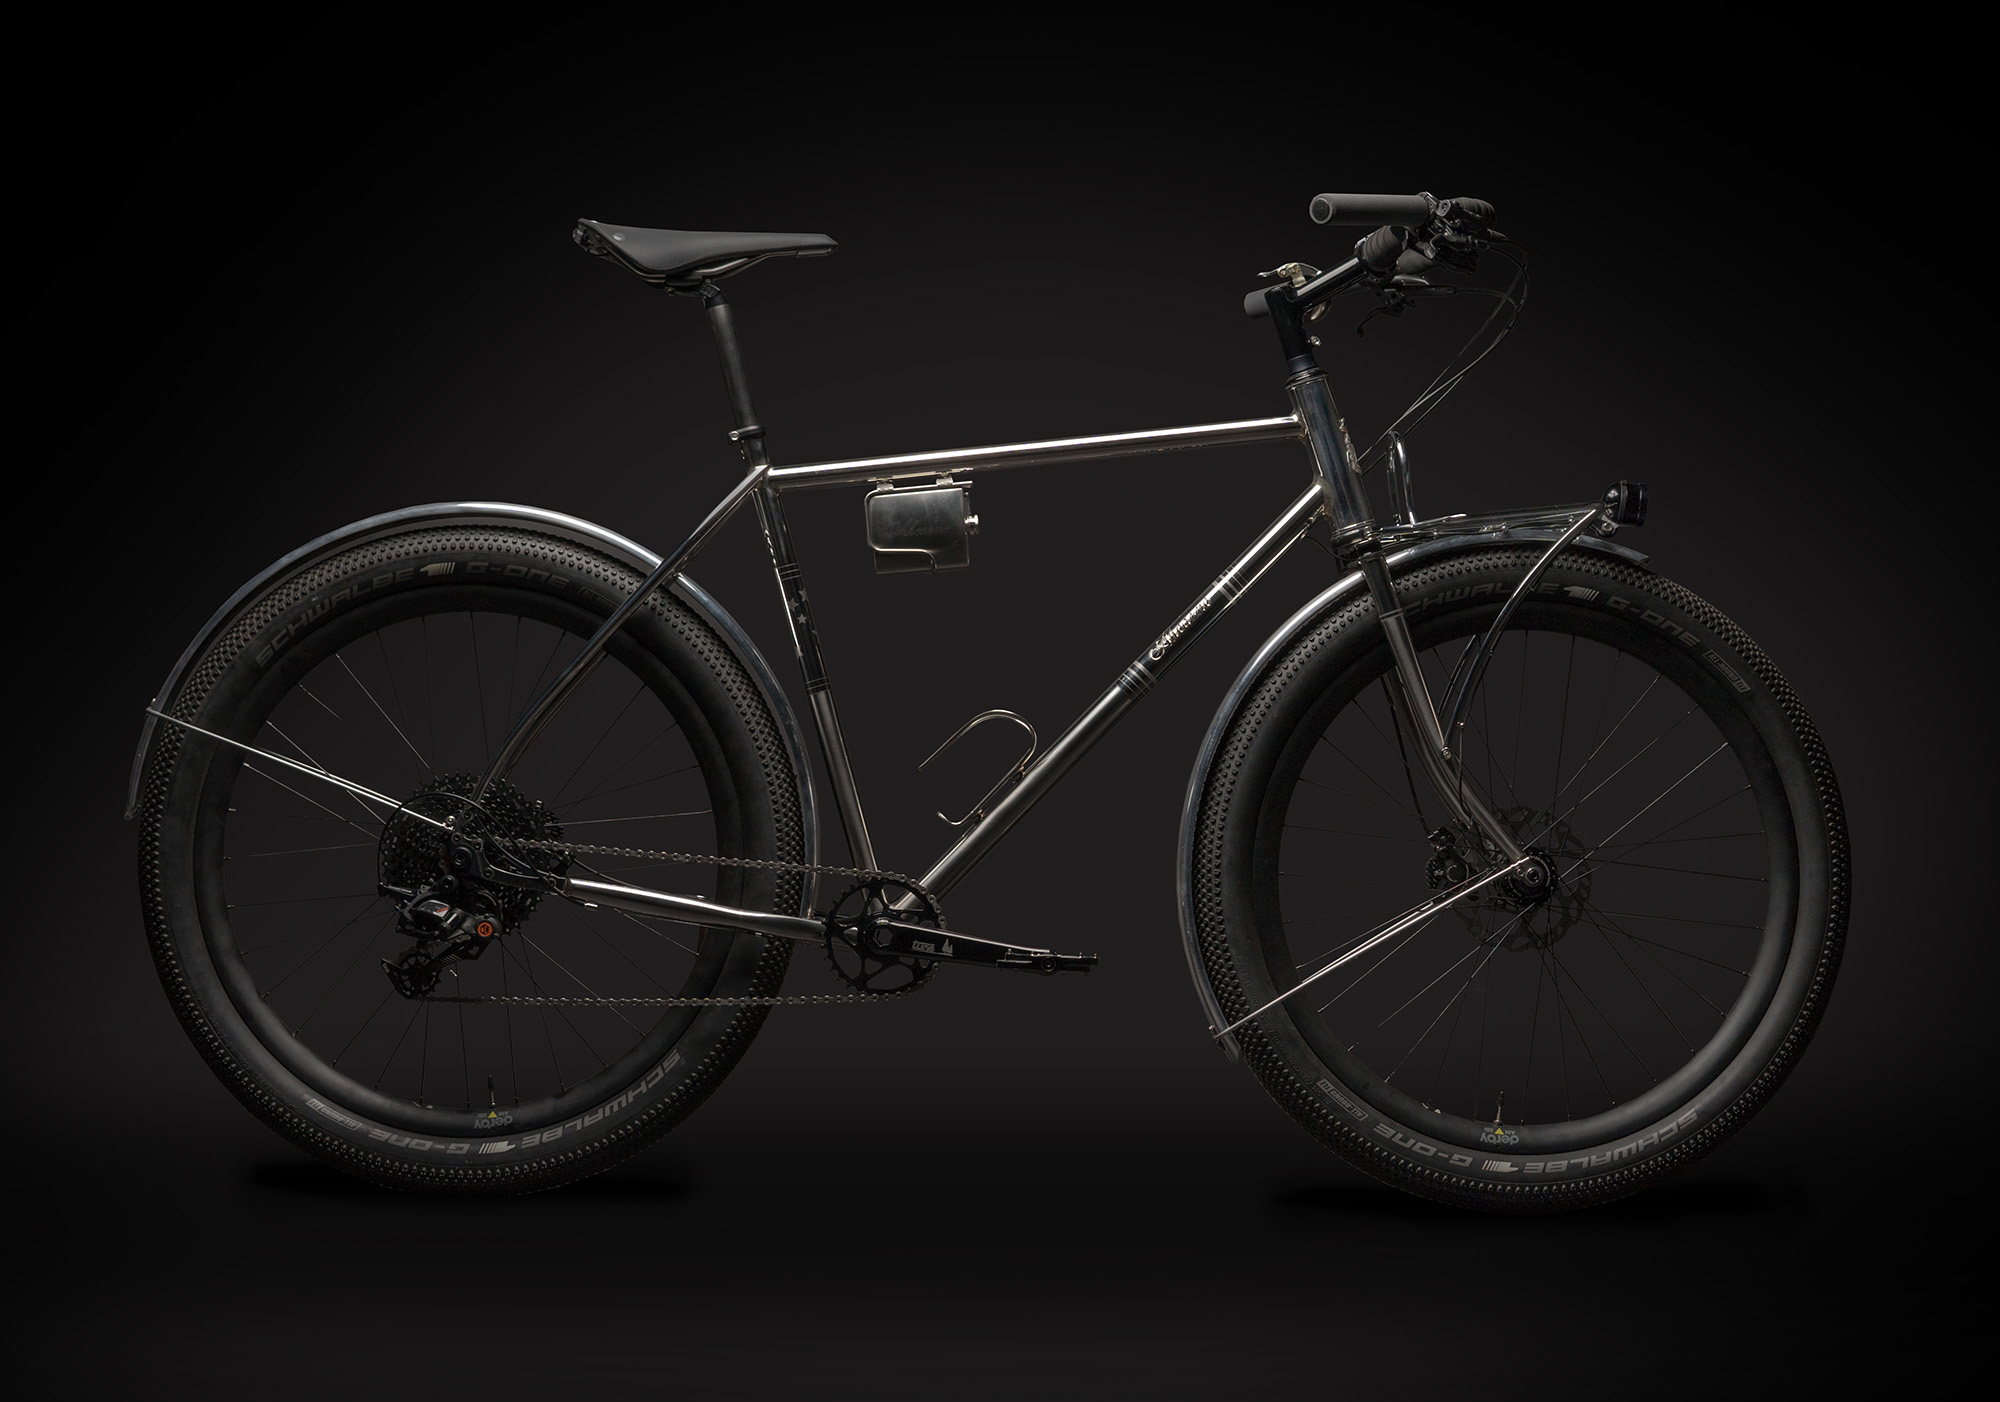
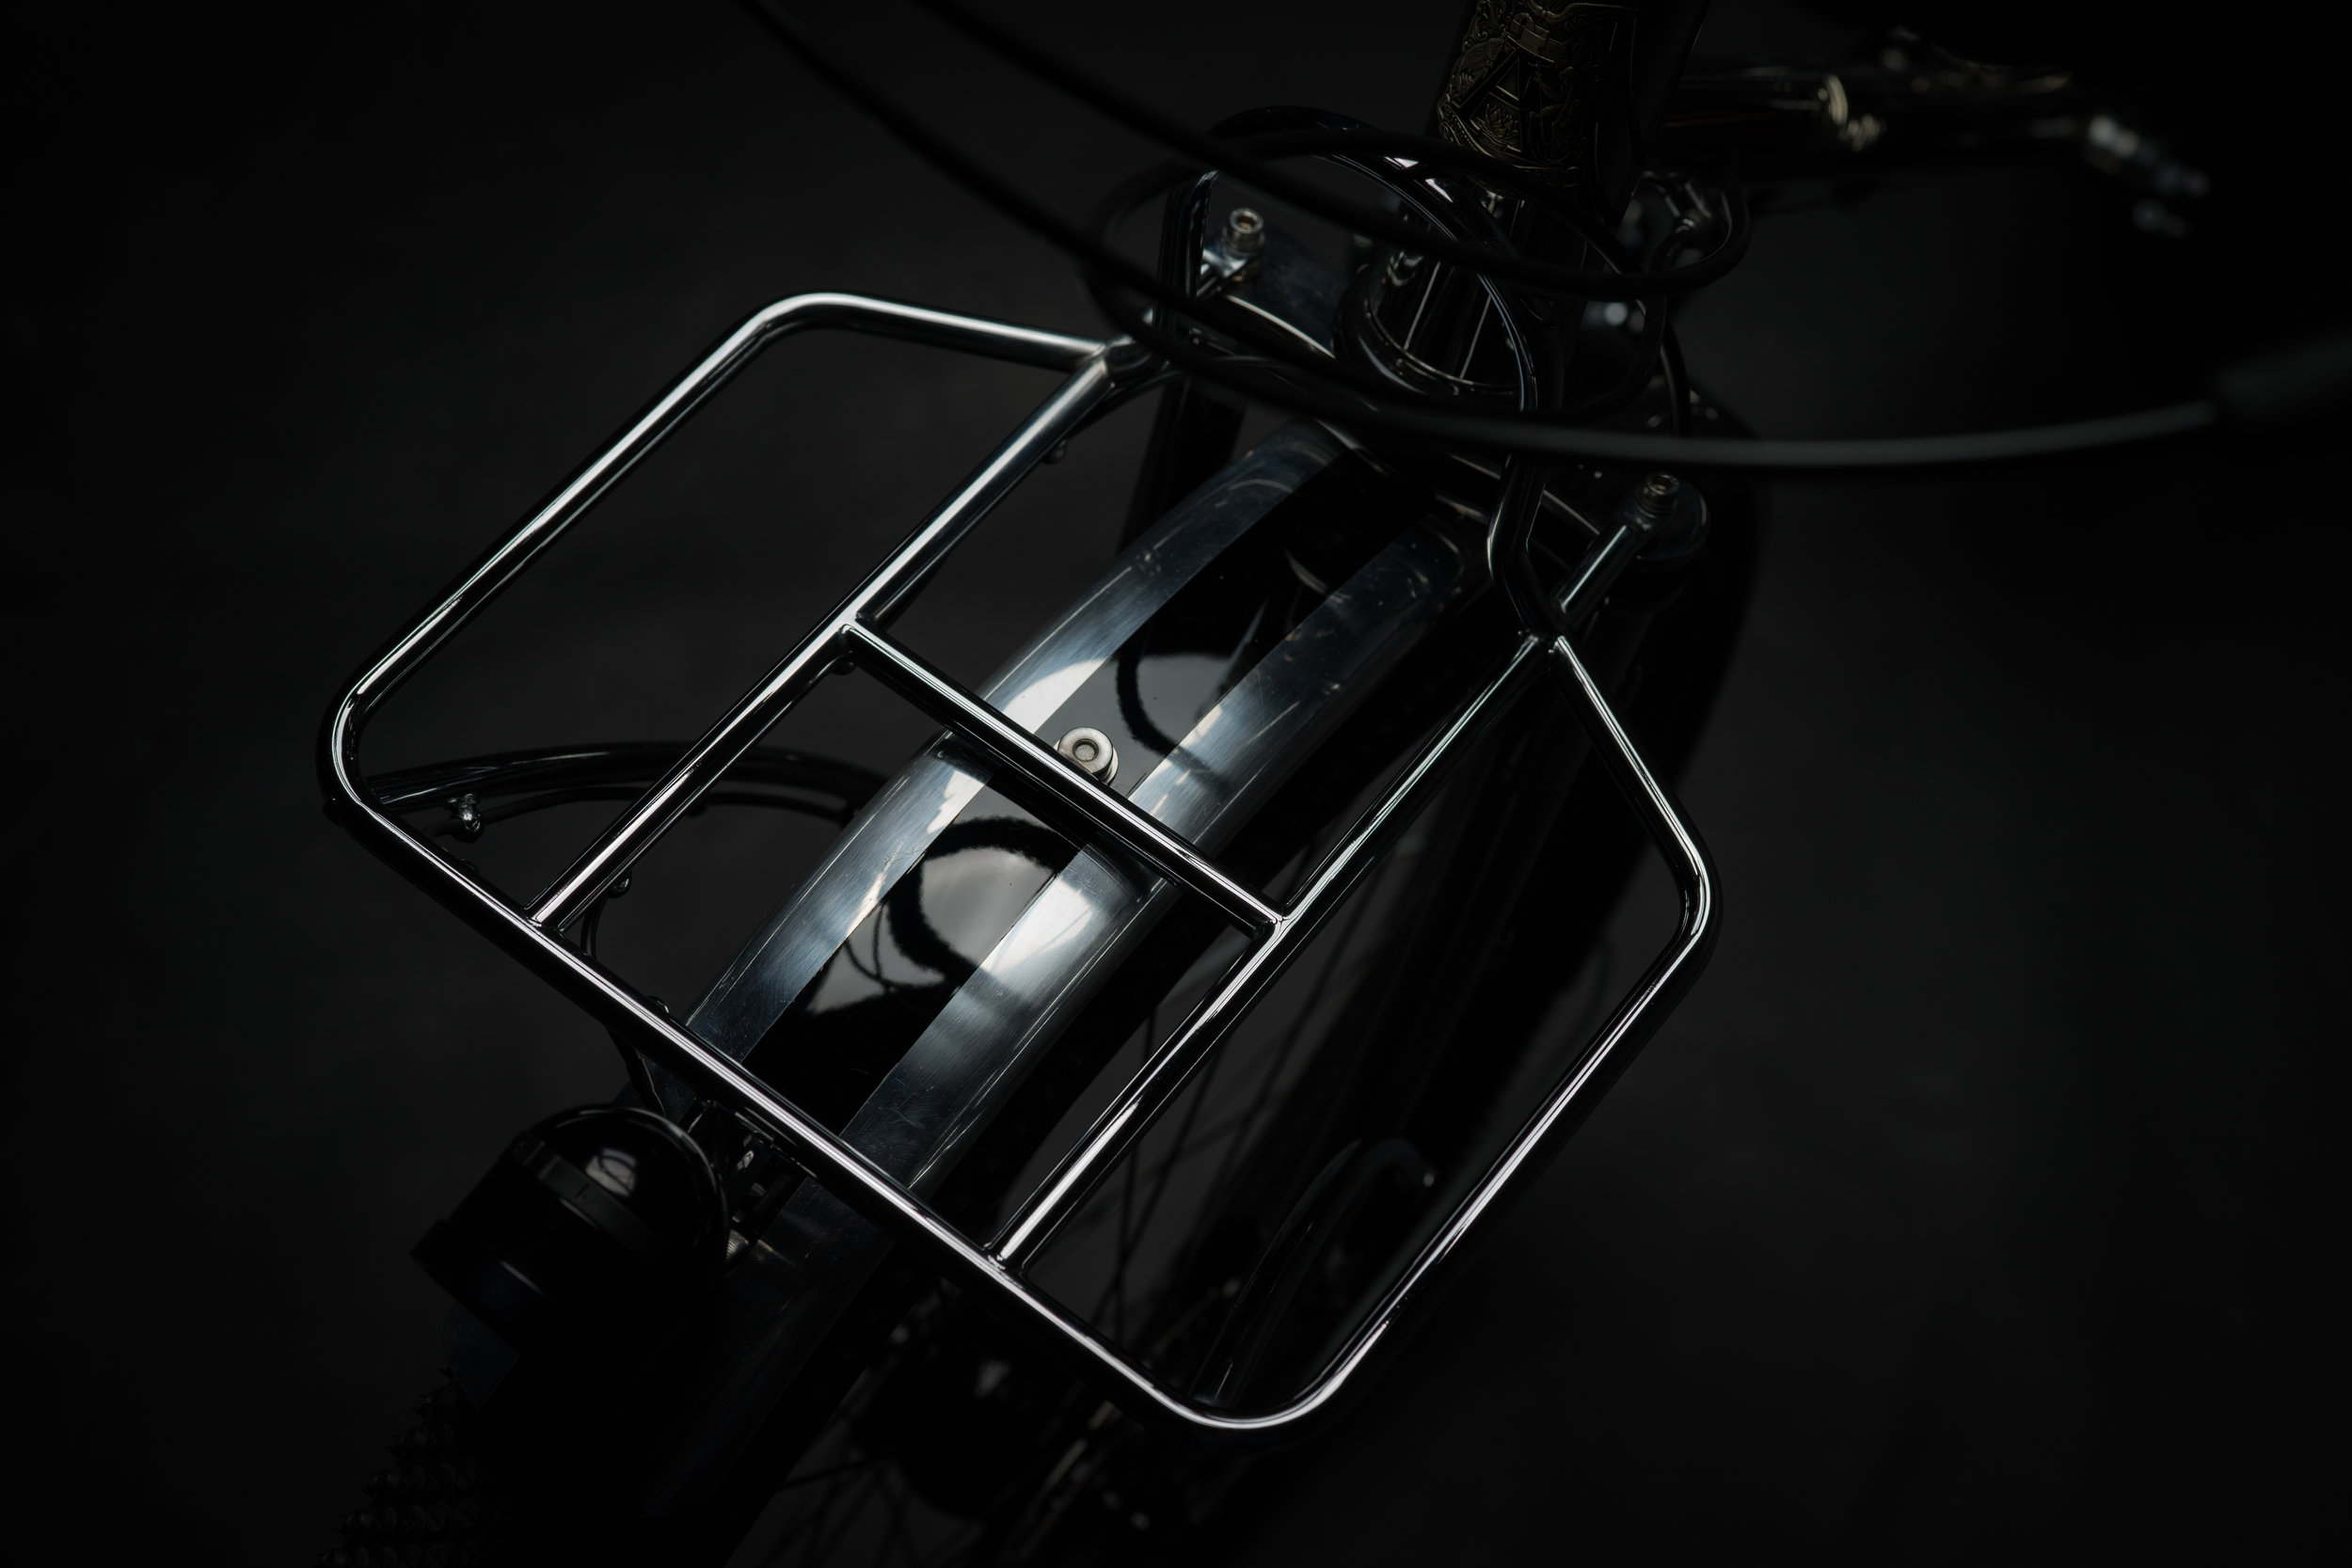
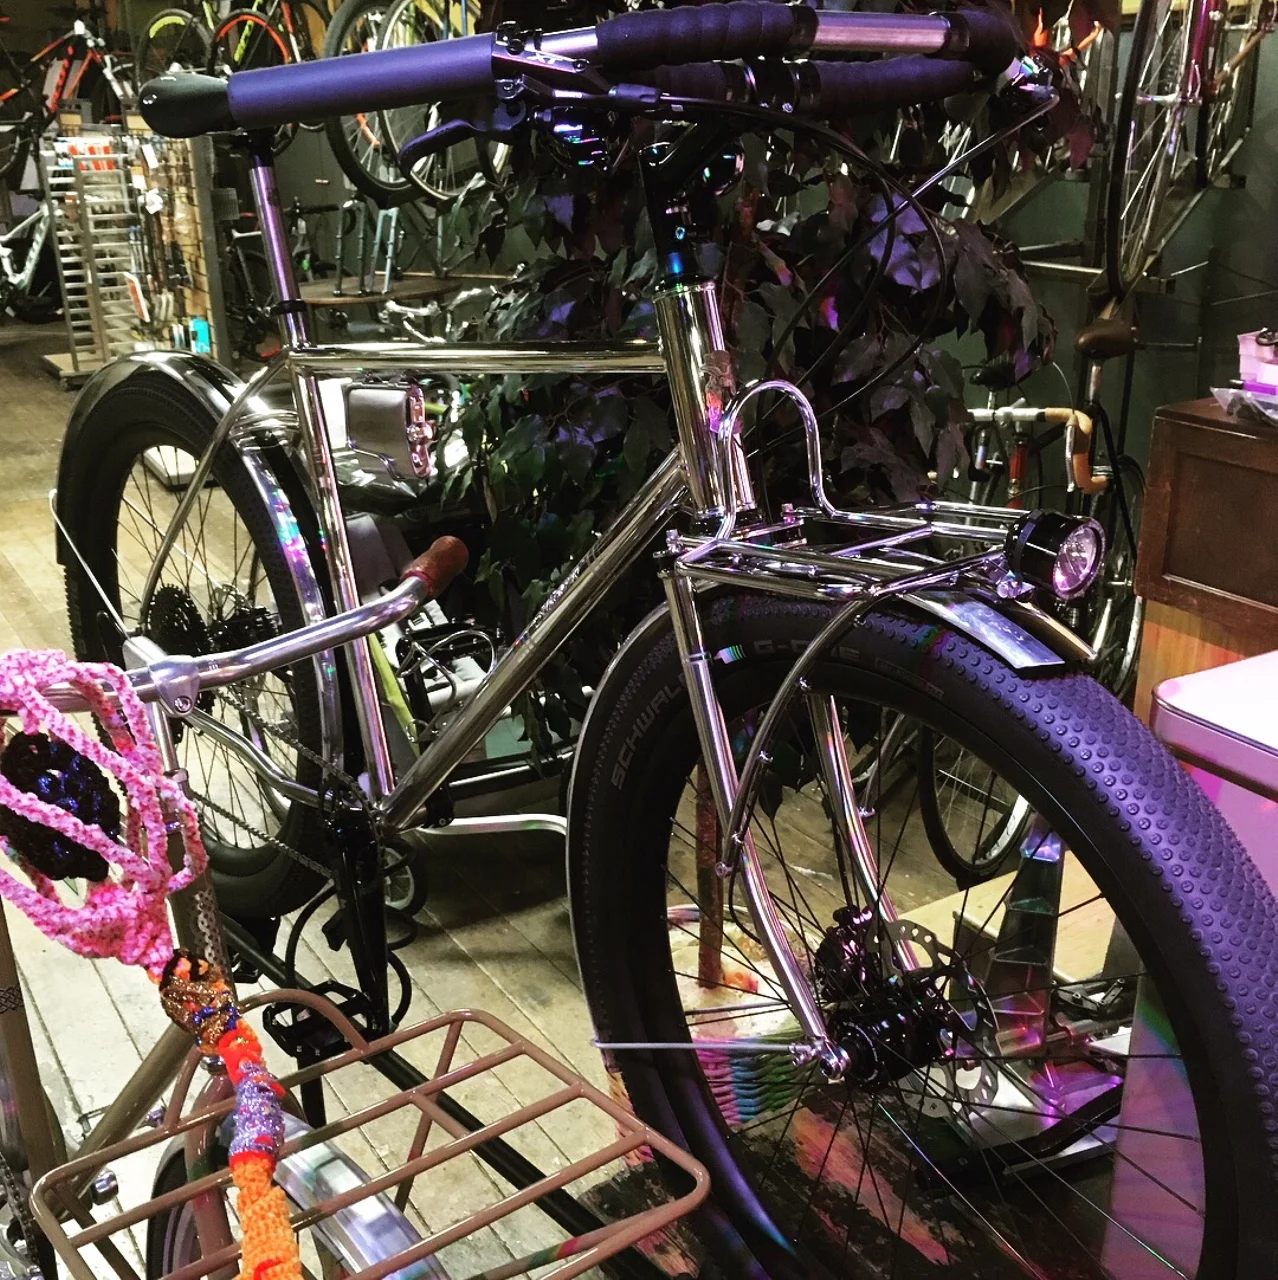
For this bike I used mostly Reynolds 921 work hardened stainless steel tubing. I chose this tubing because the walls come slightly thicker than much of the other stainless tubing available. Running 27.5" tires at almost three inches wide, this wasn't meant to be a race bike, so weight wasn't the first concern. I wanted stability and comfort. And too, putting a rack on a bike stresses a frame differently than having just a rider.

The man who commissioned this build is relocating to Colorado, up in the mountains. He told me he wanted something that could take all the various conditions that he might encounter: Roads, single track, snow & ice, dirt, gravel. We talked it through and he said, "I want something special," and he gave me license to interpret that in my own way, limited only by the parameters of what the bike would need to do, and where it might go. I told him it would be a long journey, and I'm not sure he believed me at first. Or, like many others, he just wasn't sure exactly what this sort of "long journey" would look like. How long, really, could it be?

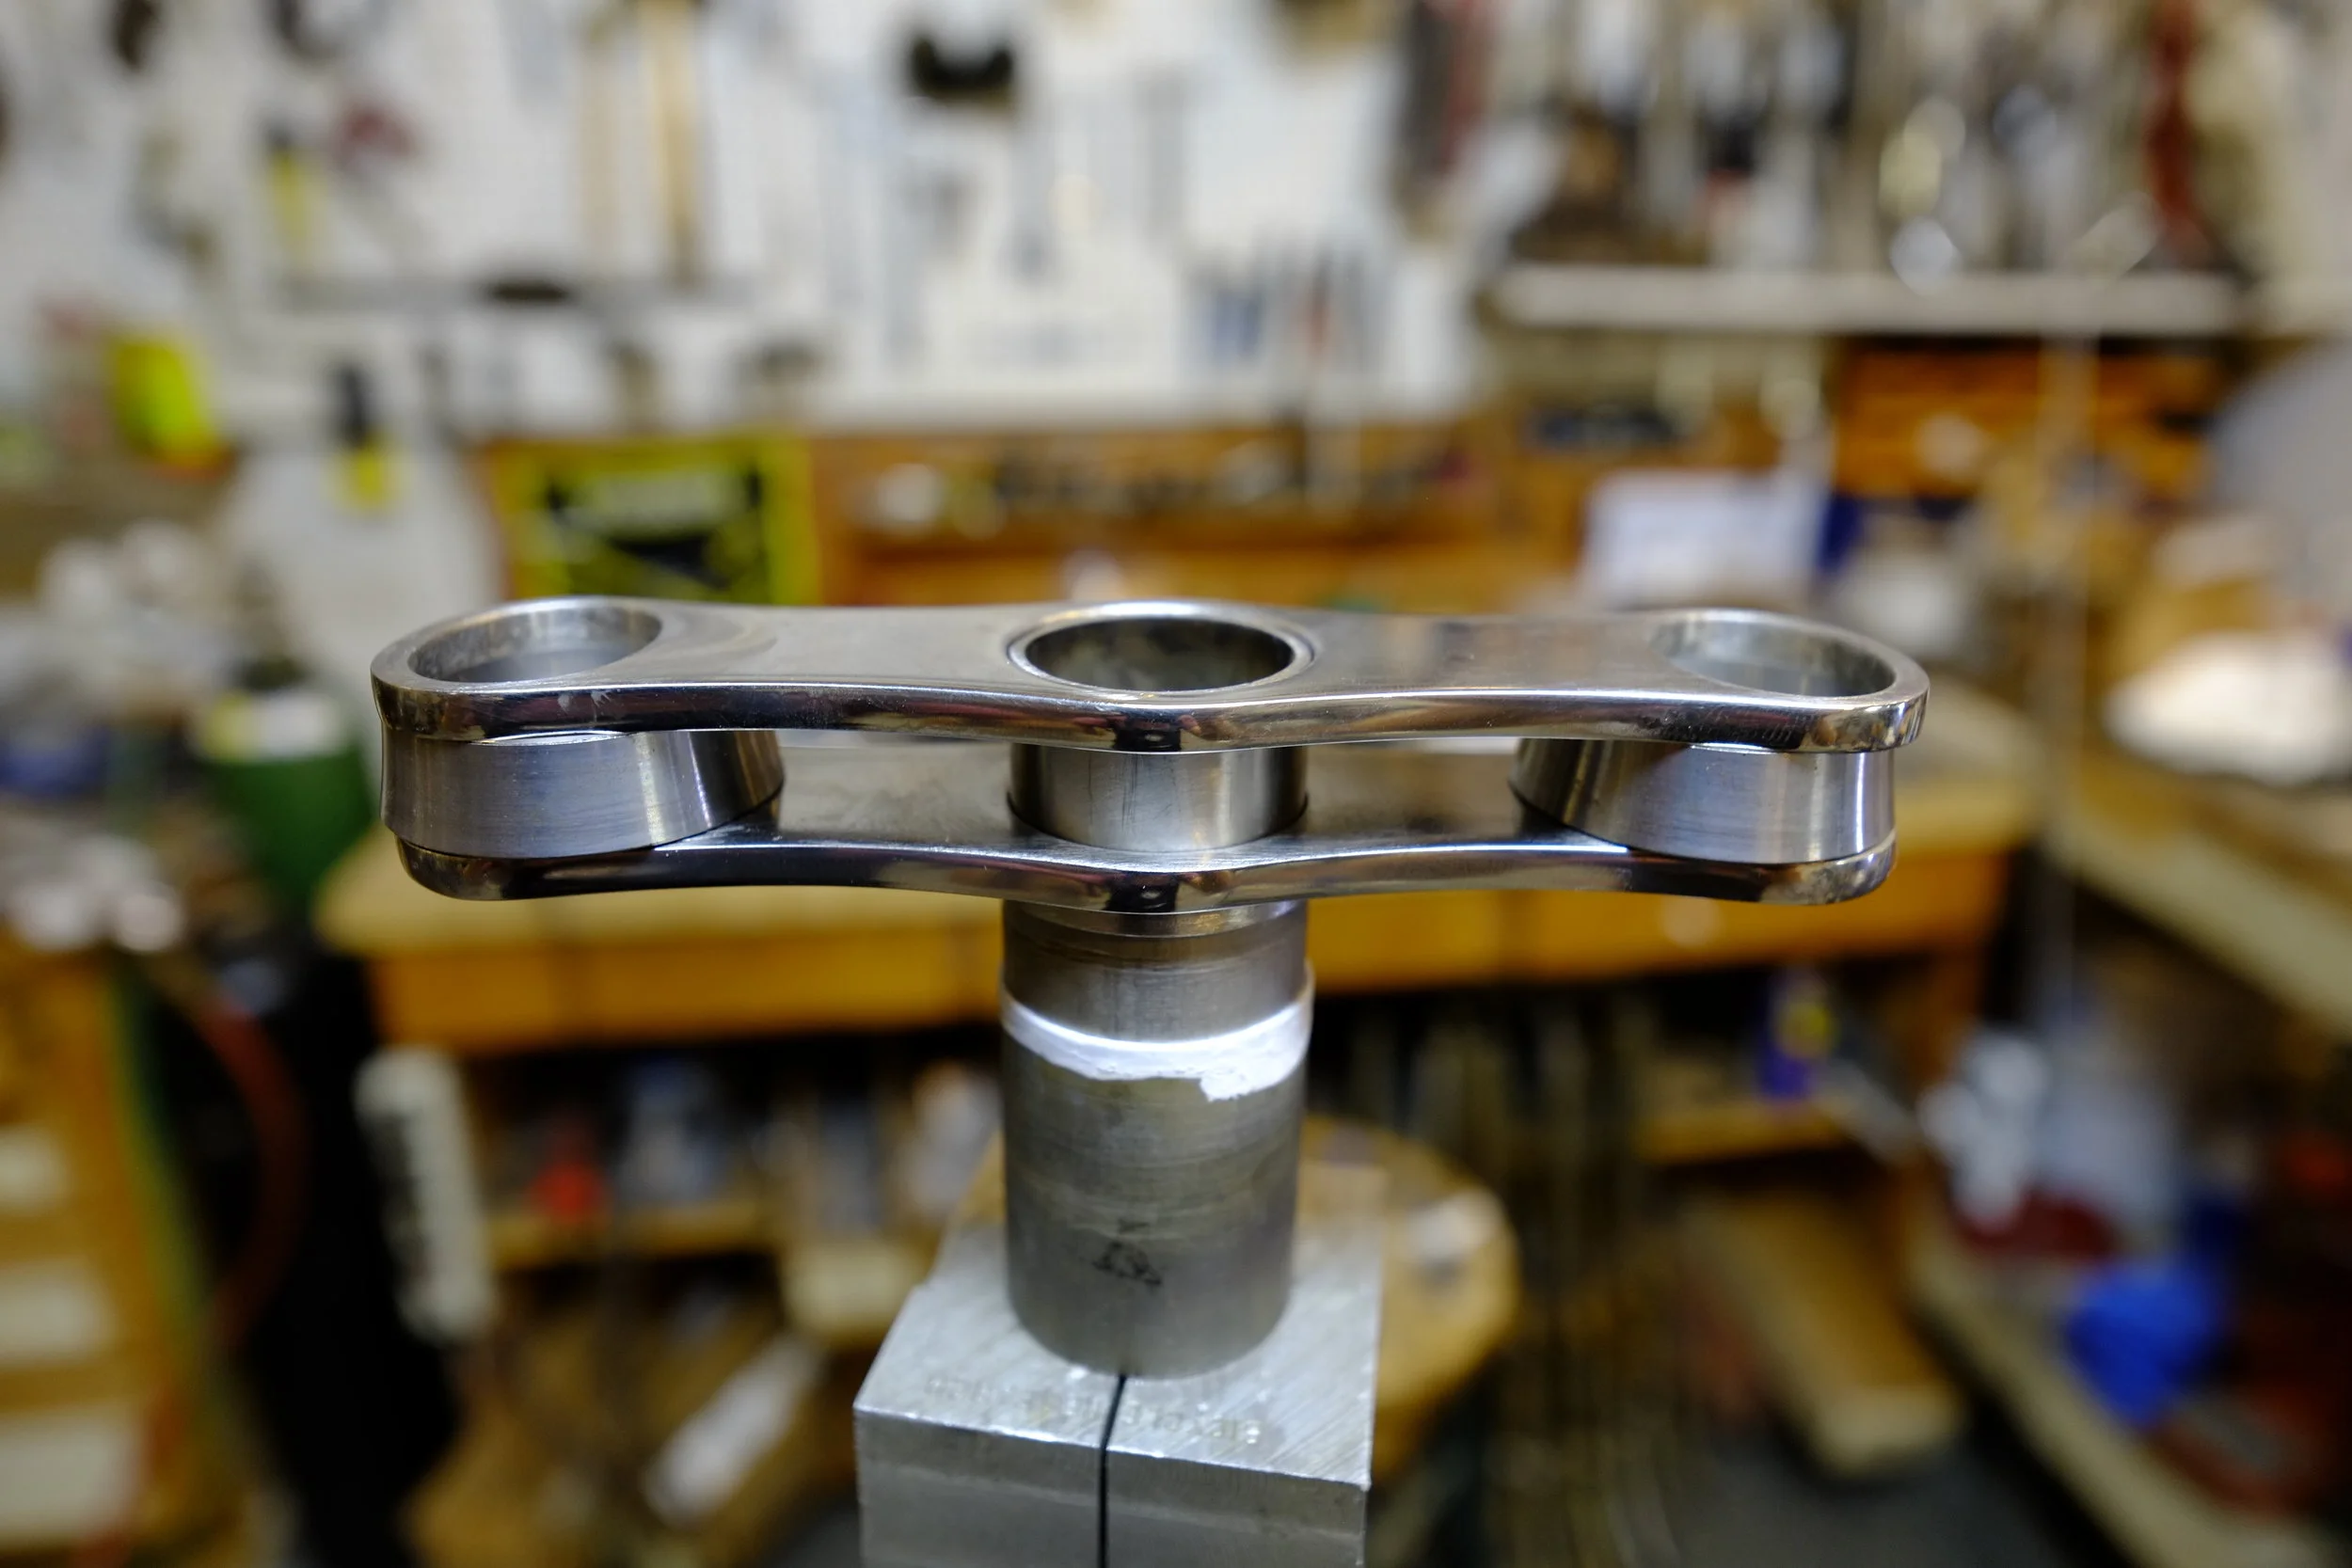
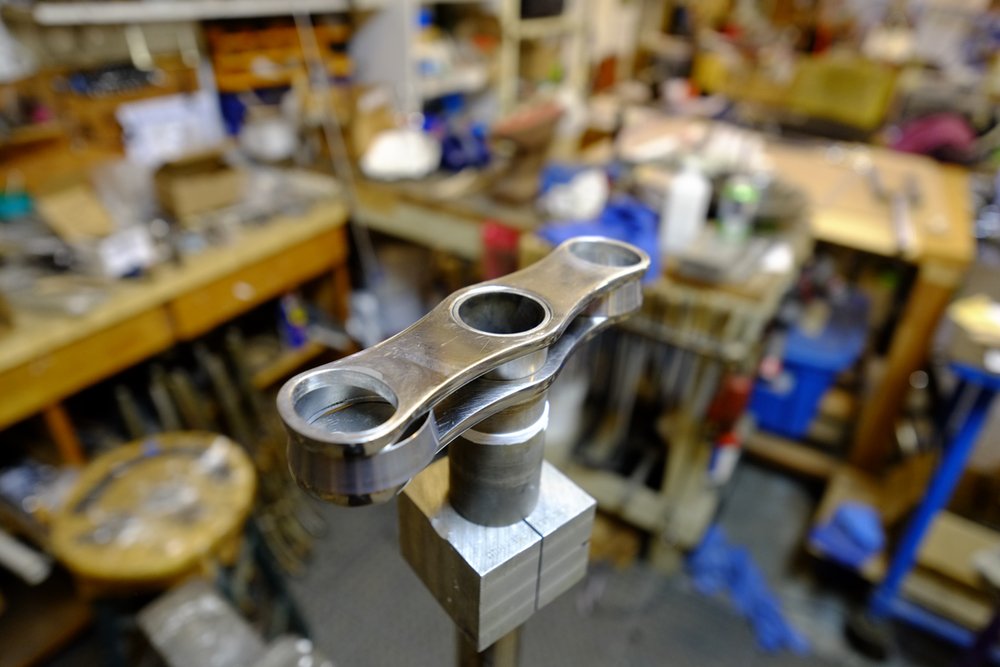
To begin, I had to gather the materials. Part of the problem was, nobody had yet fabricated in stainless steel some of the things I needed for the build. I had to remake the fork crown plates with enough width to fit the tires. The chain stay yoke and front dropouts were made only in mild steel or titanium by Paragon Machine Works, and I had to call them up and beg for them to remake these parts in stainless, which maybe sounds easy, but because of the material, everything has to be reworked and retooled for the job.
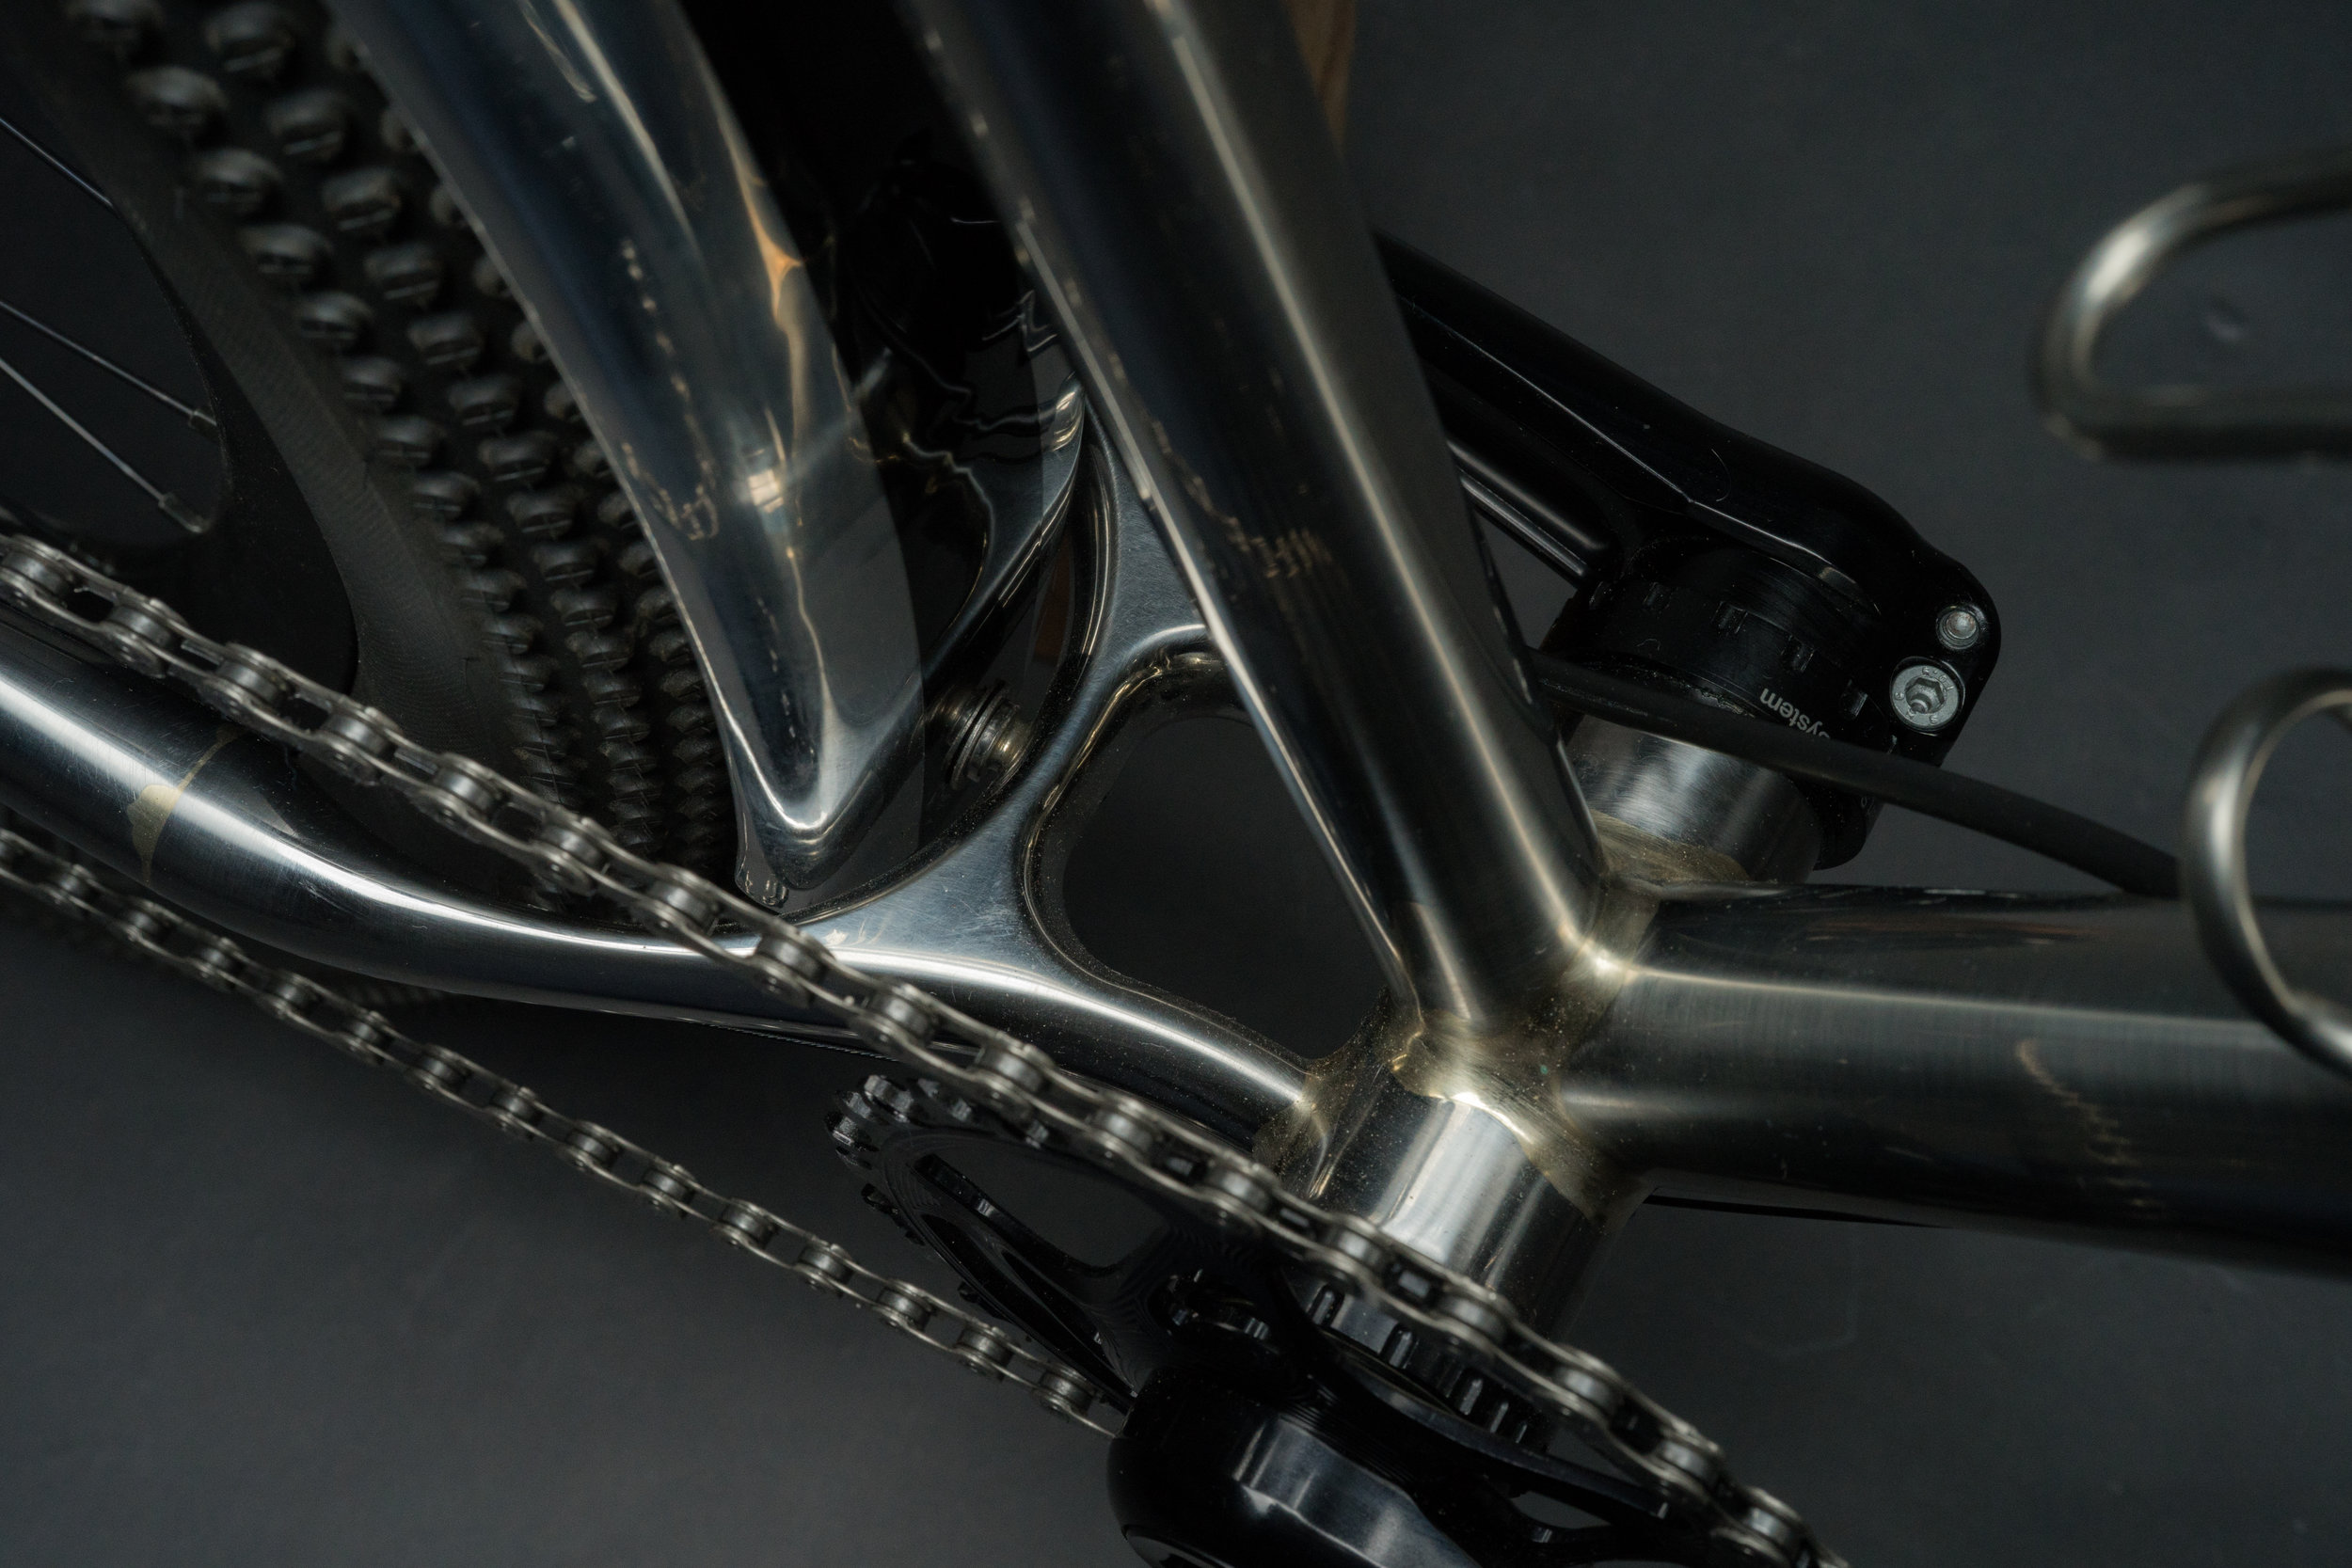
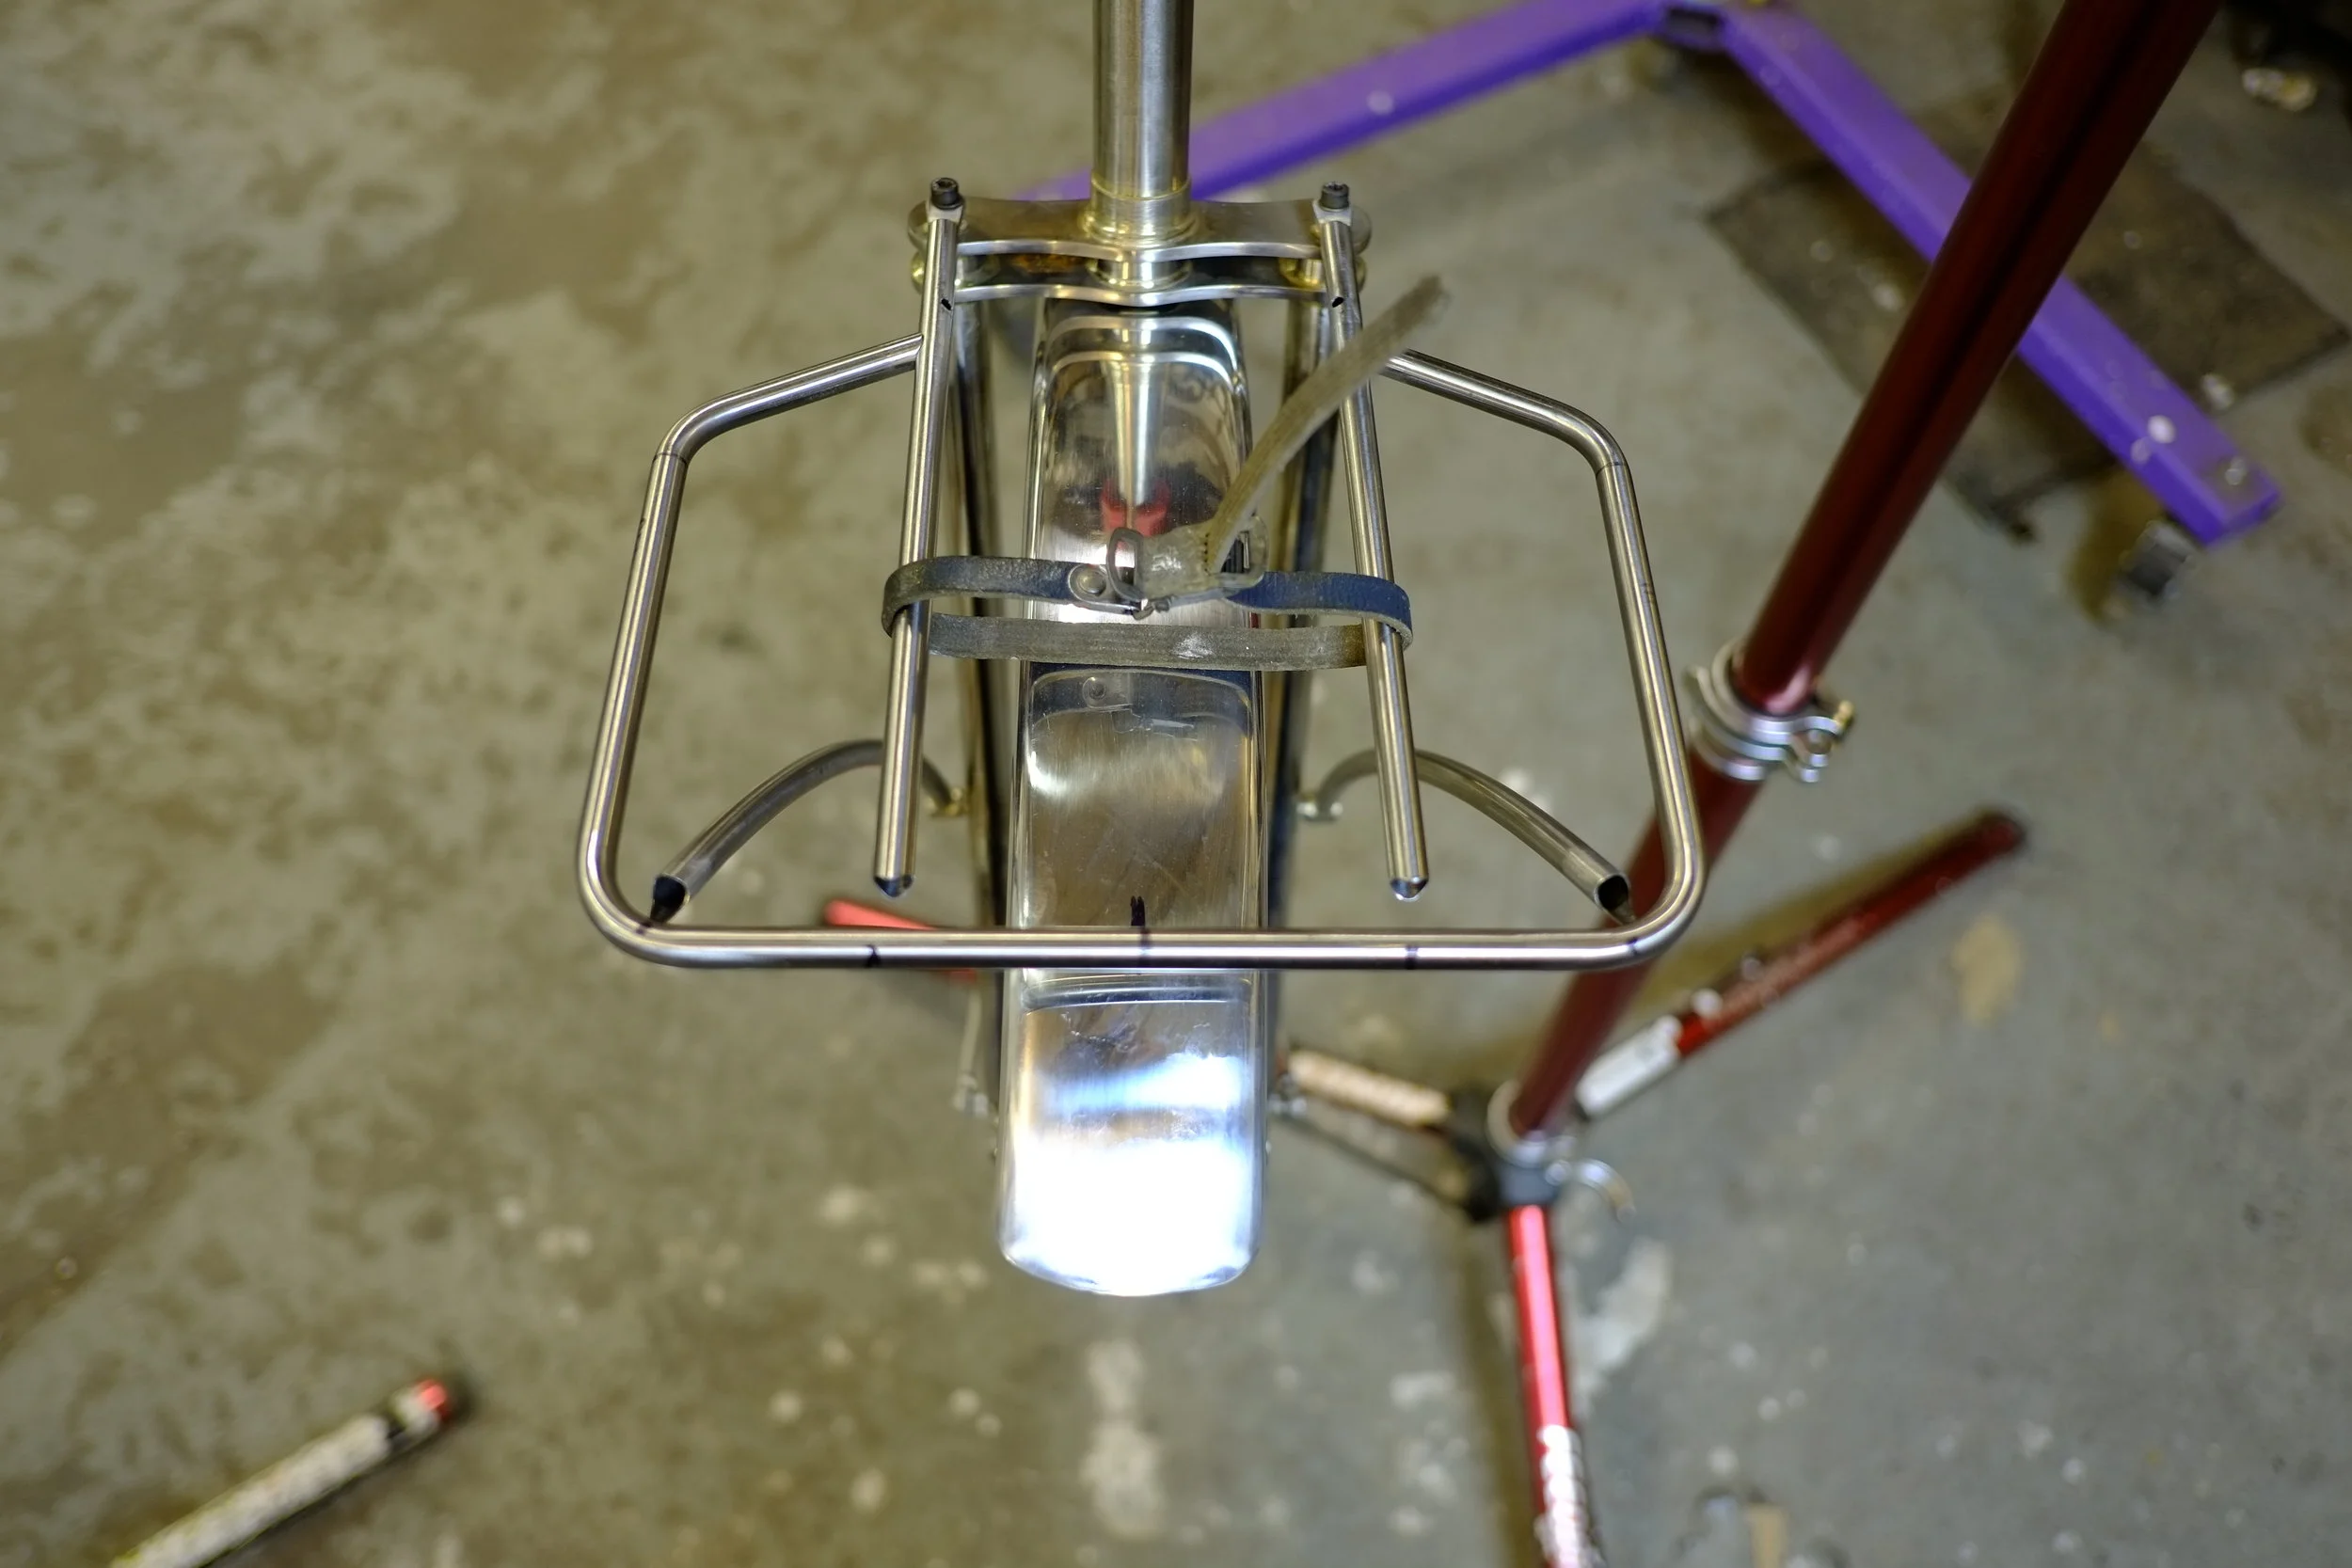
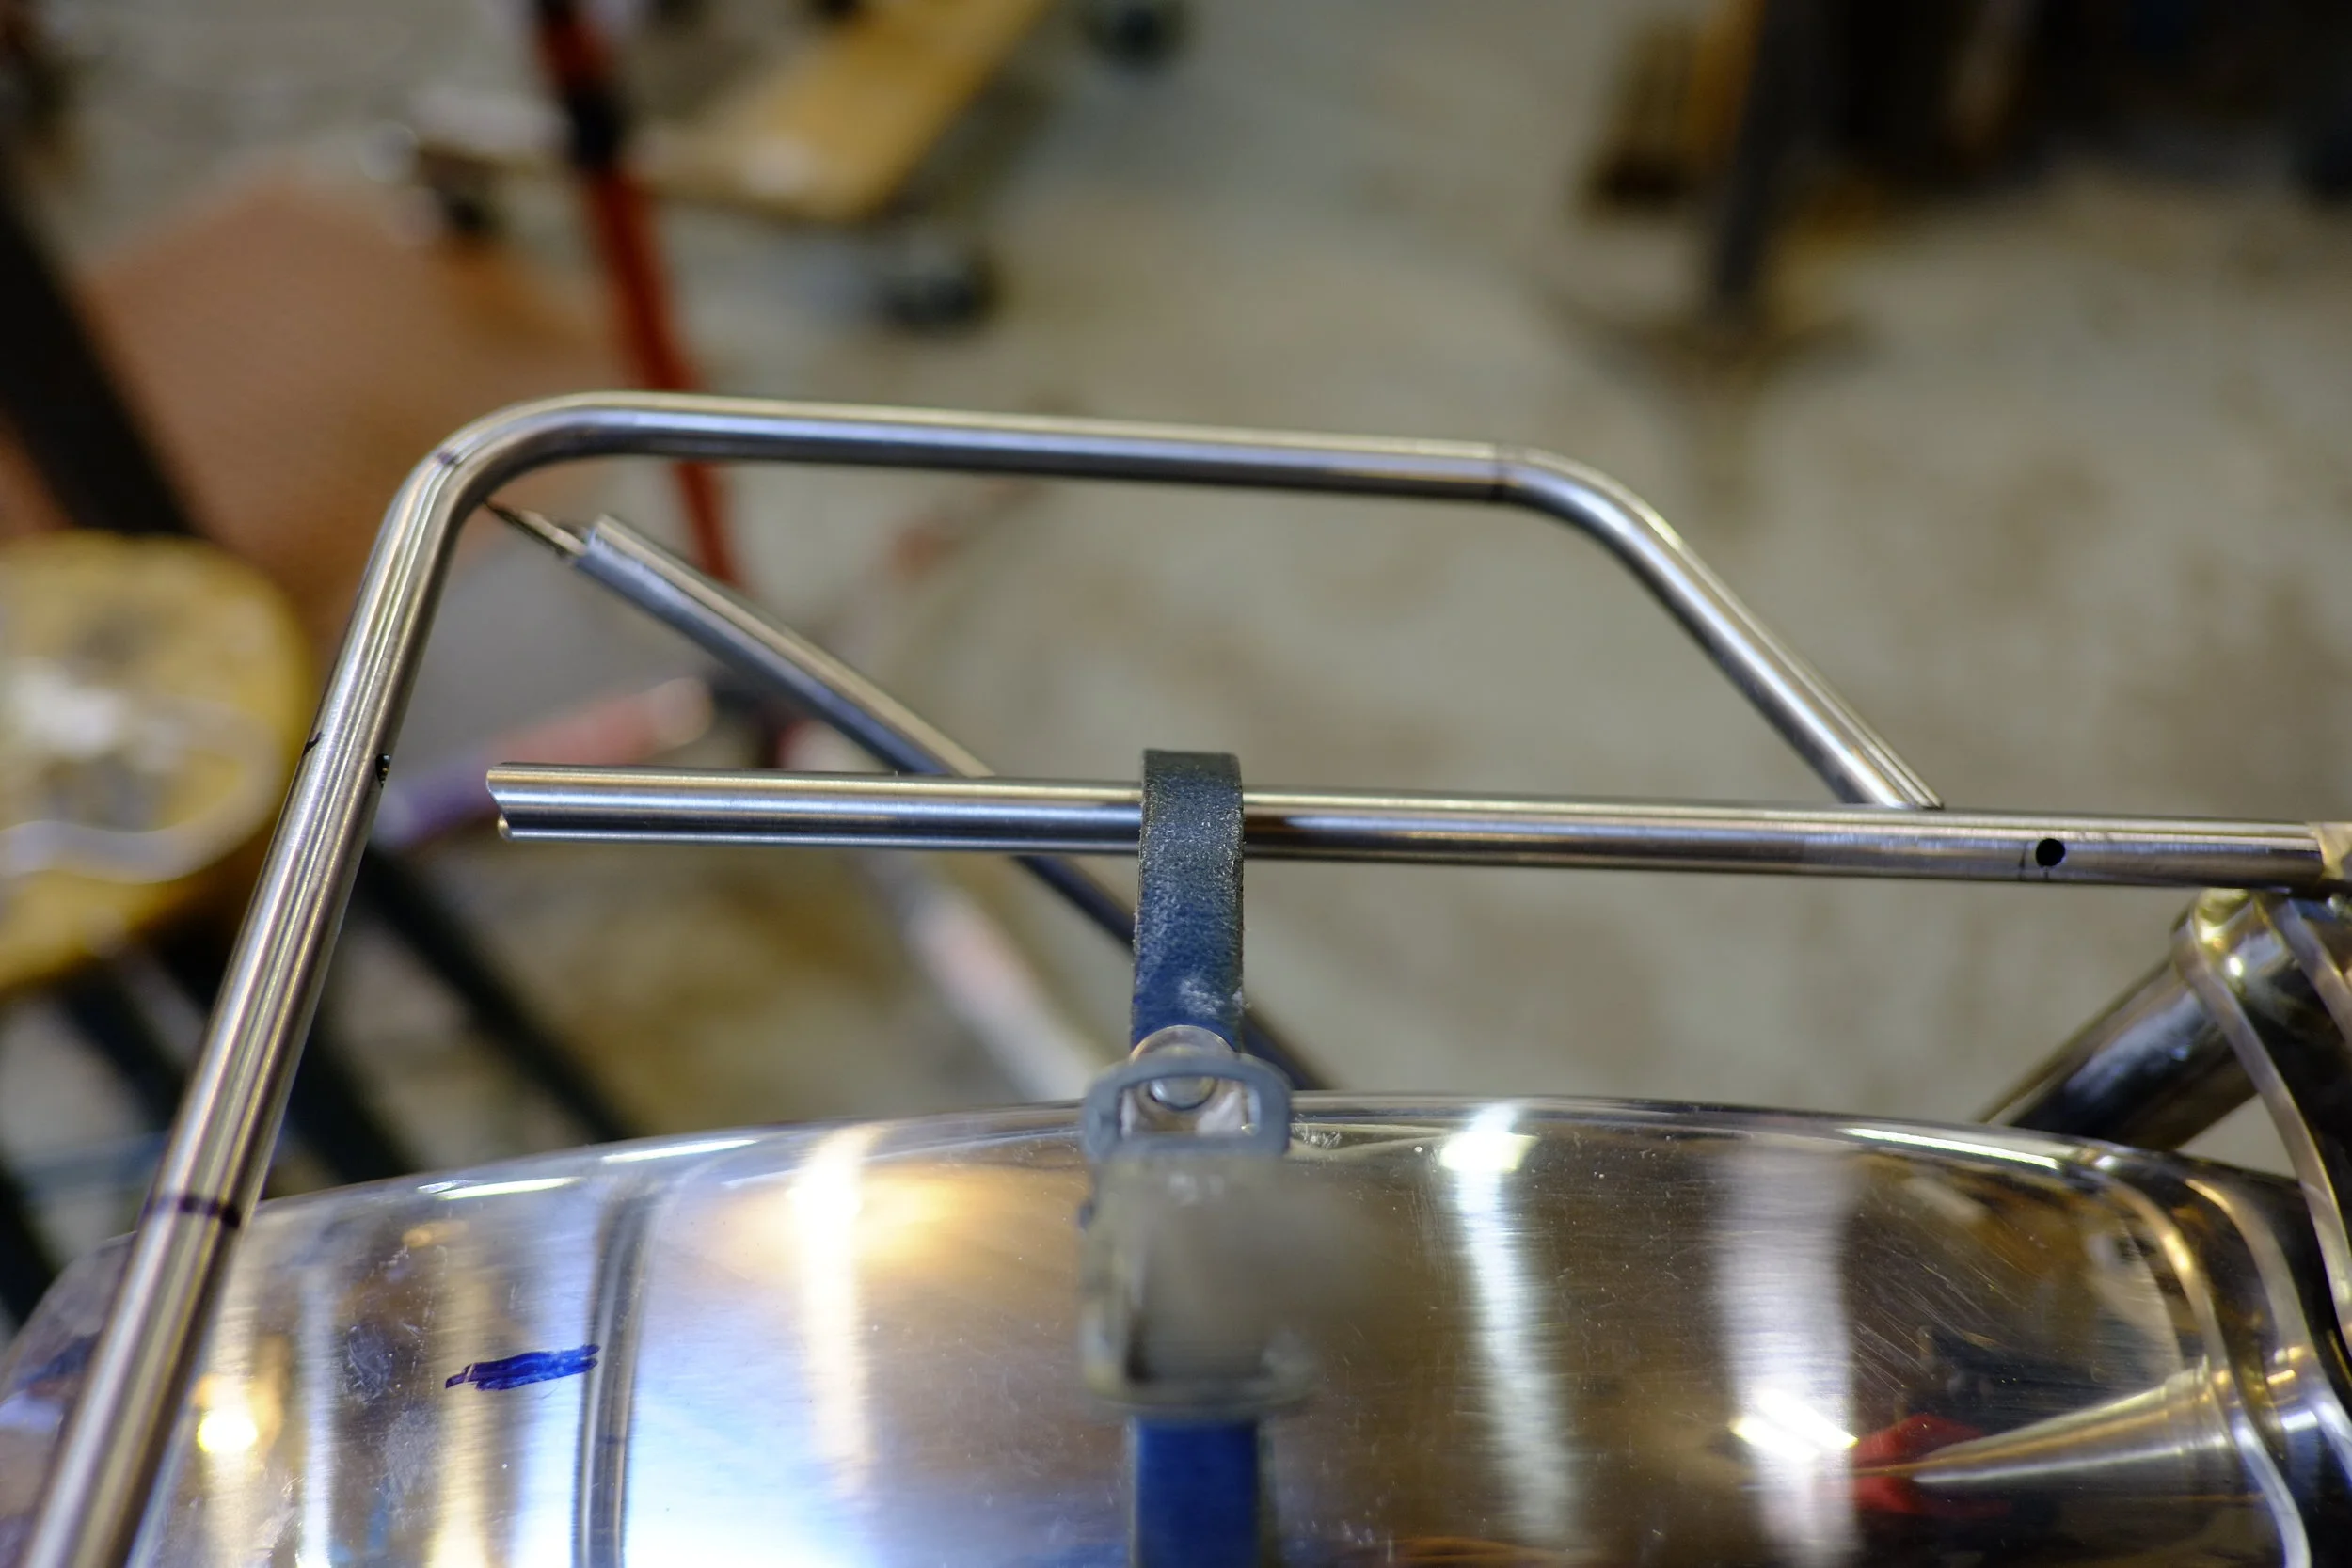
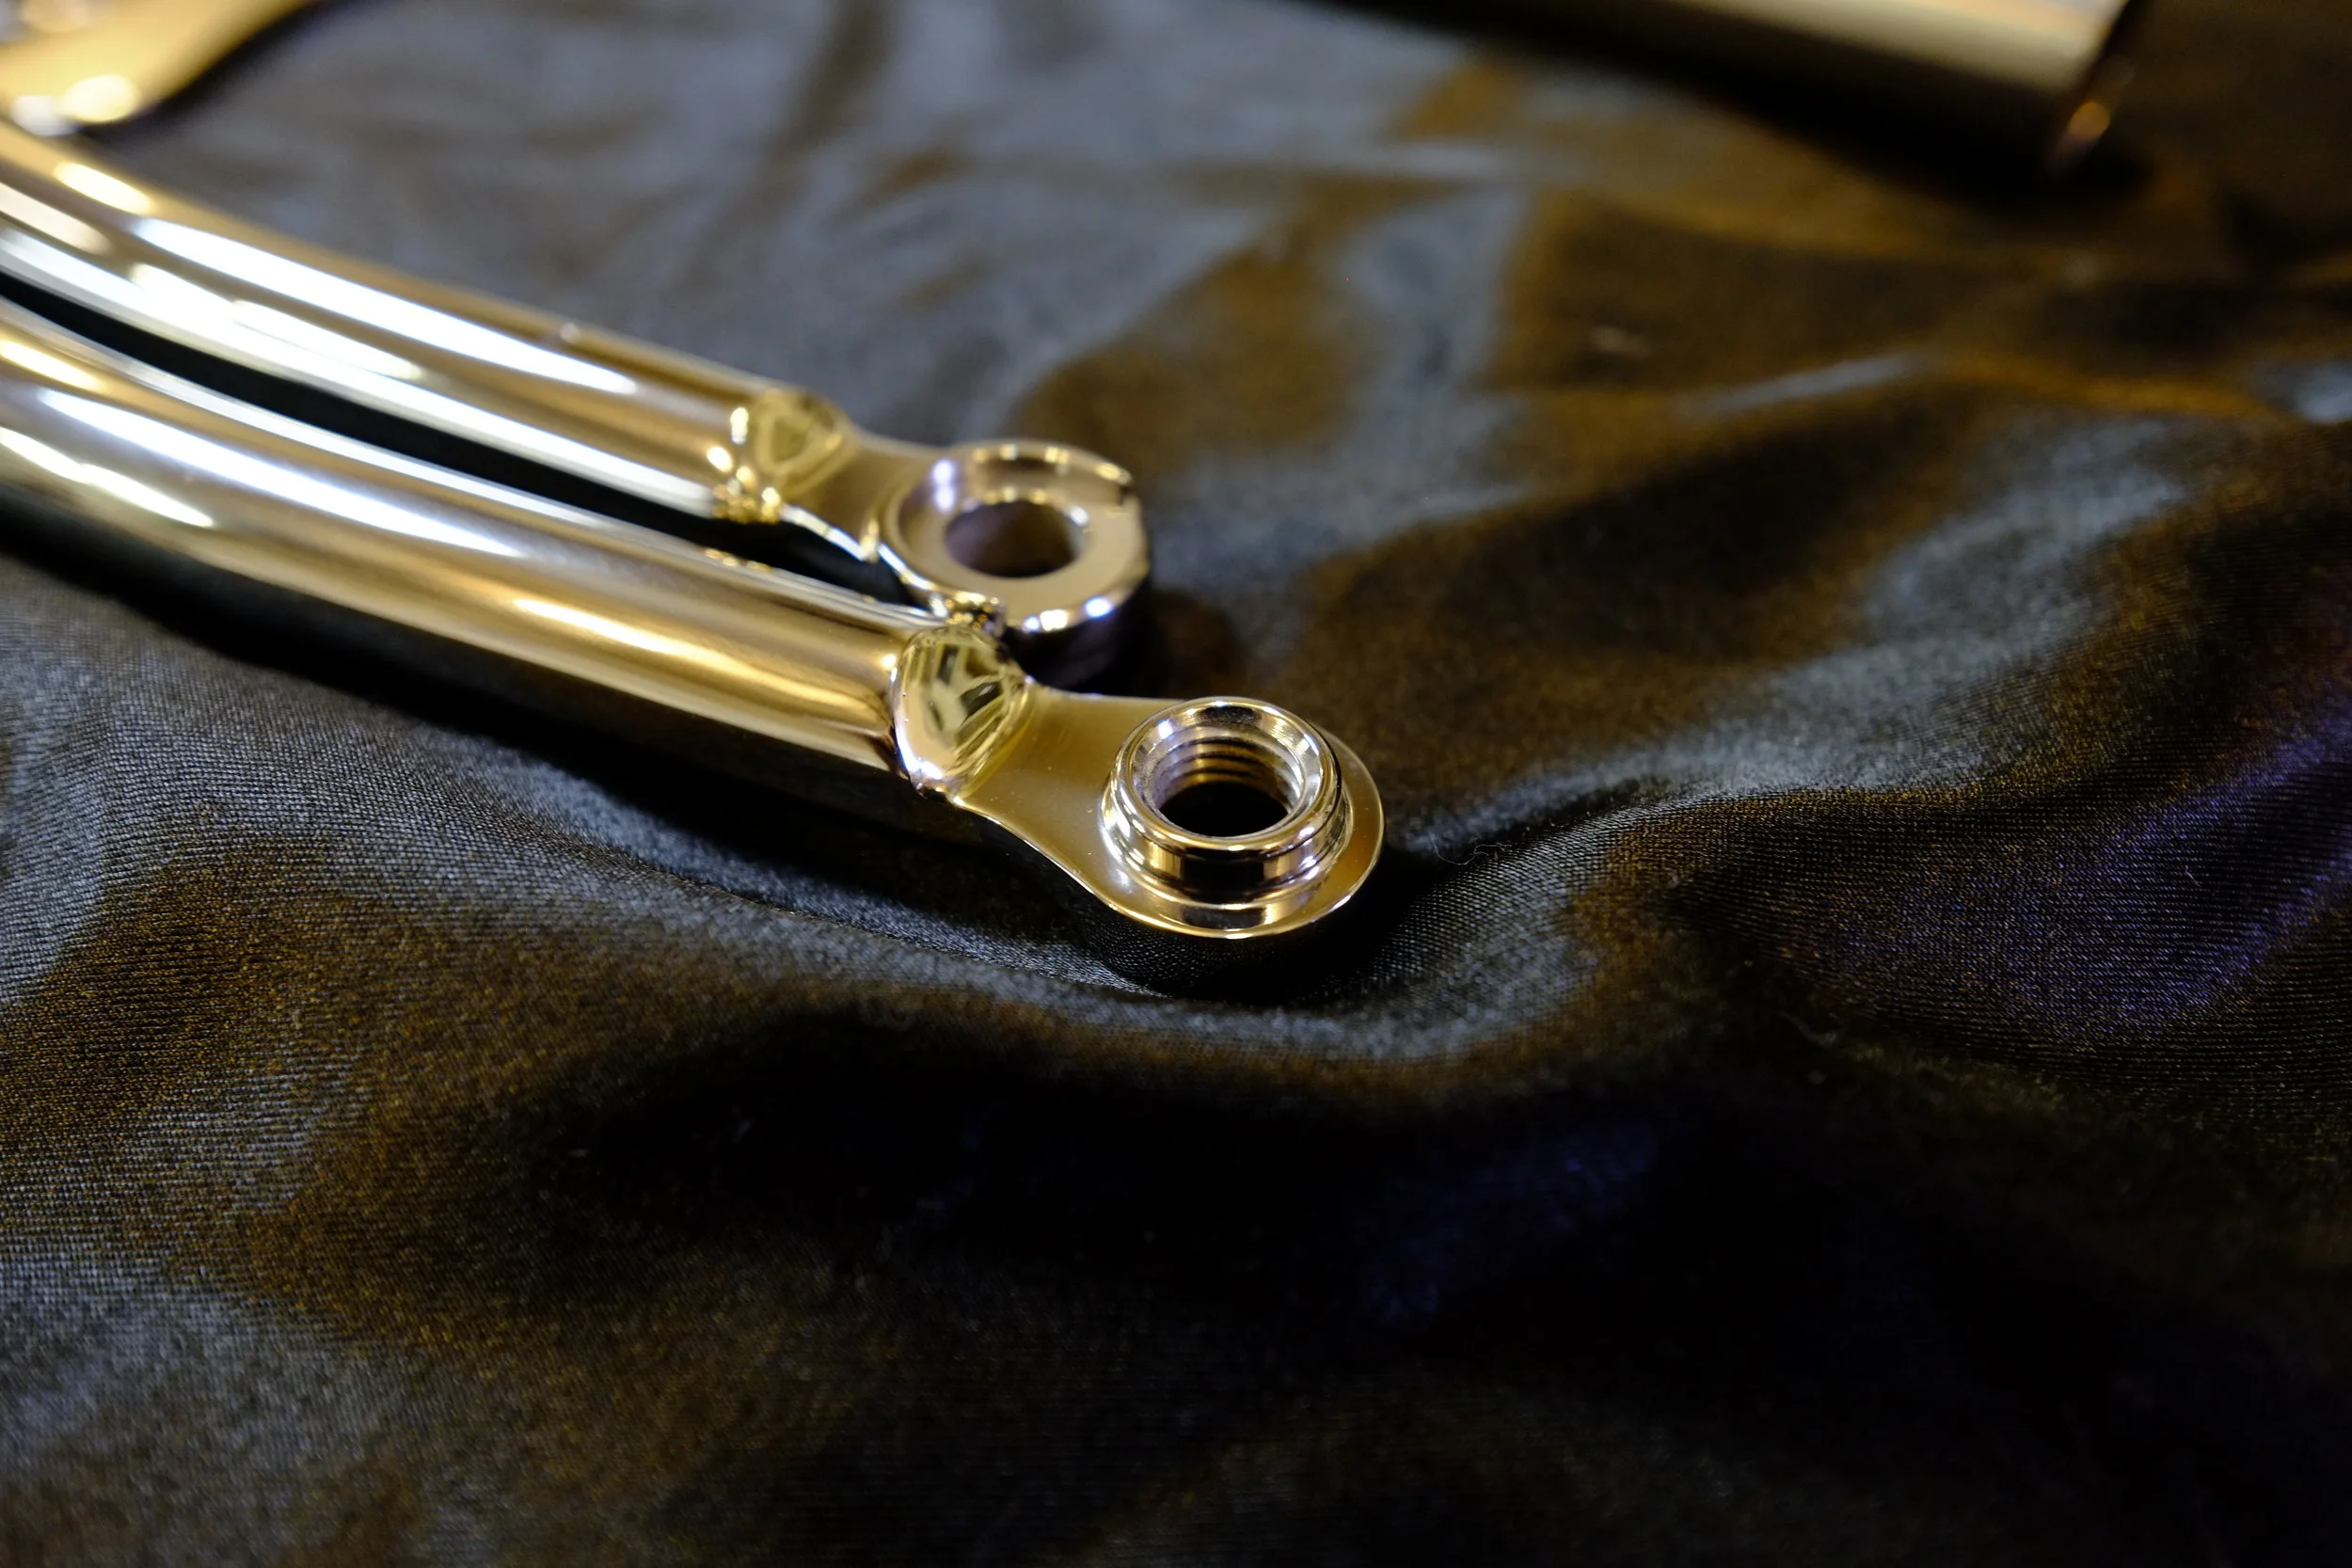
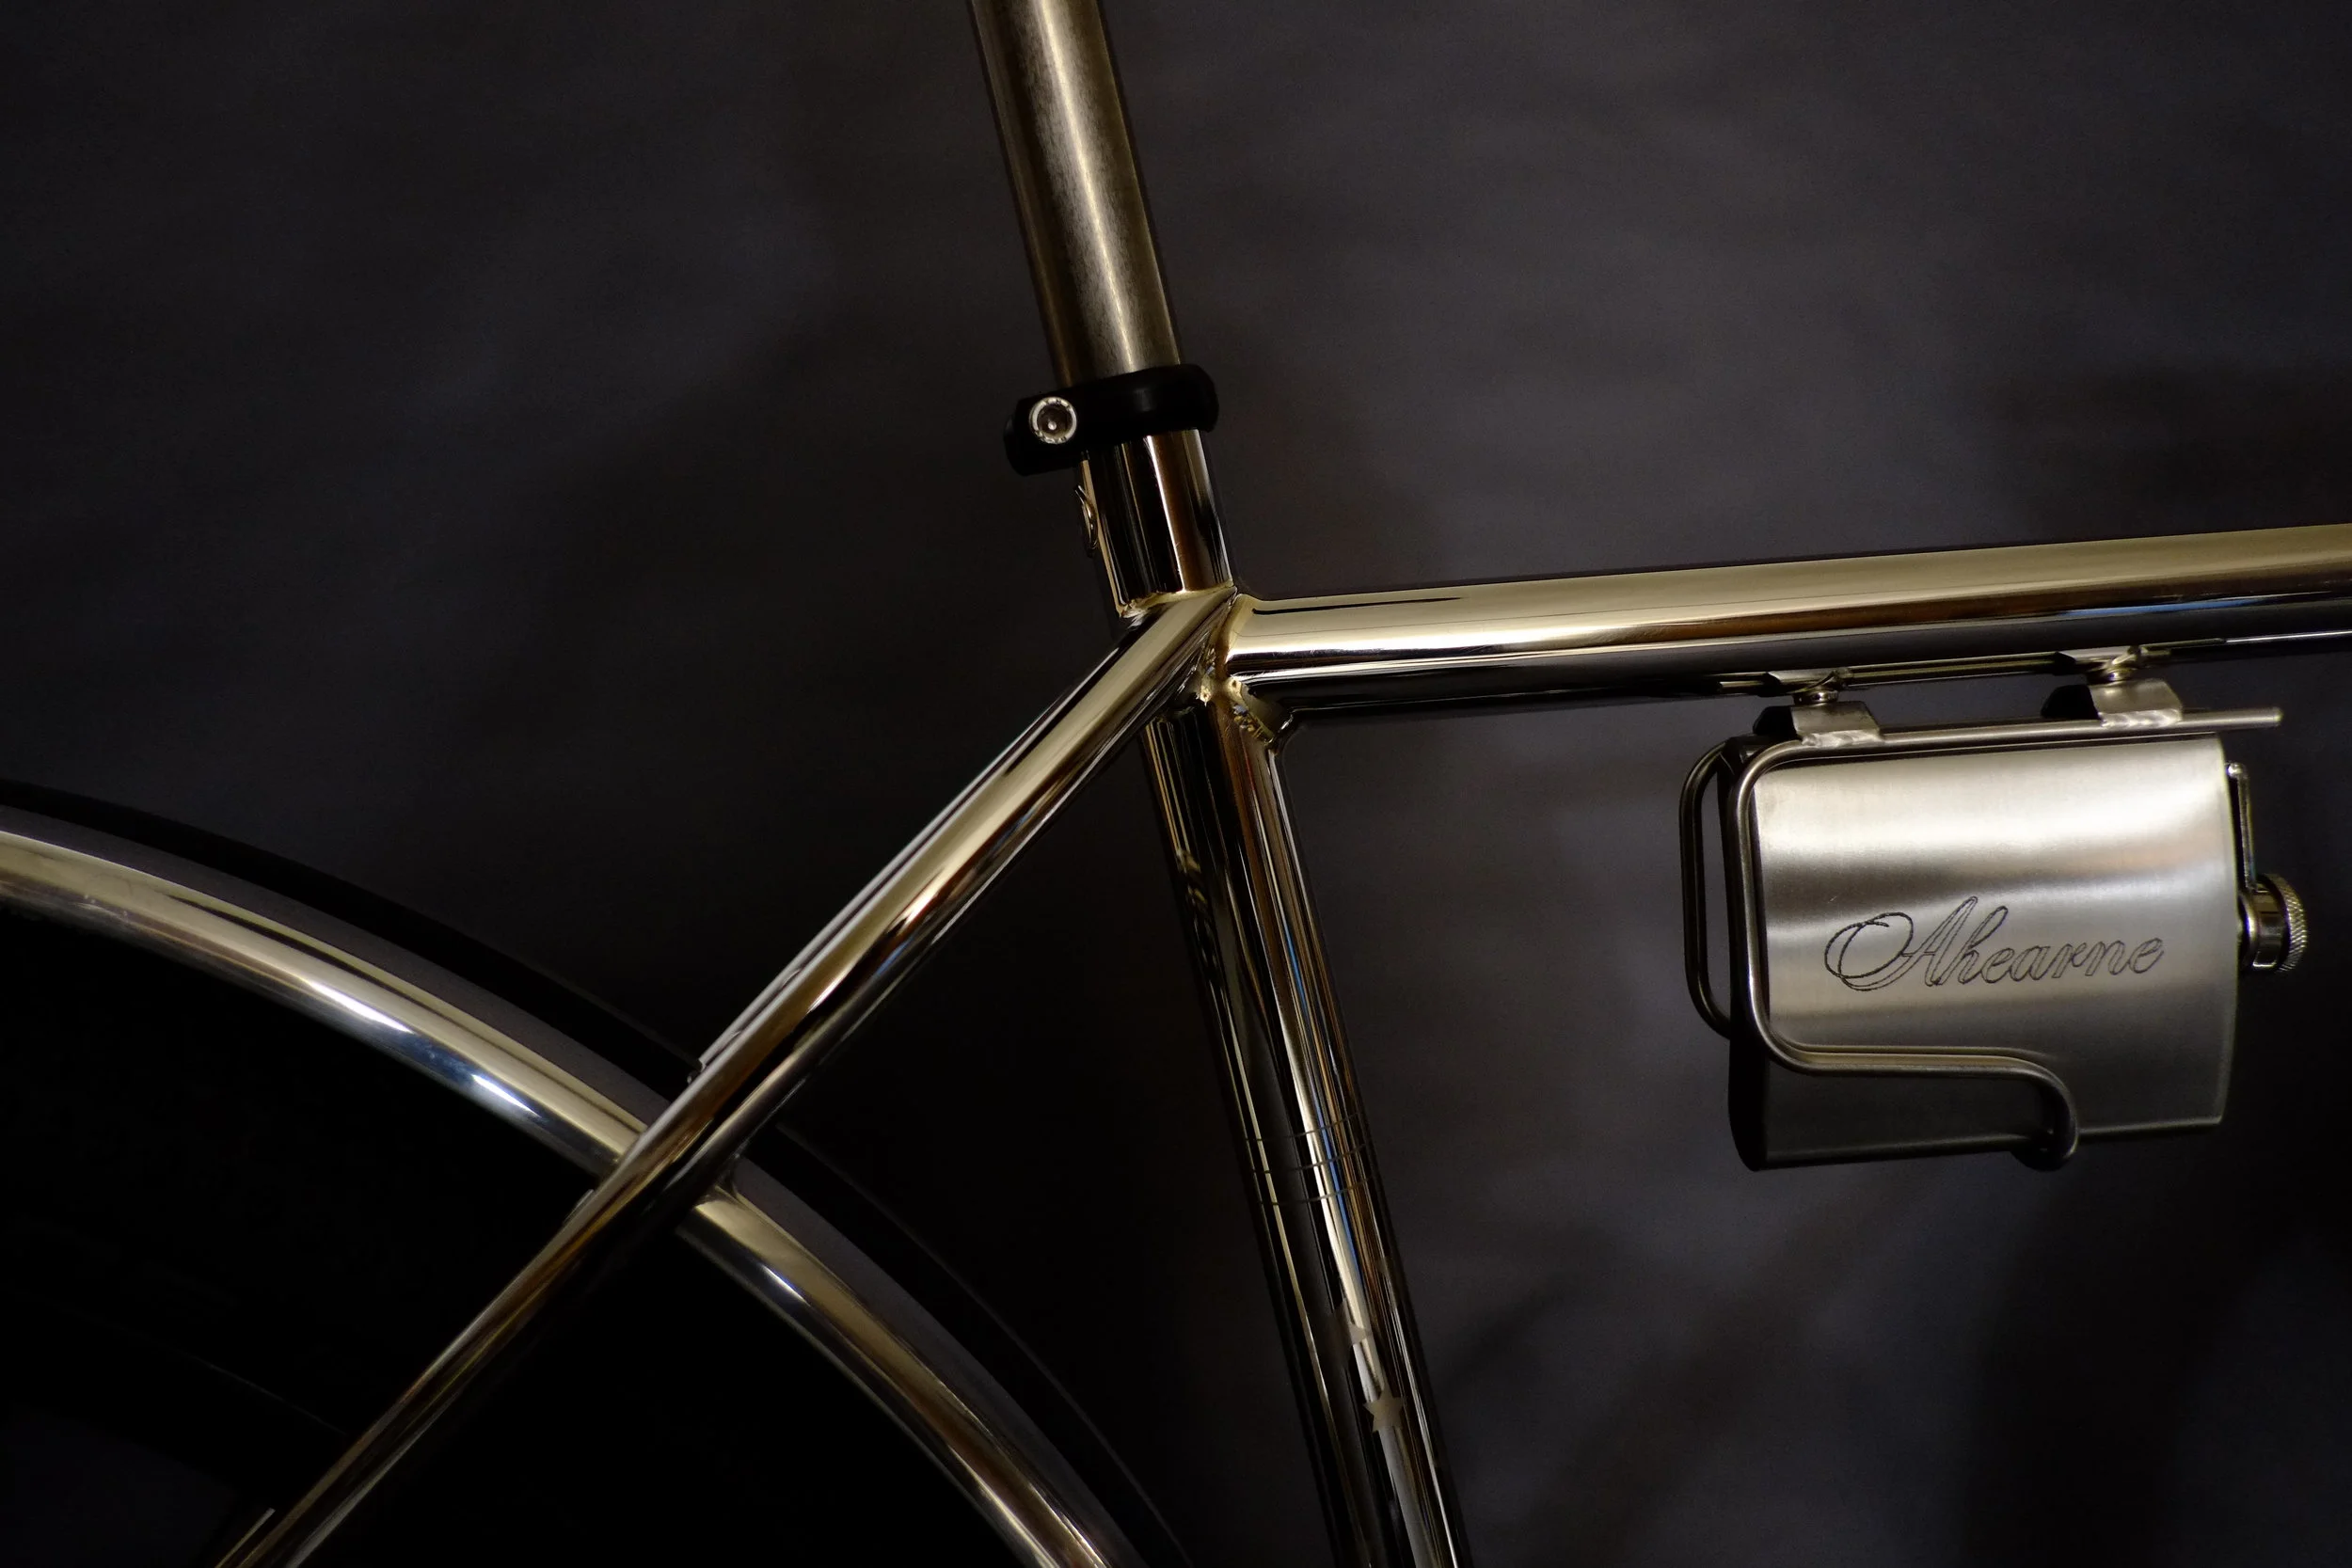
The first thing I did, after gathering all the materials, was to put together the initial sub assemblies: Seat tube to bb, dropouts to fork legs, and dropouts to chain stays, assemble the chain stay yoke. Then, before I ever cut the first tube, everything was pre-polished. The fork crown pieces, fork legs with dropouts, chain stays with dropouts, the seat stays, bottom bracket & seat tube, head tube, yoke, and all the main tubes. All of it brought to a mirror finish. Then I brazed the crown plates onto the steerer, and re-polished the plates. Then put the fork legs into the crown, and re-polish. Then braze ons, and I installed the fender, and set up to build the front rack. I waited to do the final polish until after the rack was finished.

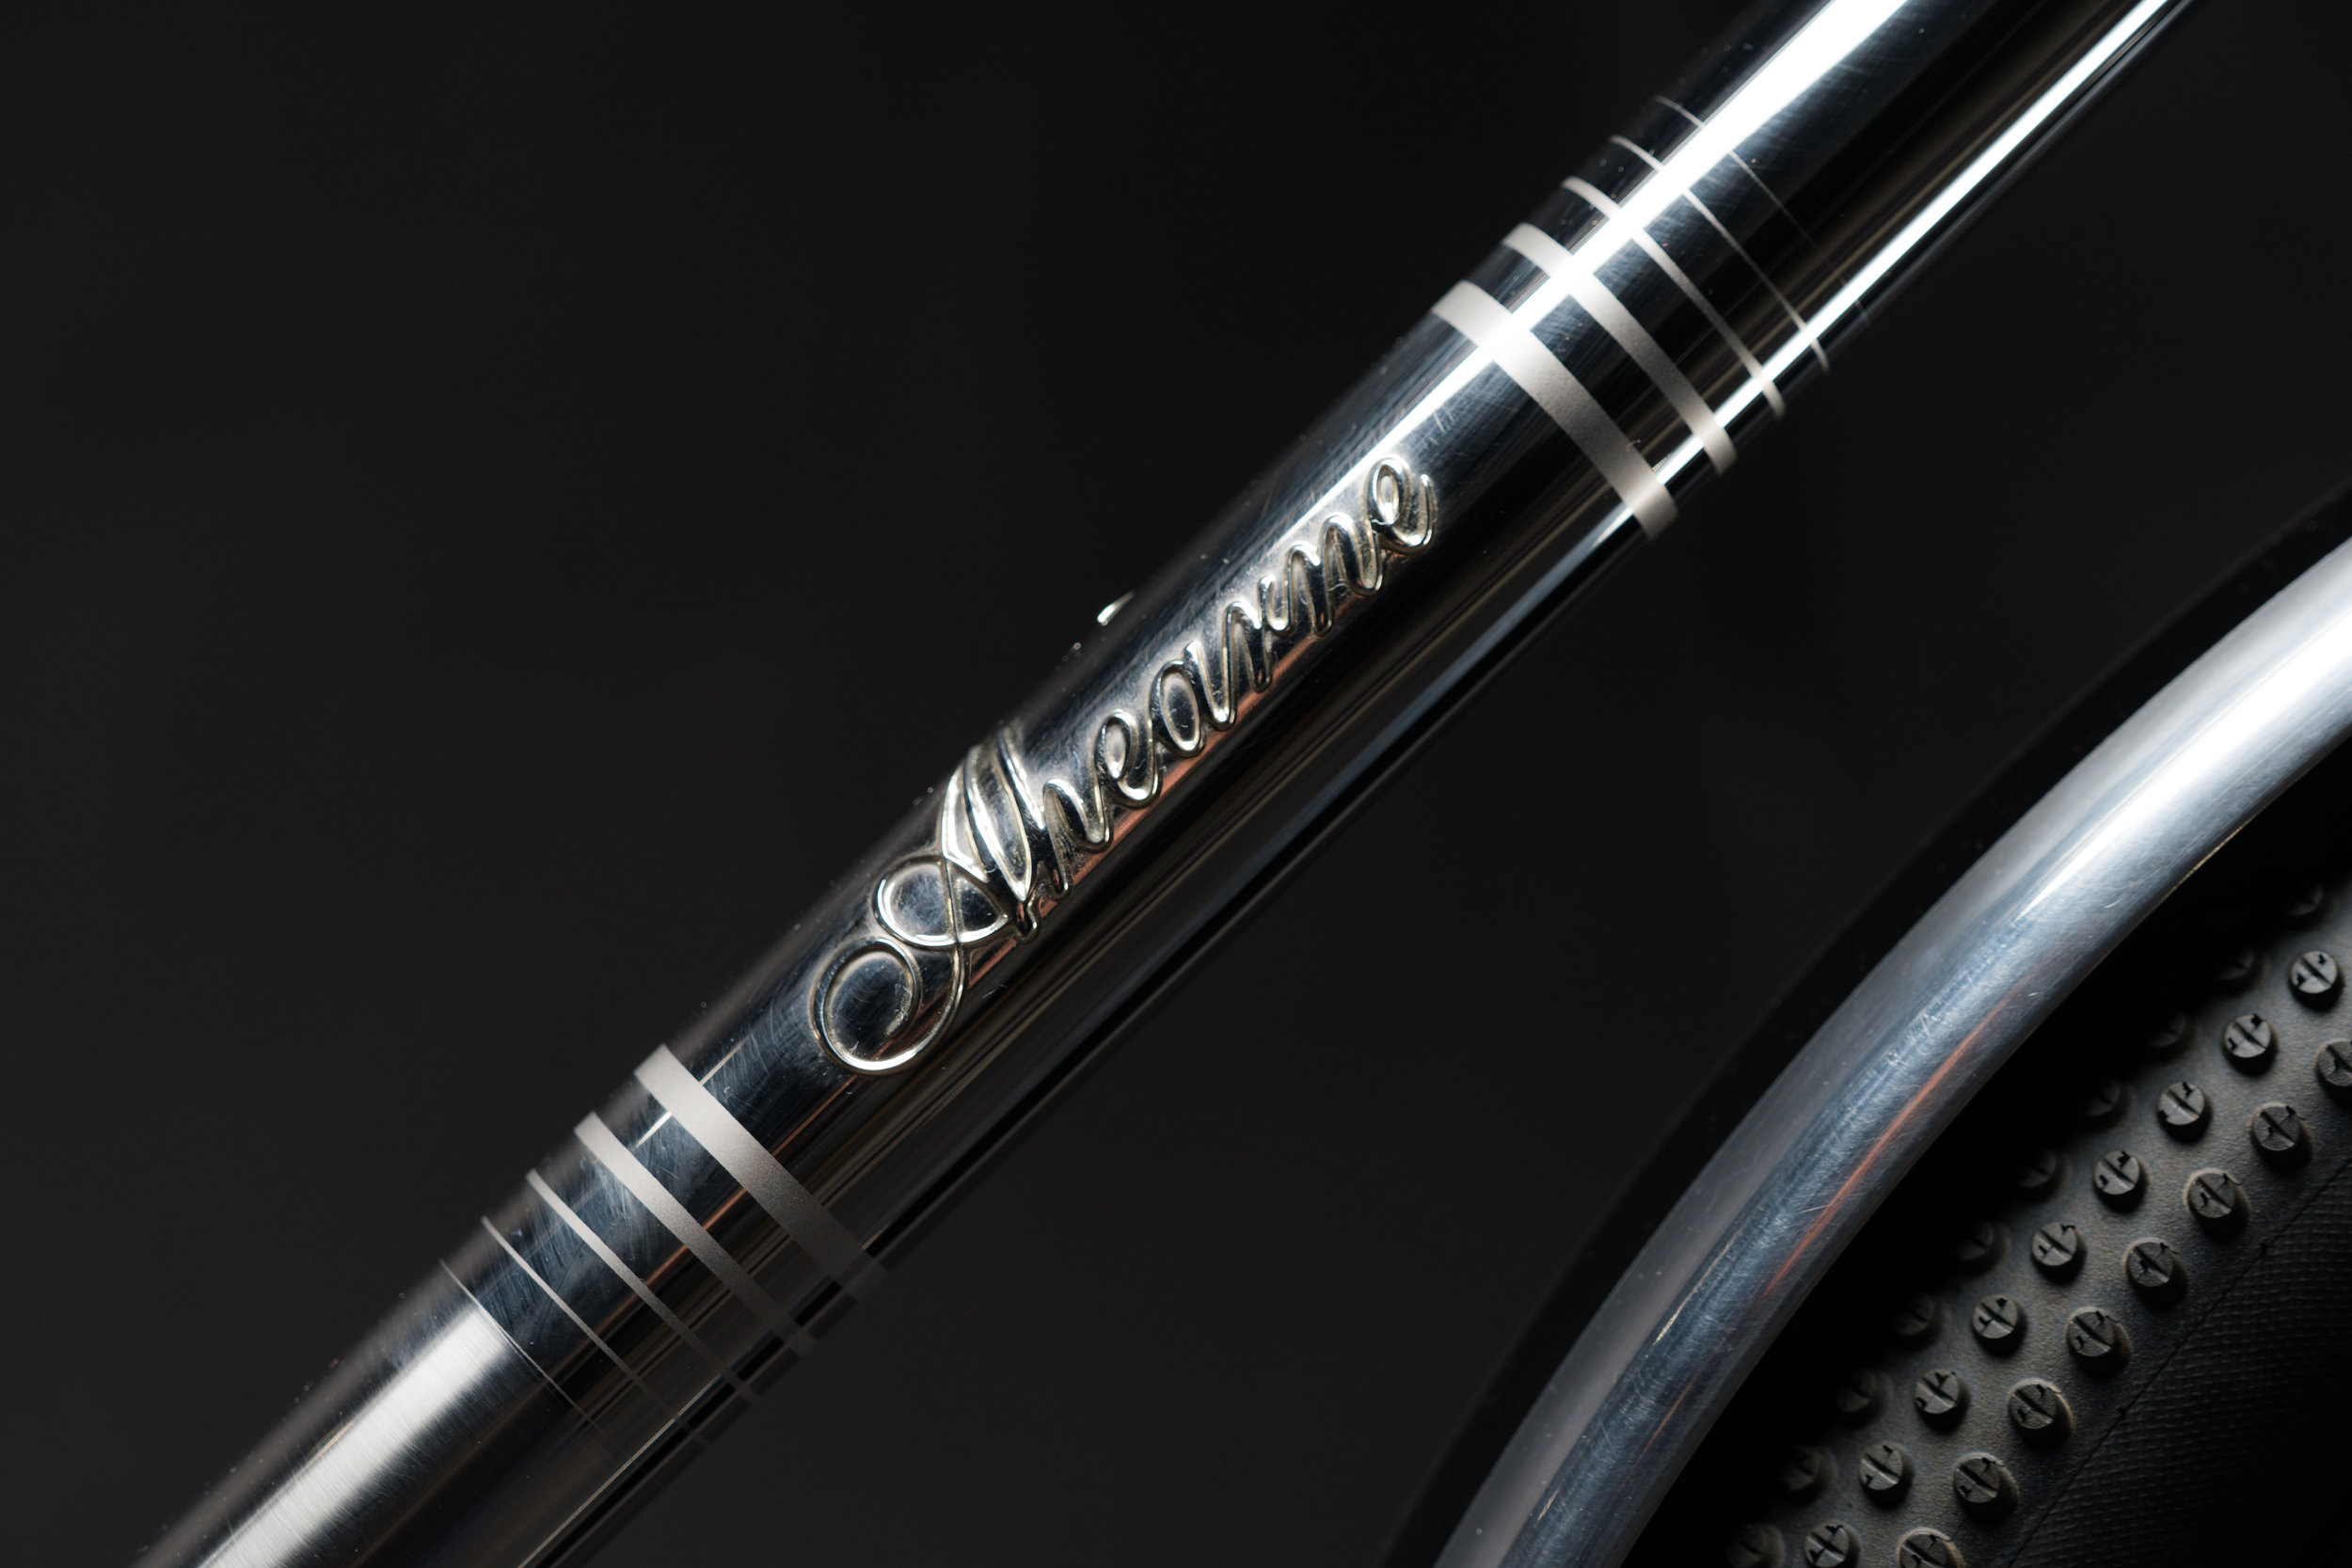
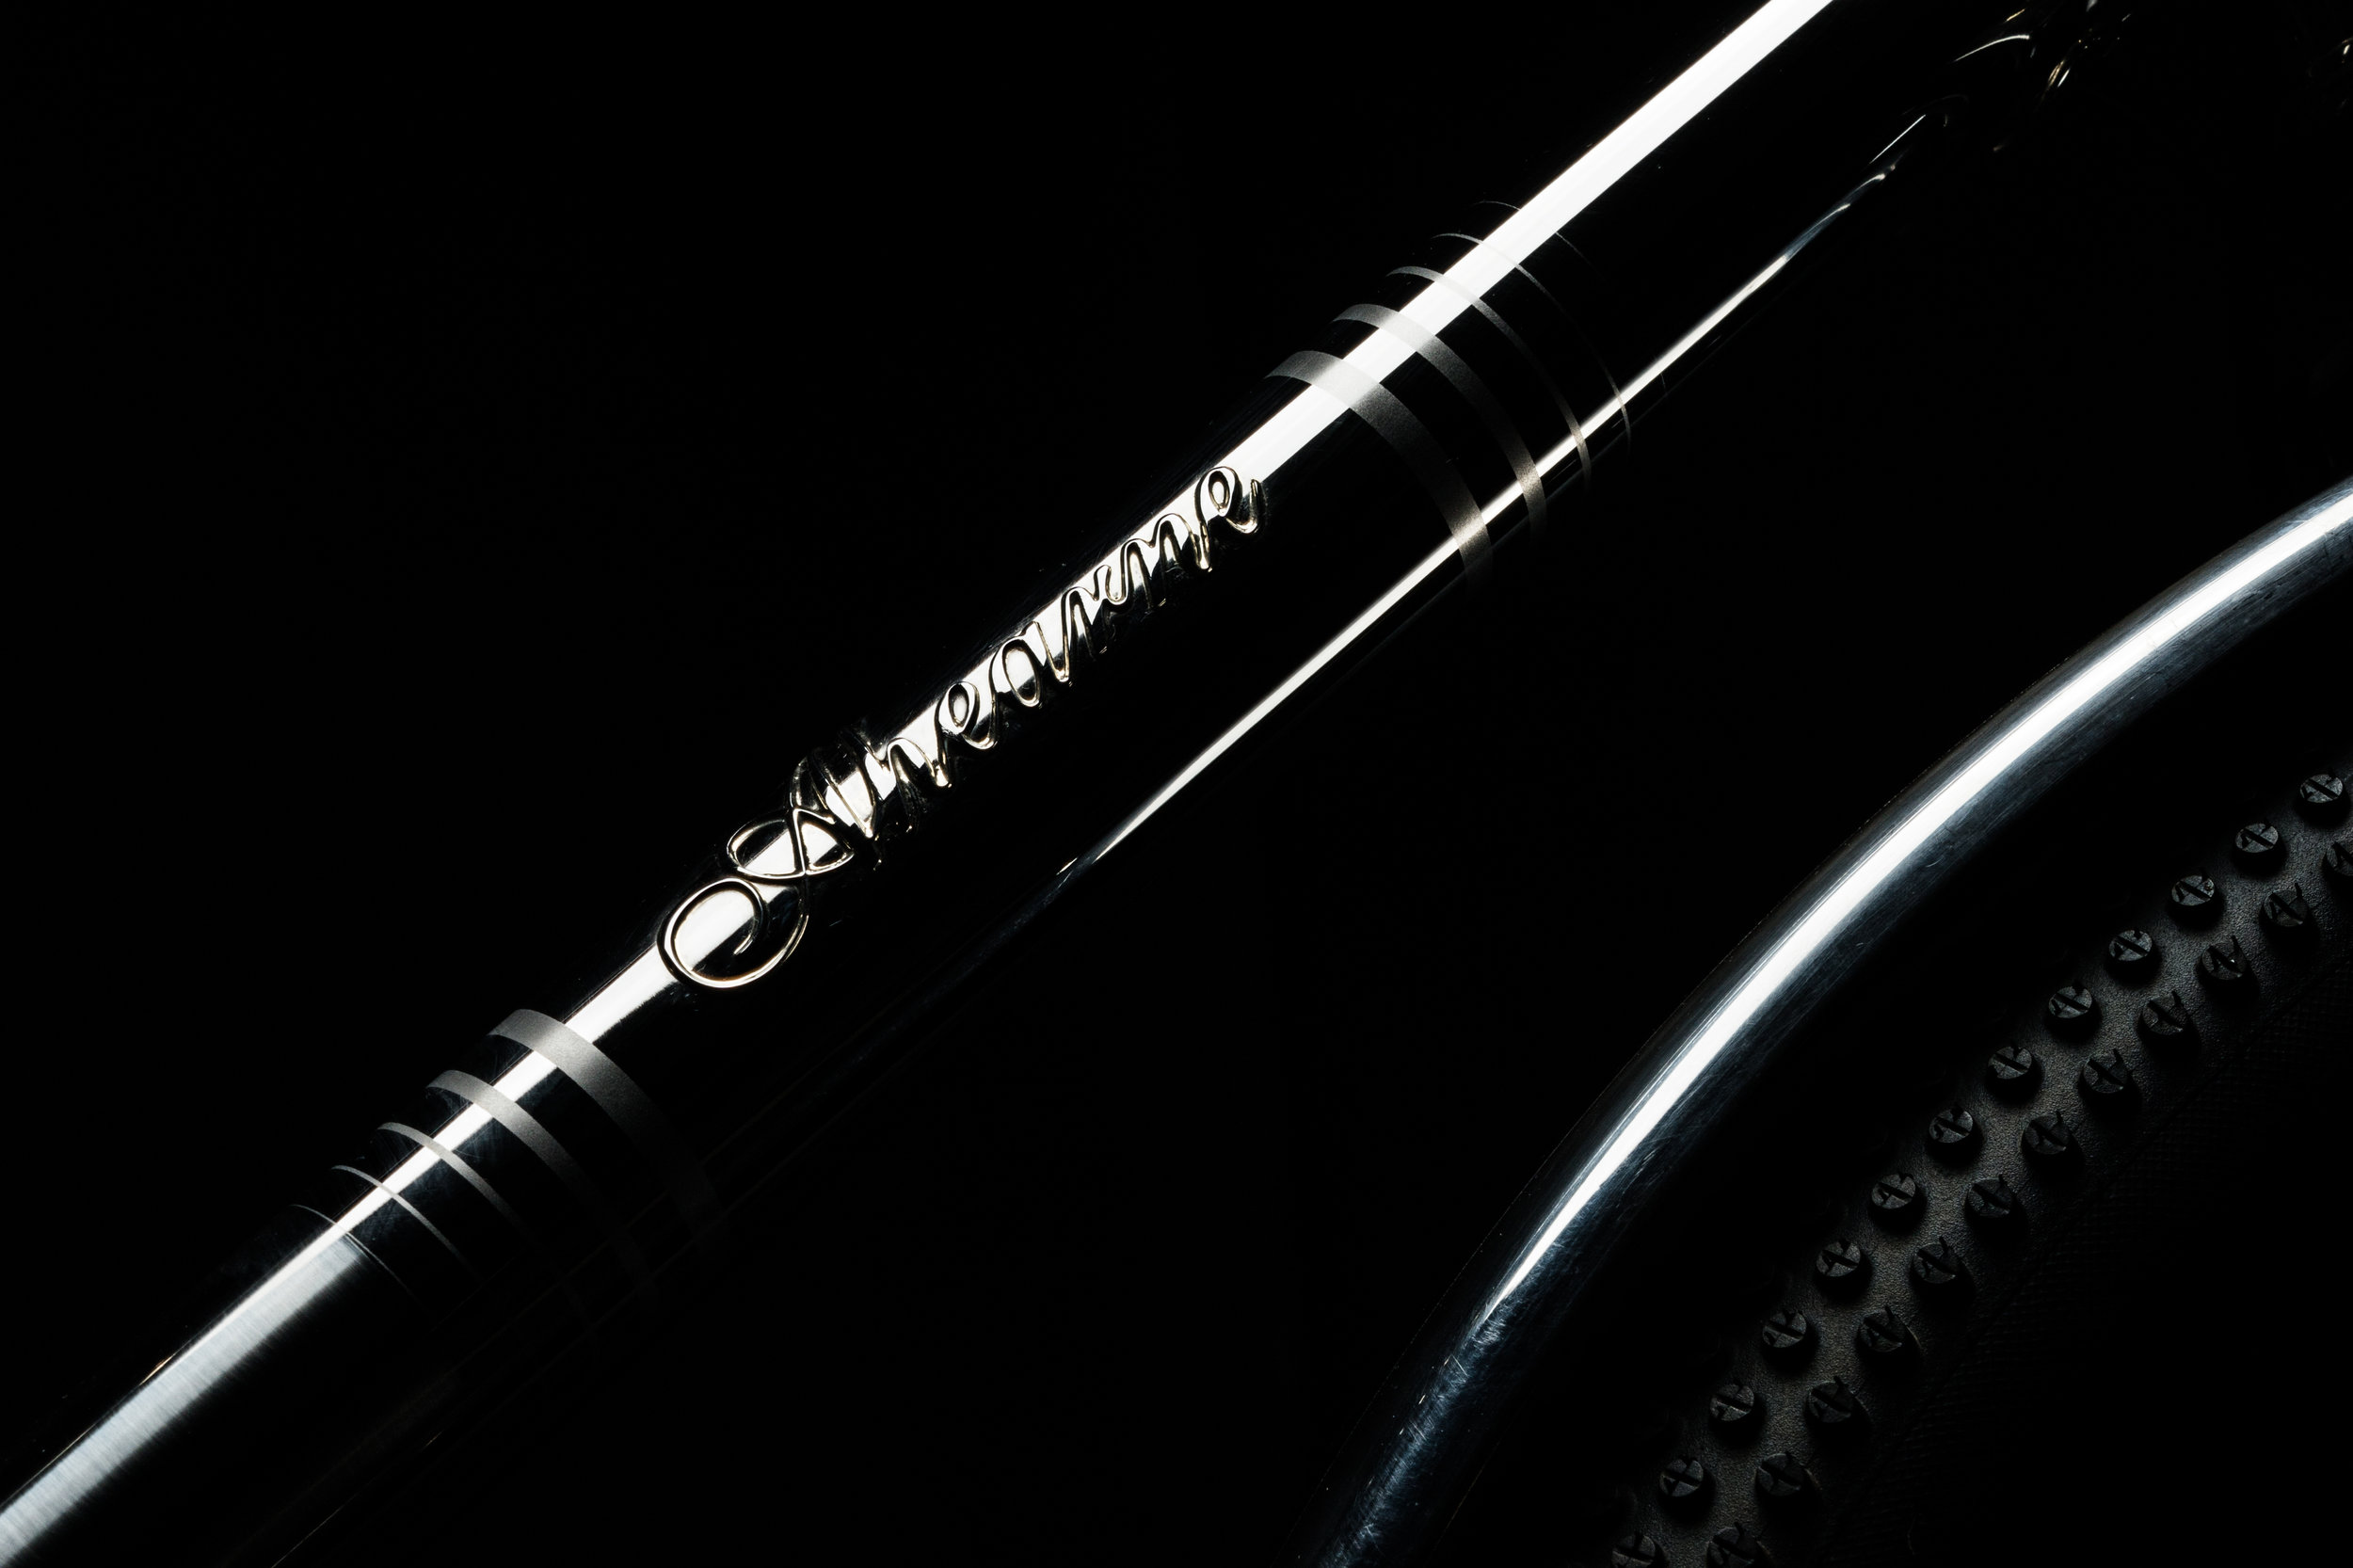
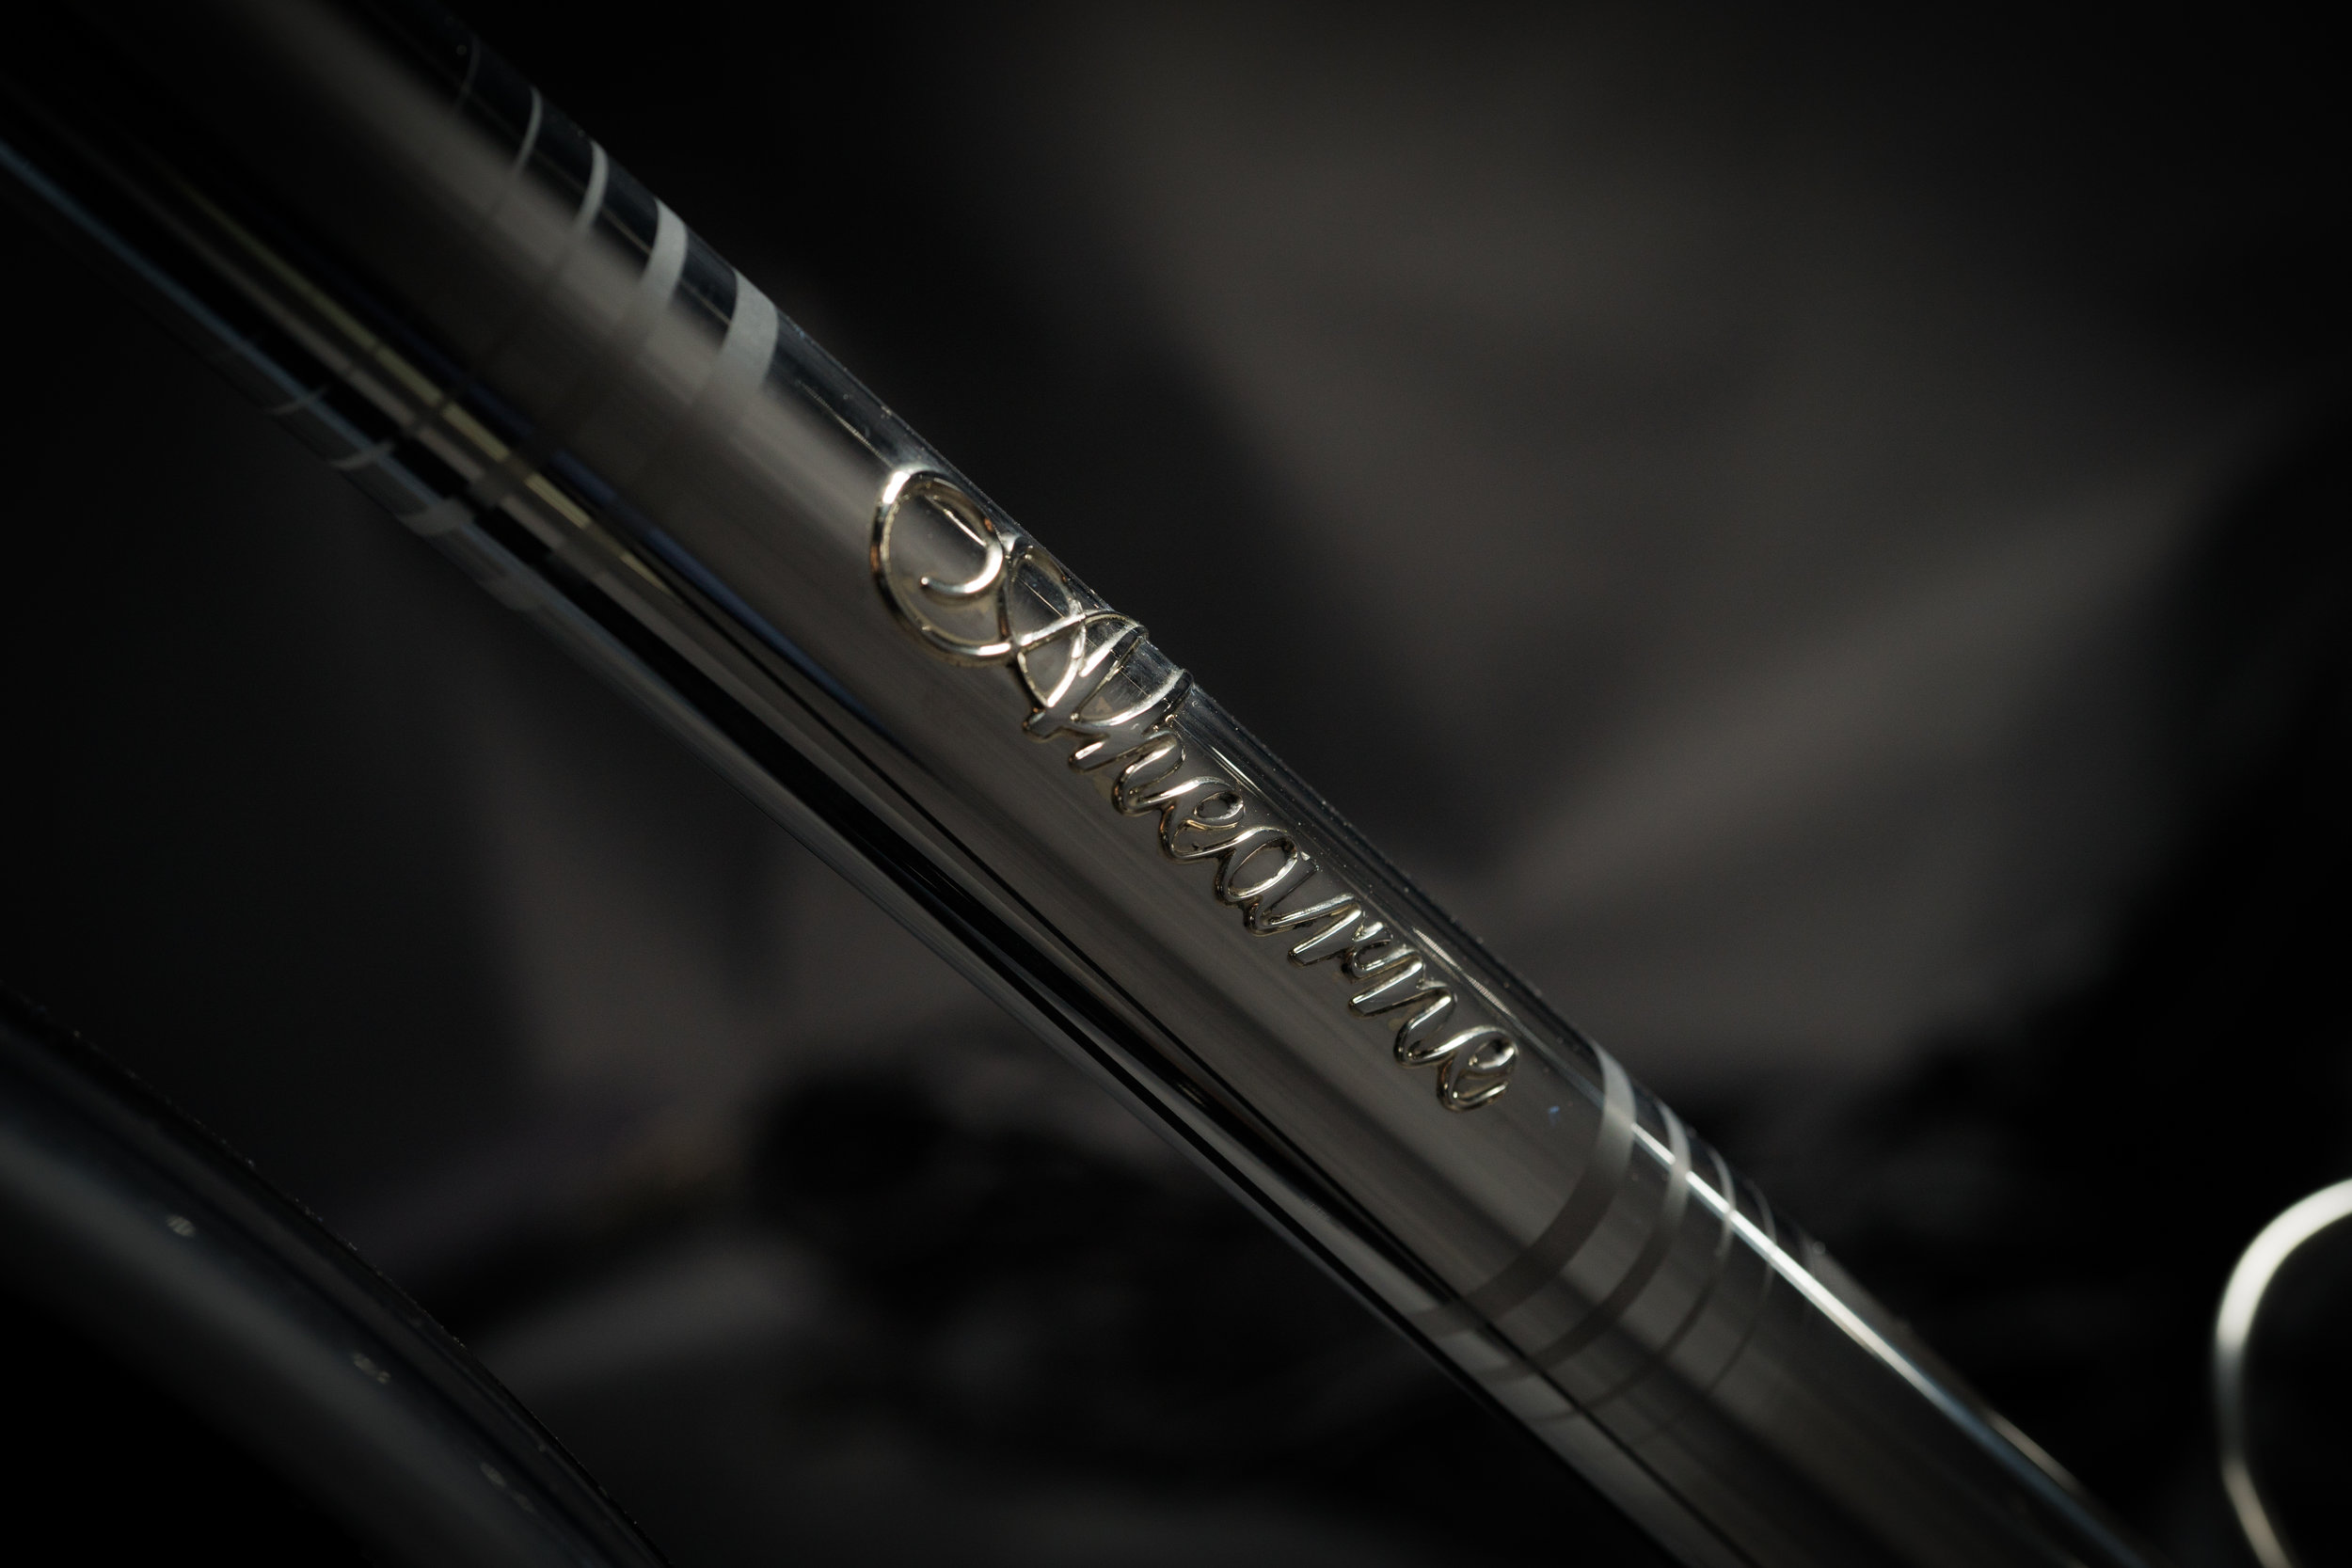
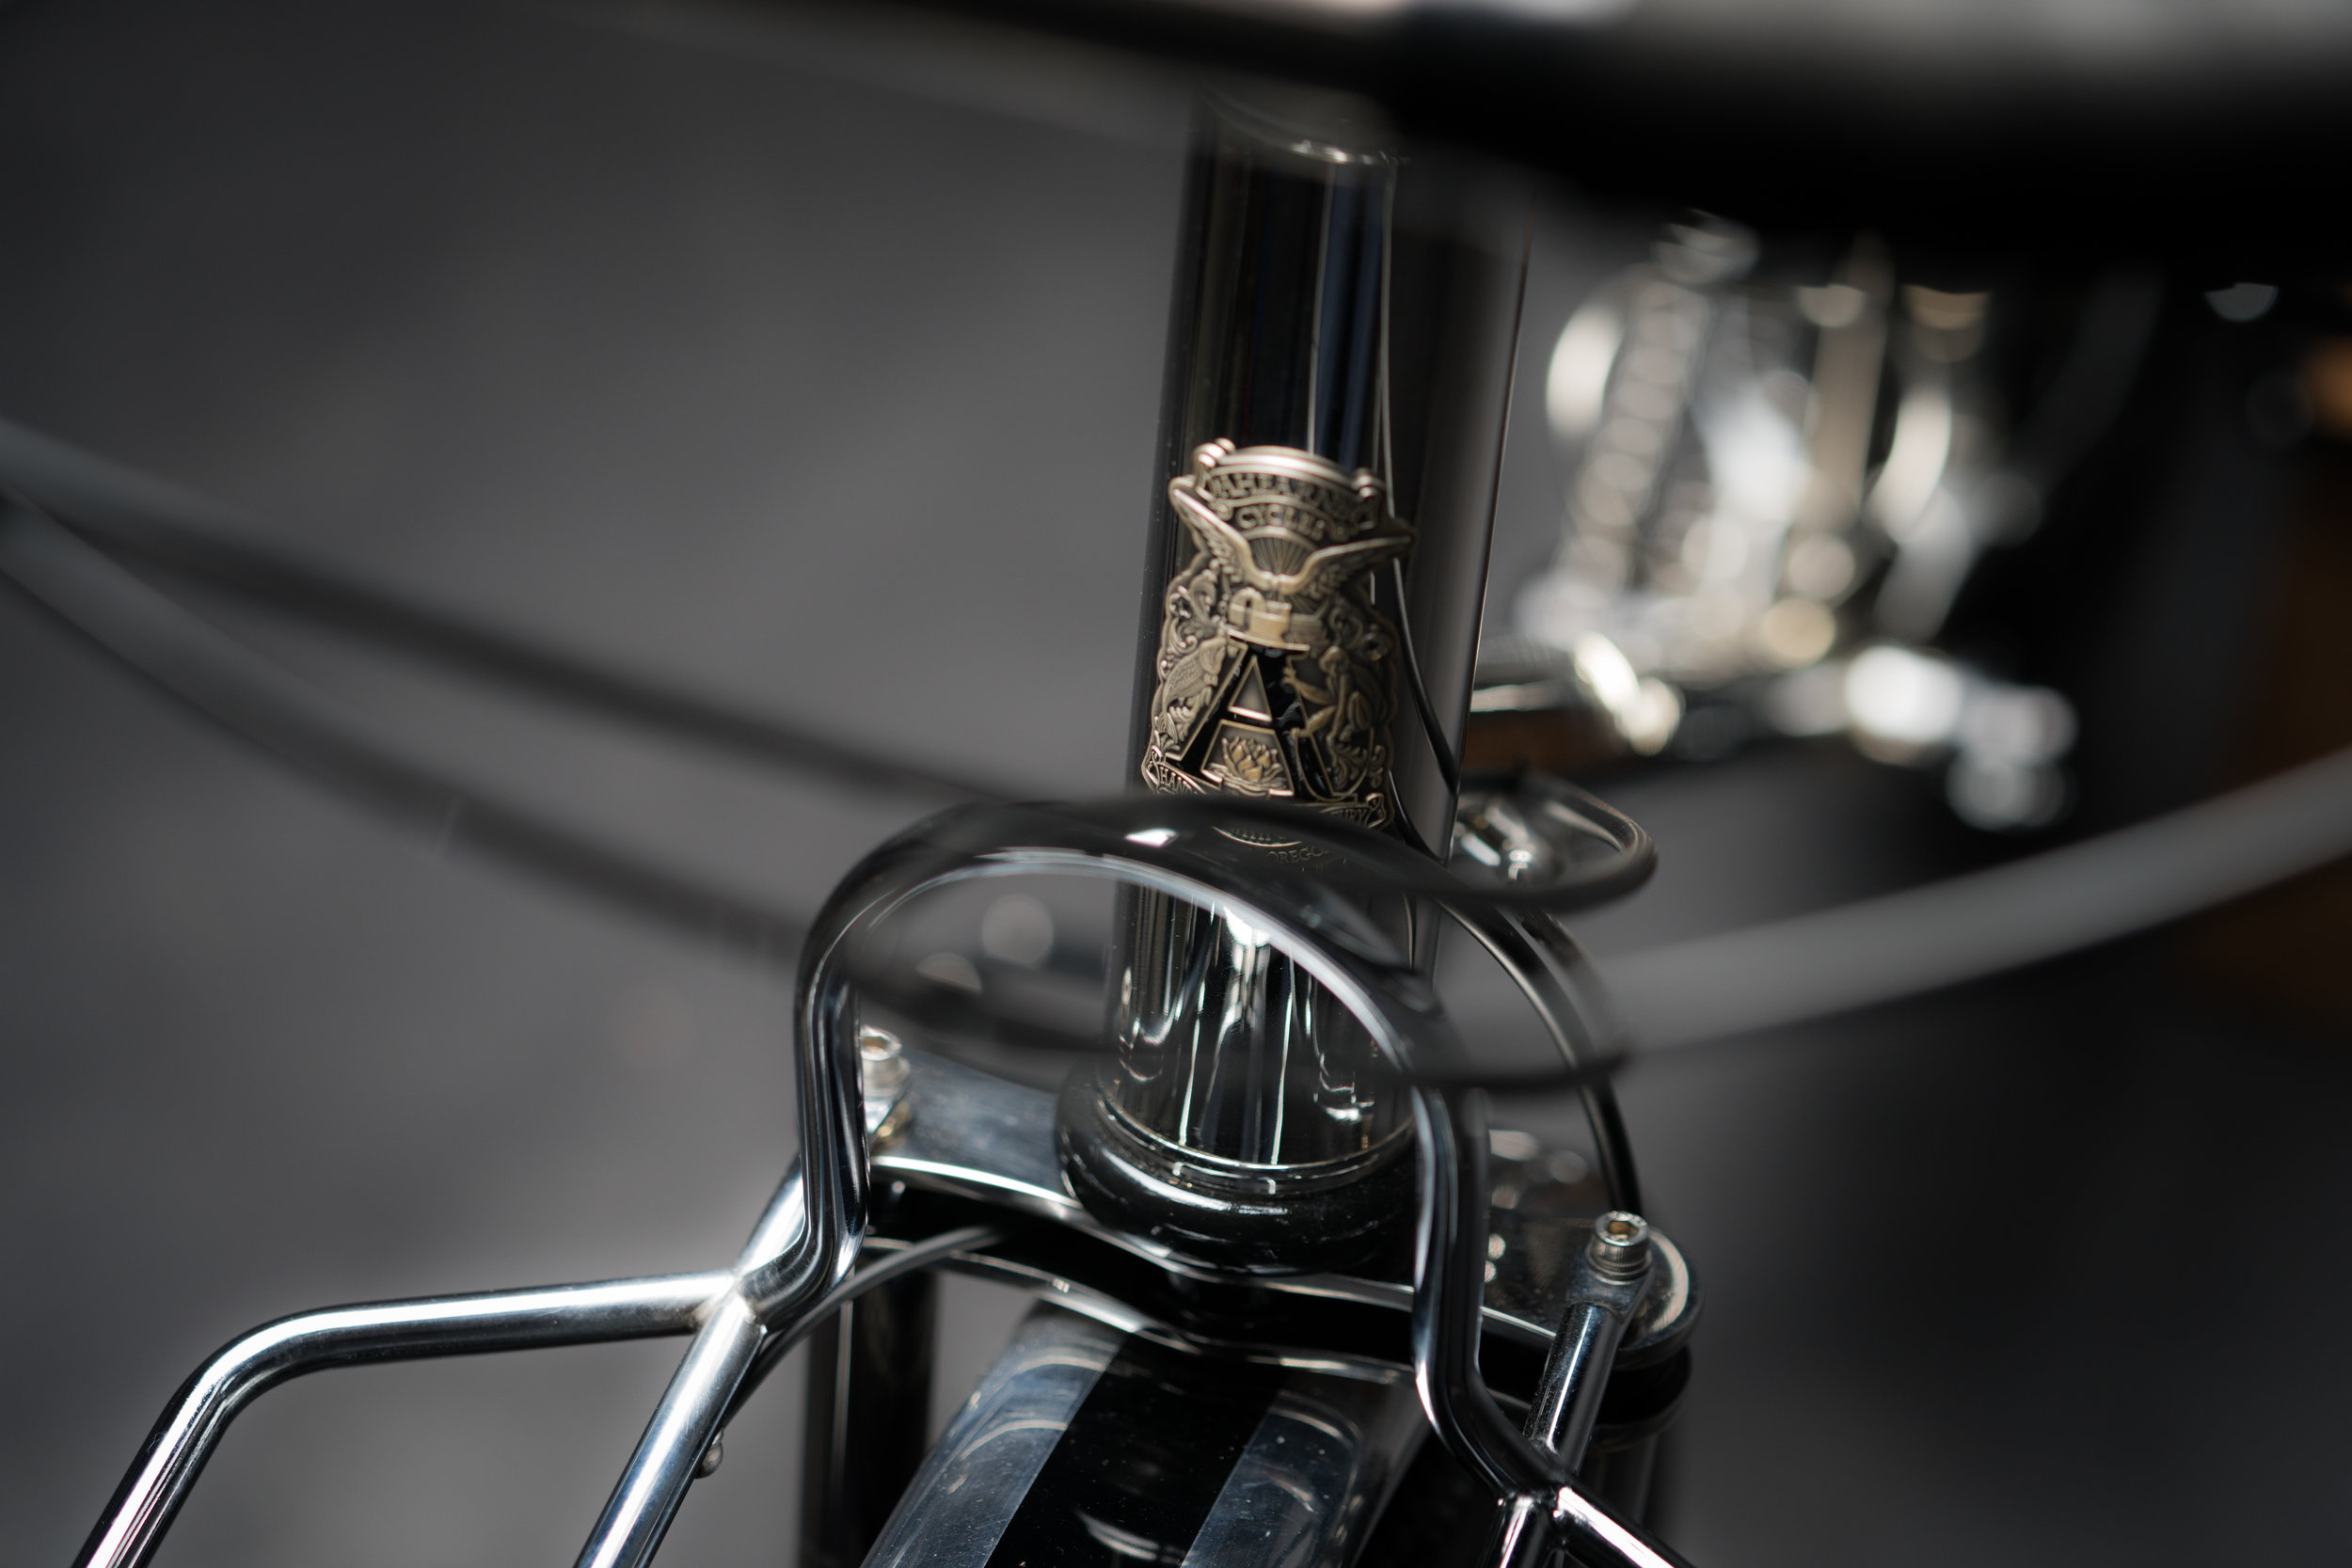
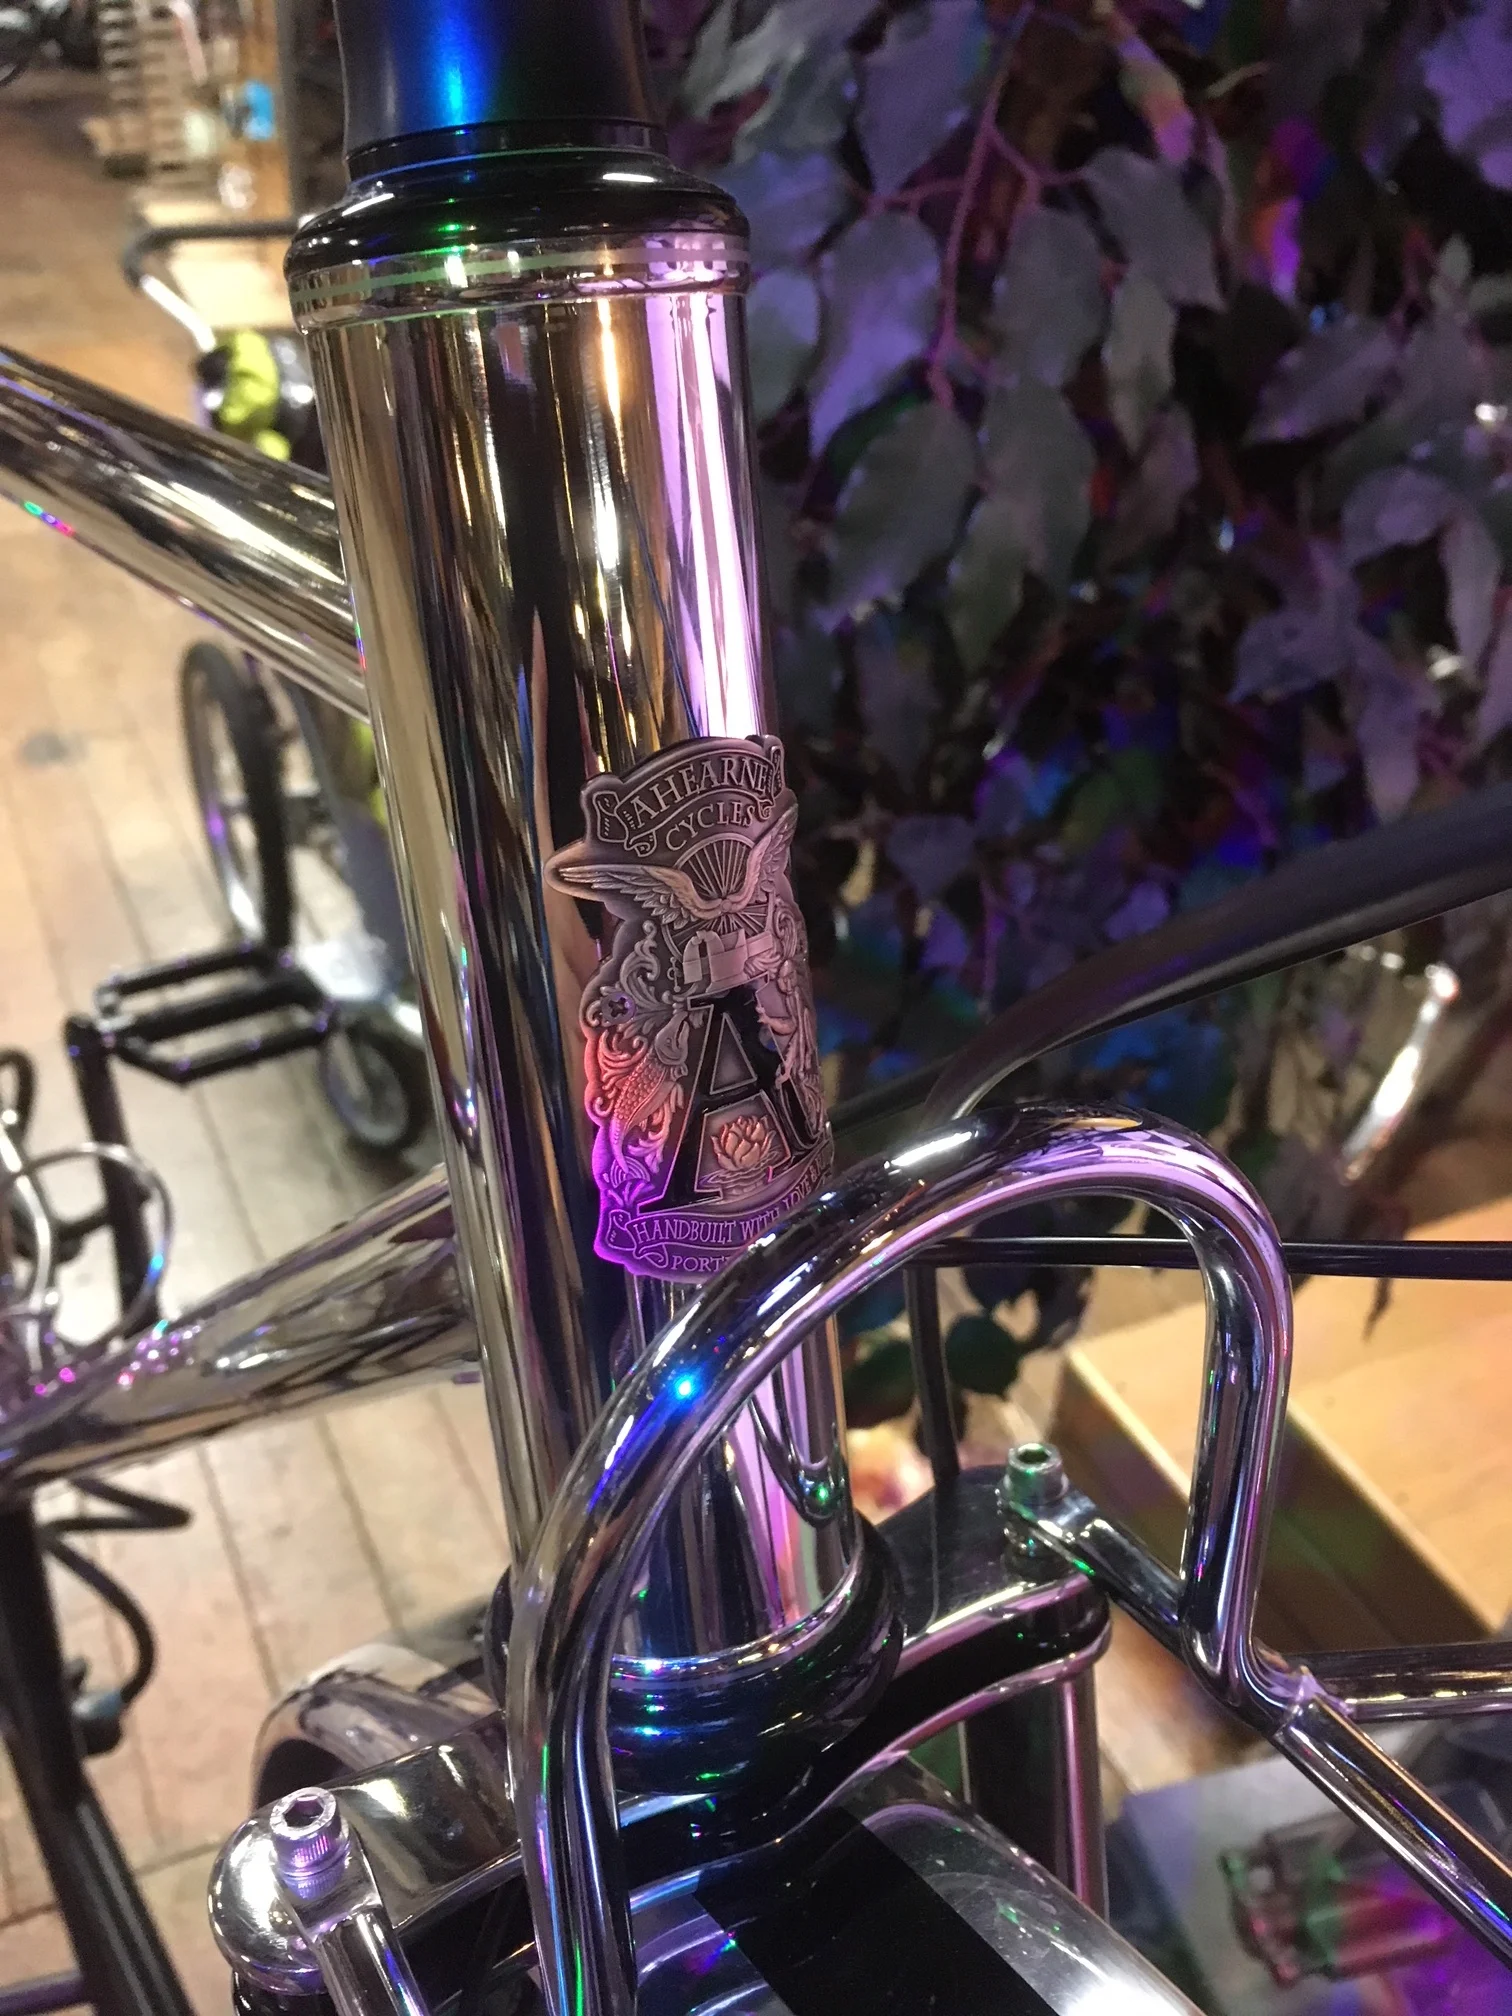
Finishing the rack, I moved on to the front triangle. First thing I did was braze on the Ahearne logo. This is the closest I come to making jewelry, since the brazing is so delicate. I have to turn my torch low, and recruit the help of whoever may be in the shop at the time to hold the fragile piece against the tube. You can see a time-lapse video of the process in the "video" section of the website.
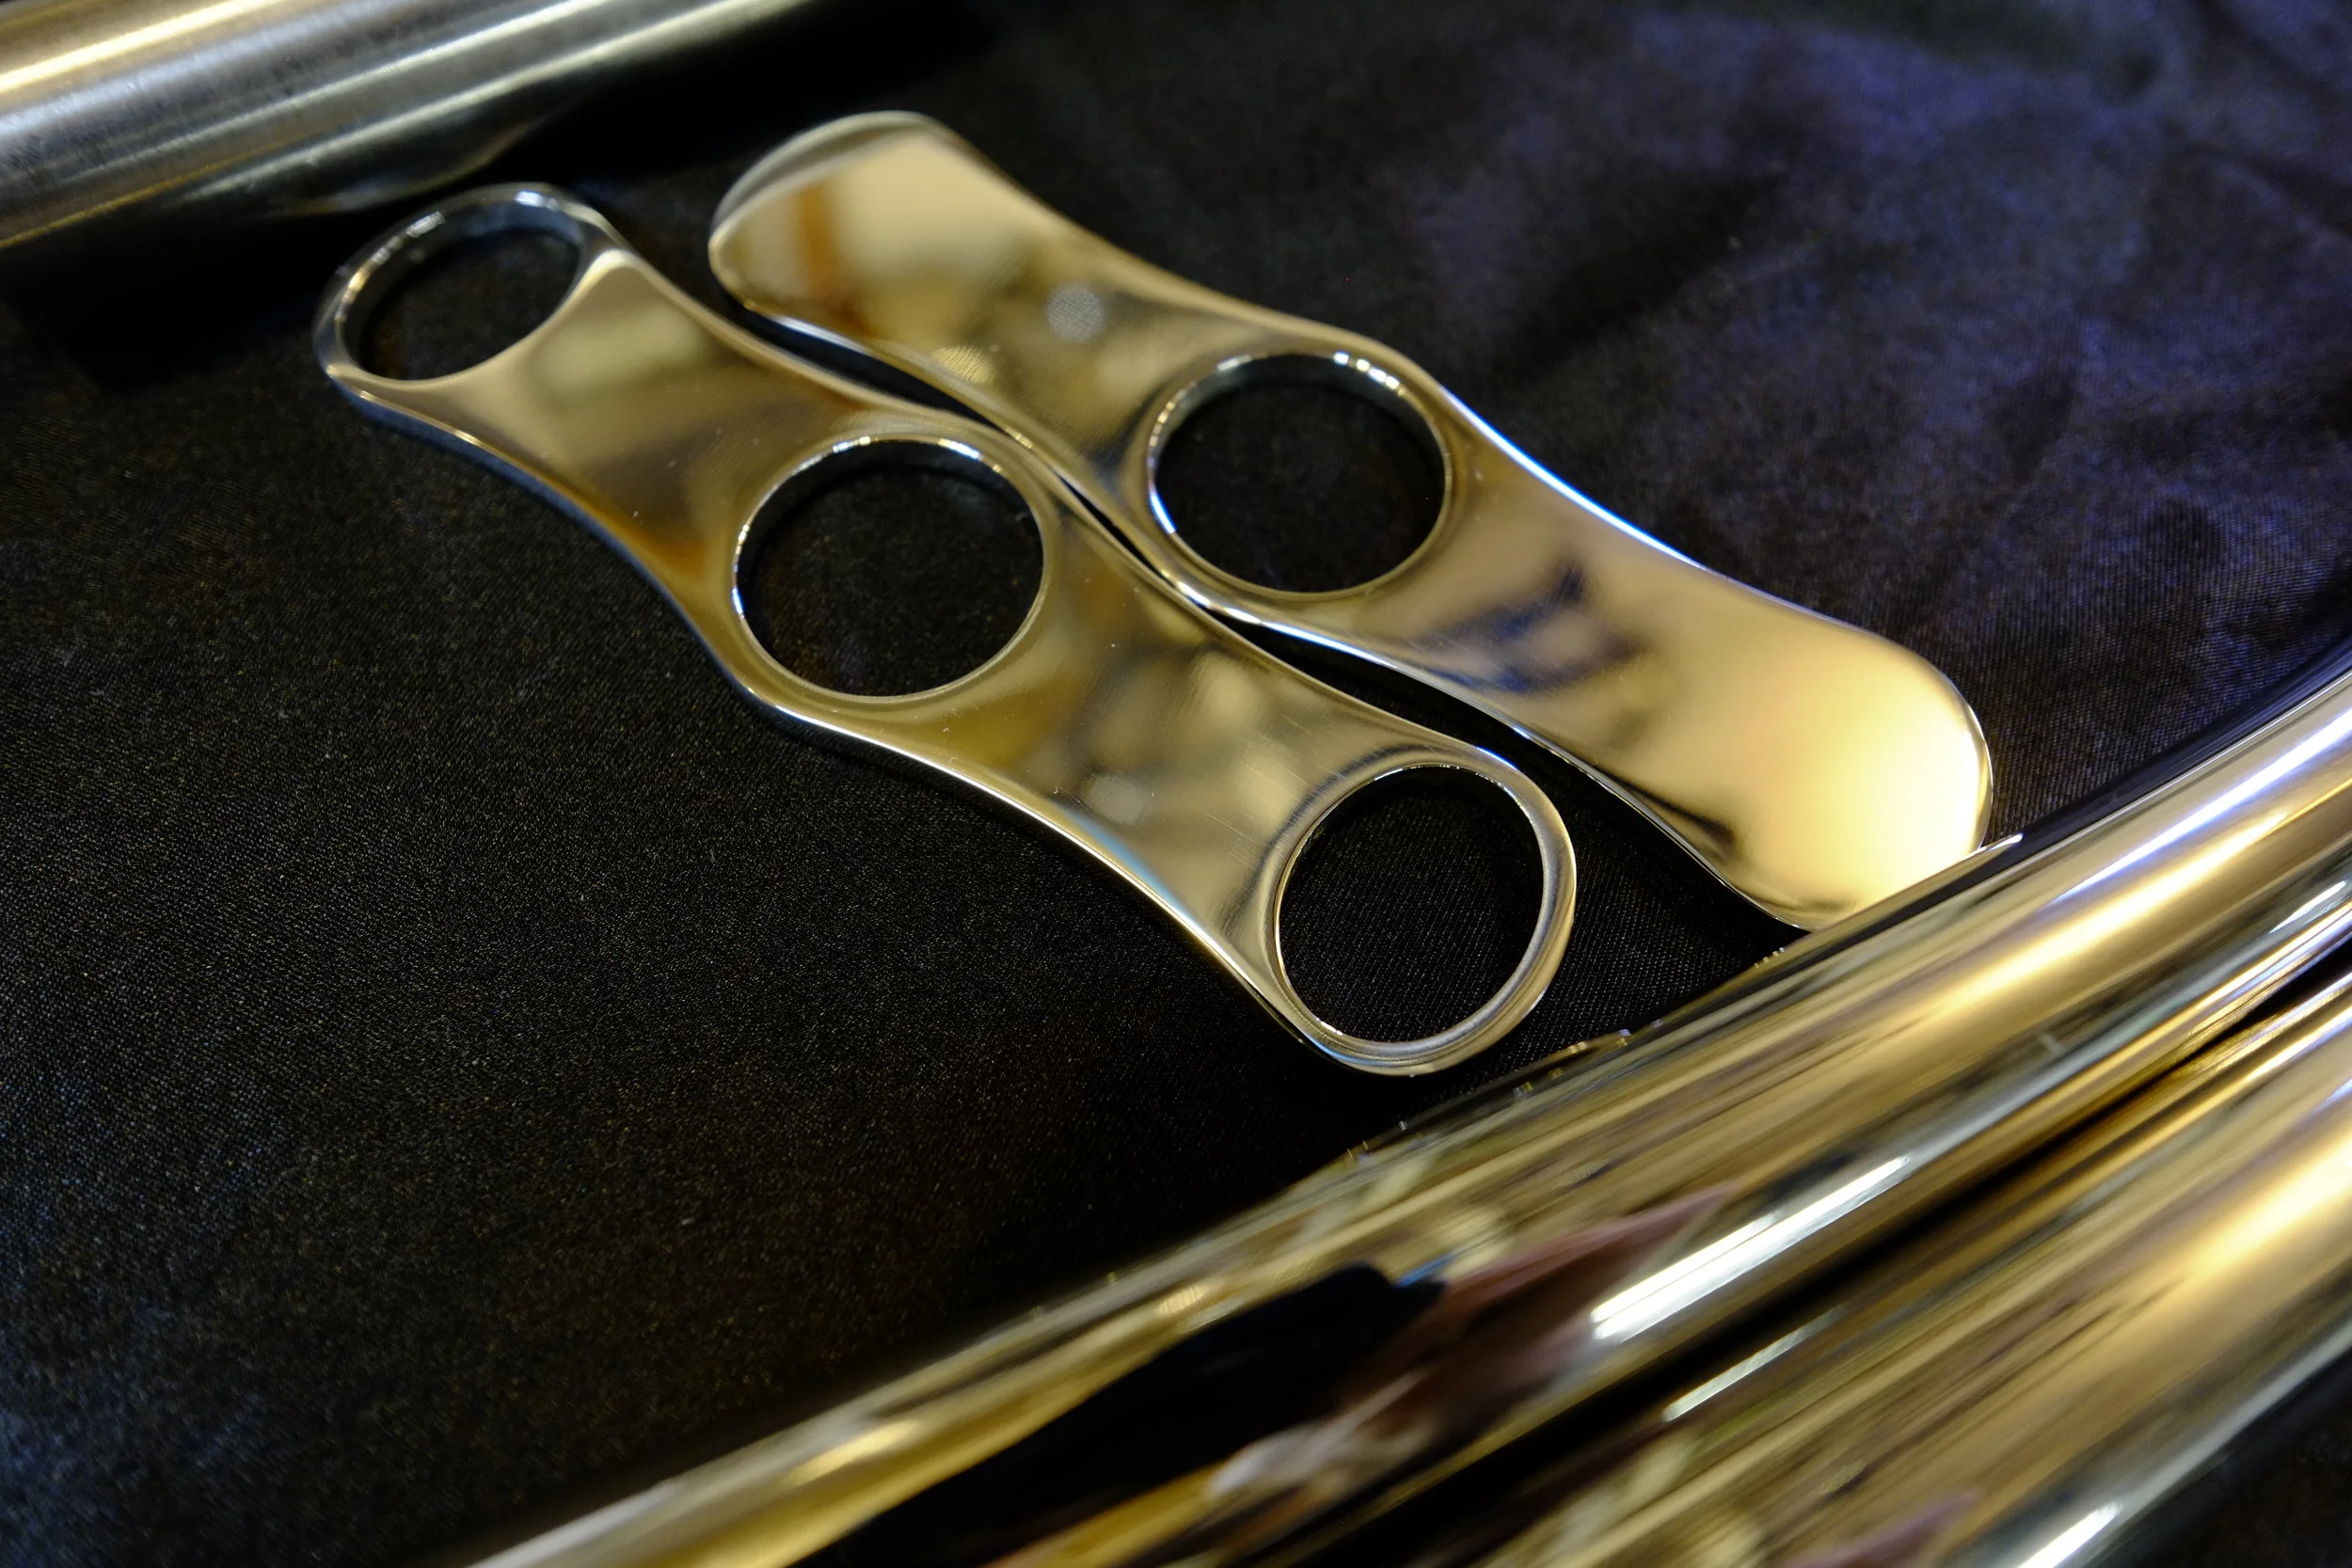
Logo on, I then drilled and installed internal routing for the rear brake housing. With this it was time for to re-polish the tube, and assemble the front triangle. And a re-polish. Add chain stays to the yoke. Re-polish. Put yoke to bb, re-polish. I hand bent the seat stays using the "Roberto" double fork blade bender by Anvil Bikes. Bending seat stays in two planes is tricky, and then to slot and hand miter them correctly takes a lot of time. On this bike that I had to do two sets -- the first set of stays was practice, and taught me how to bend and miter them correctly. Sometimes that's what it takes. I got that first set all finished, but realized I just didn't have the tire clearance I wanted, and this was not a bike to cut corners on. Everything was perfect, except I just needed about 5 mm more on each side to feel like it was right. So I bought a new set of stays, and started the process of polishing, bending, slotting, and mitering all over again.
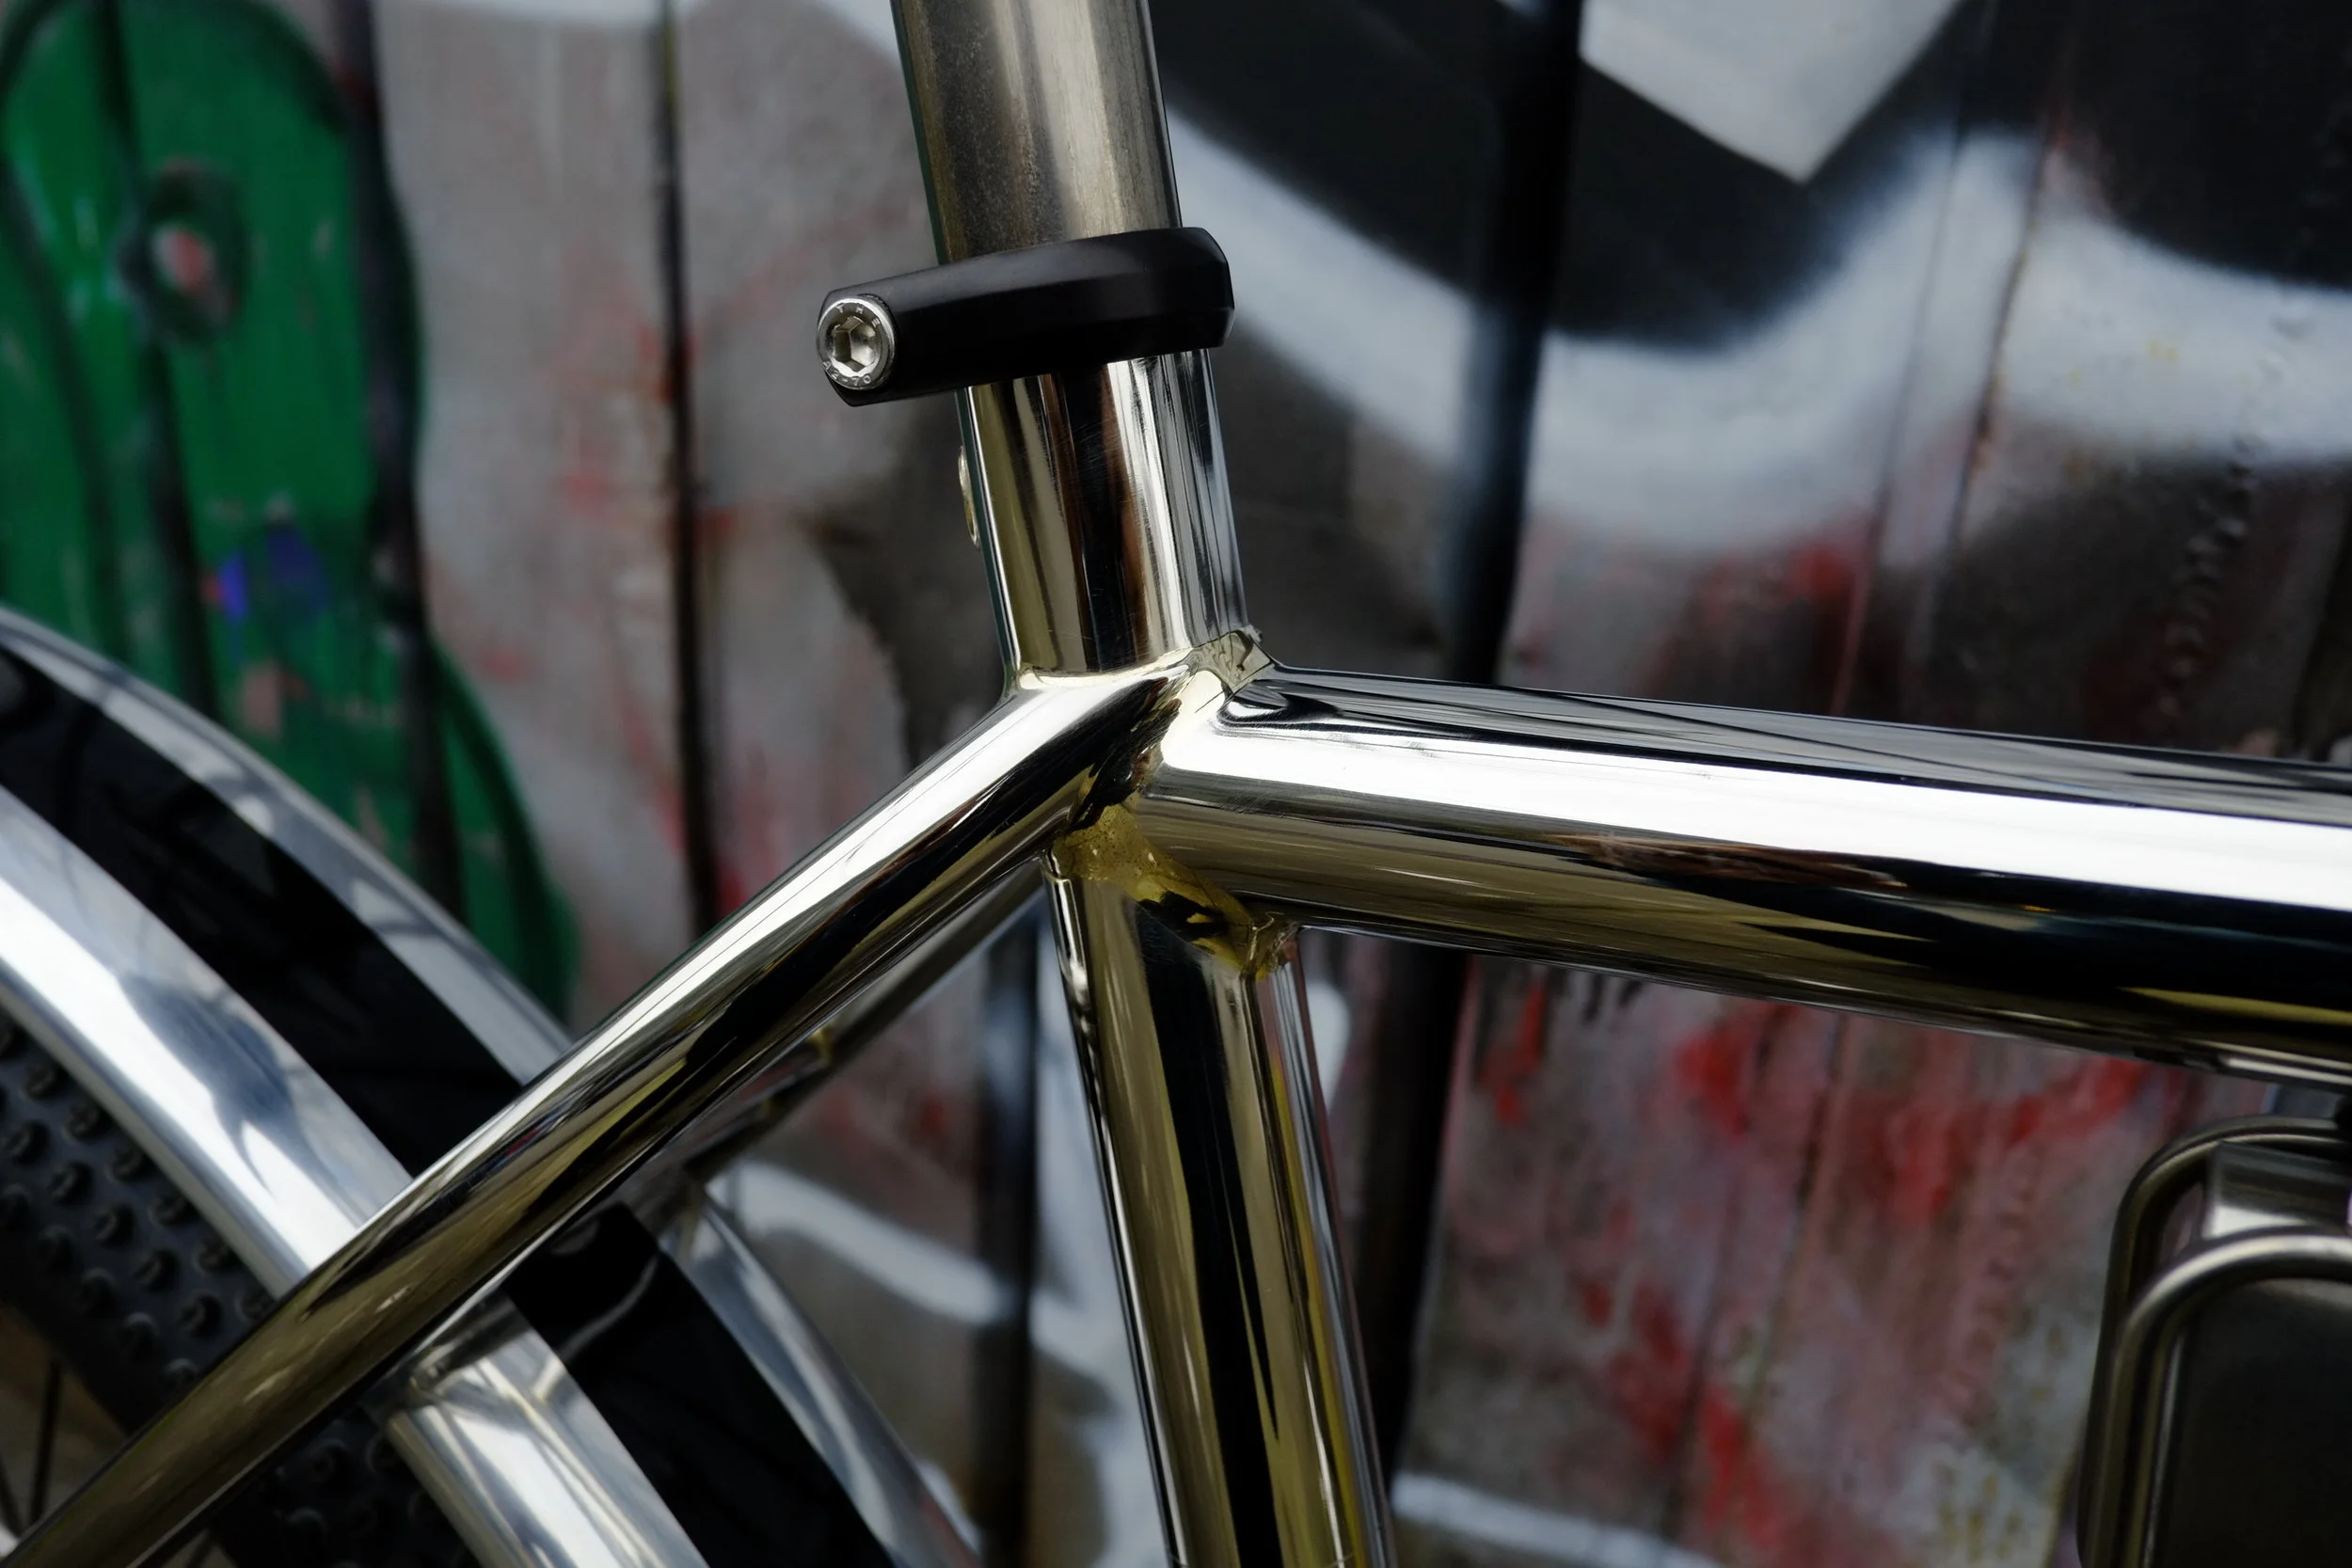
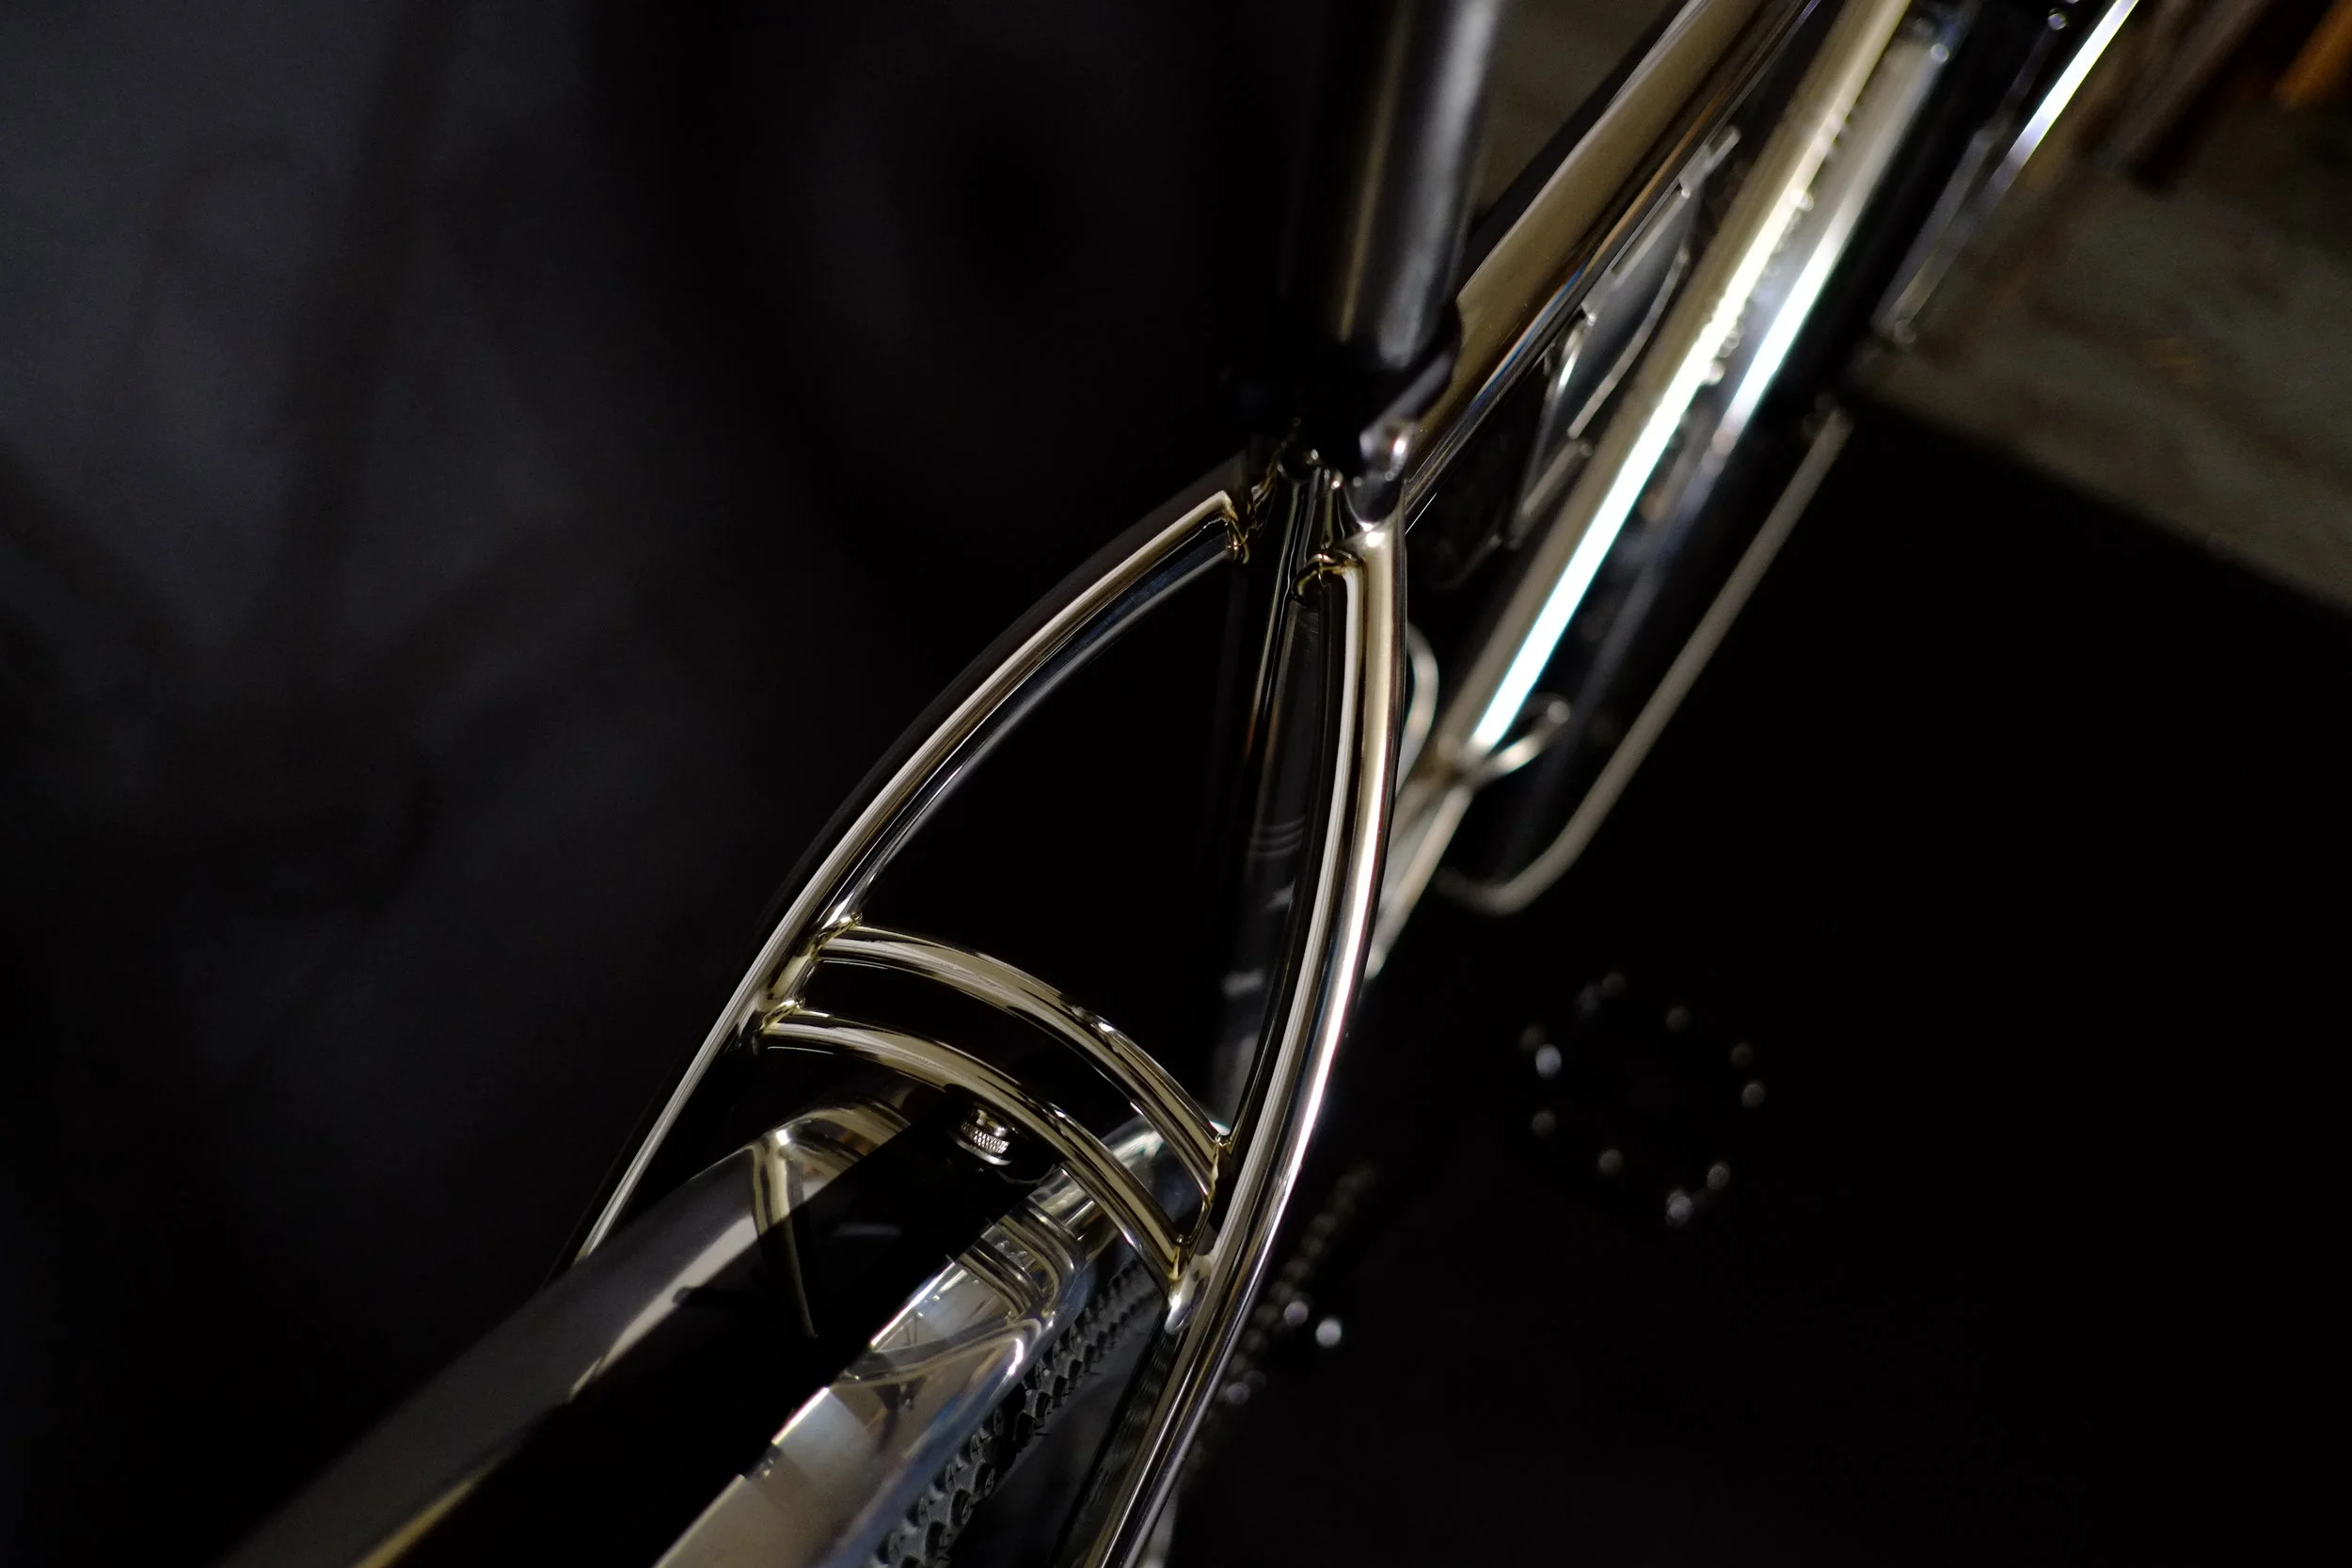
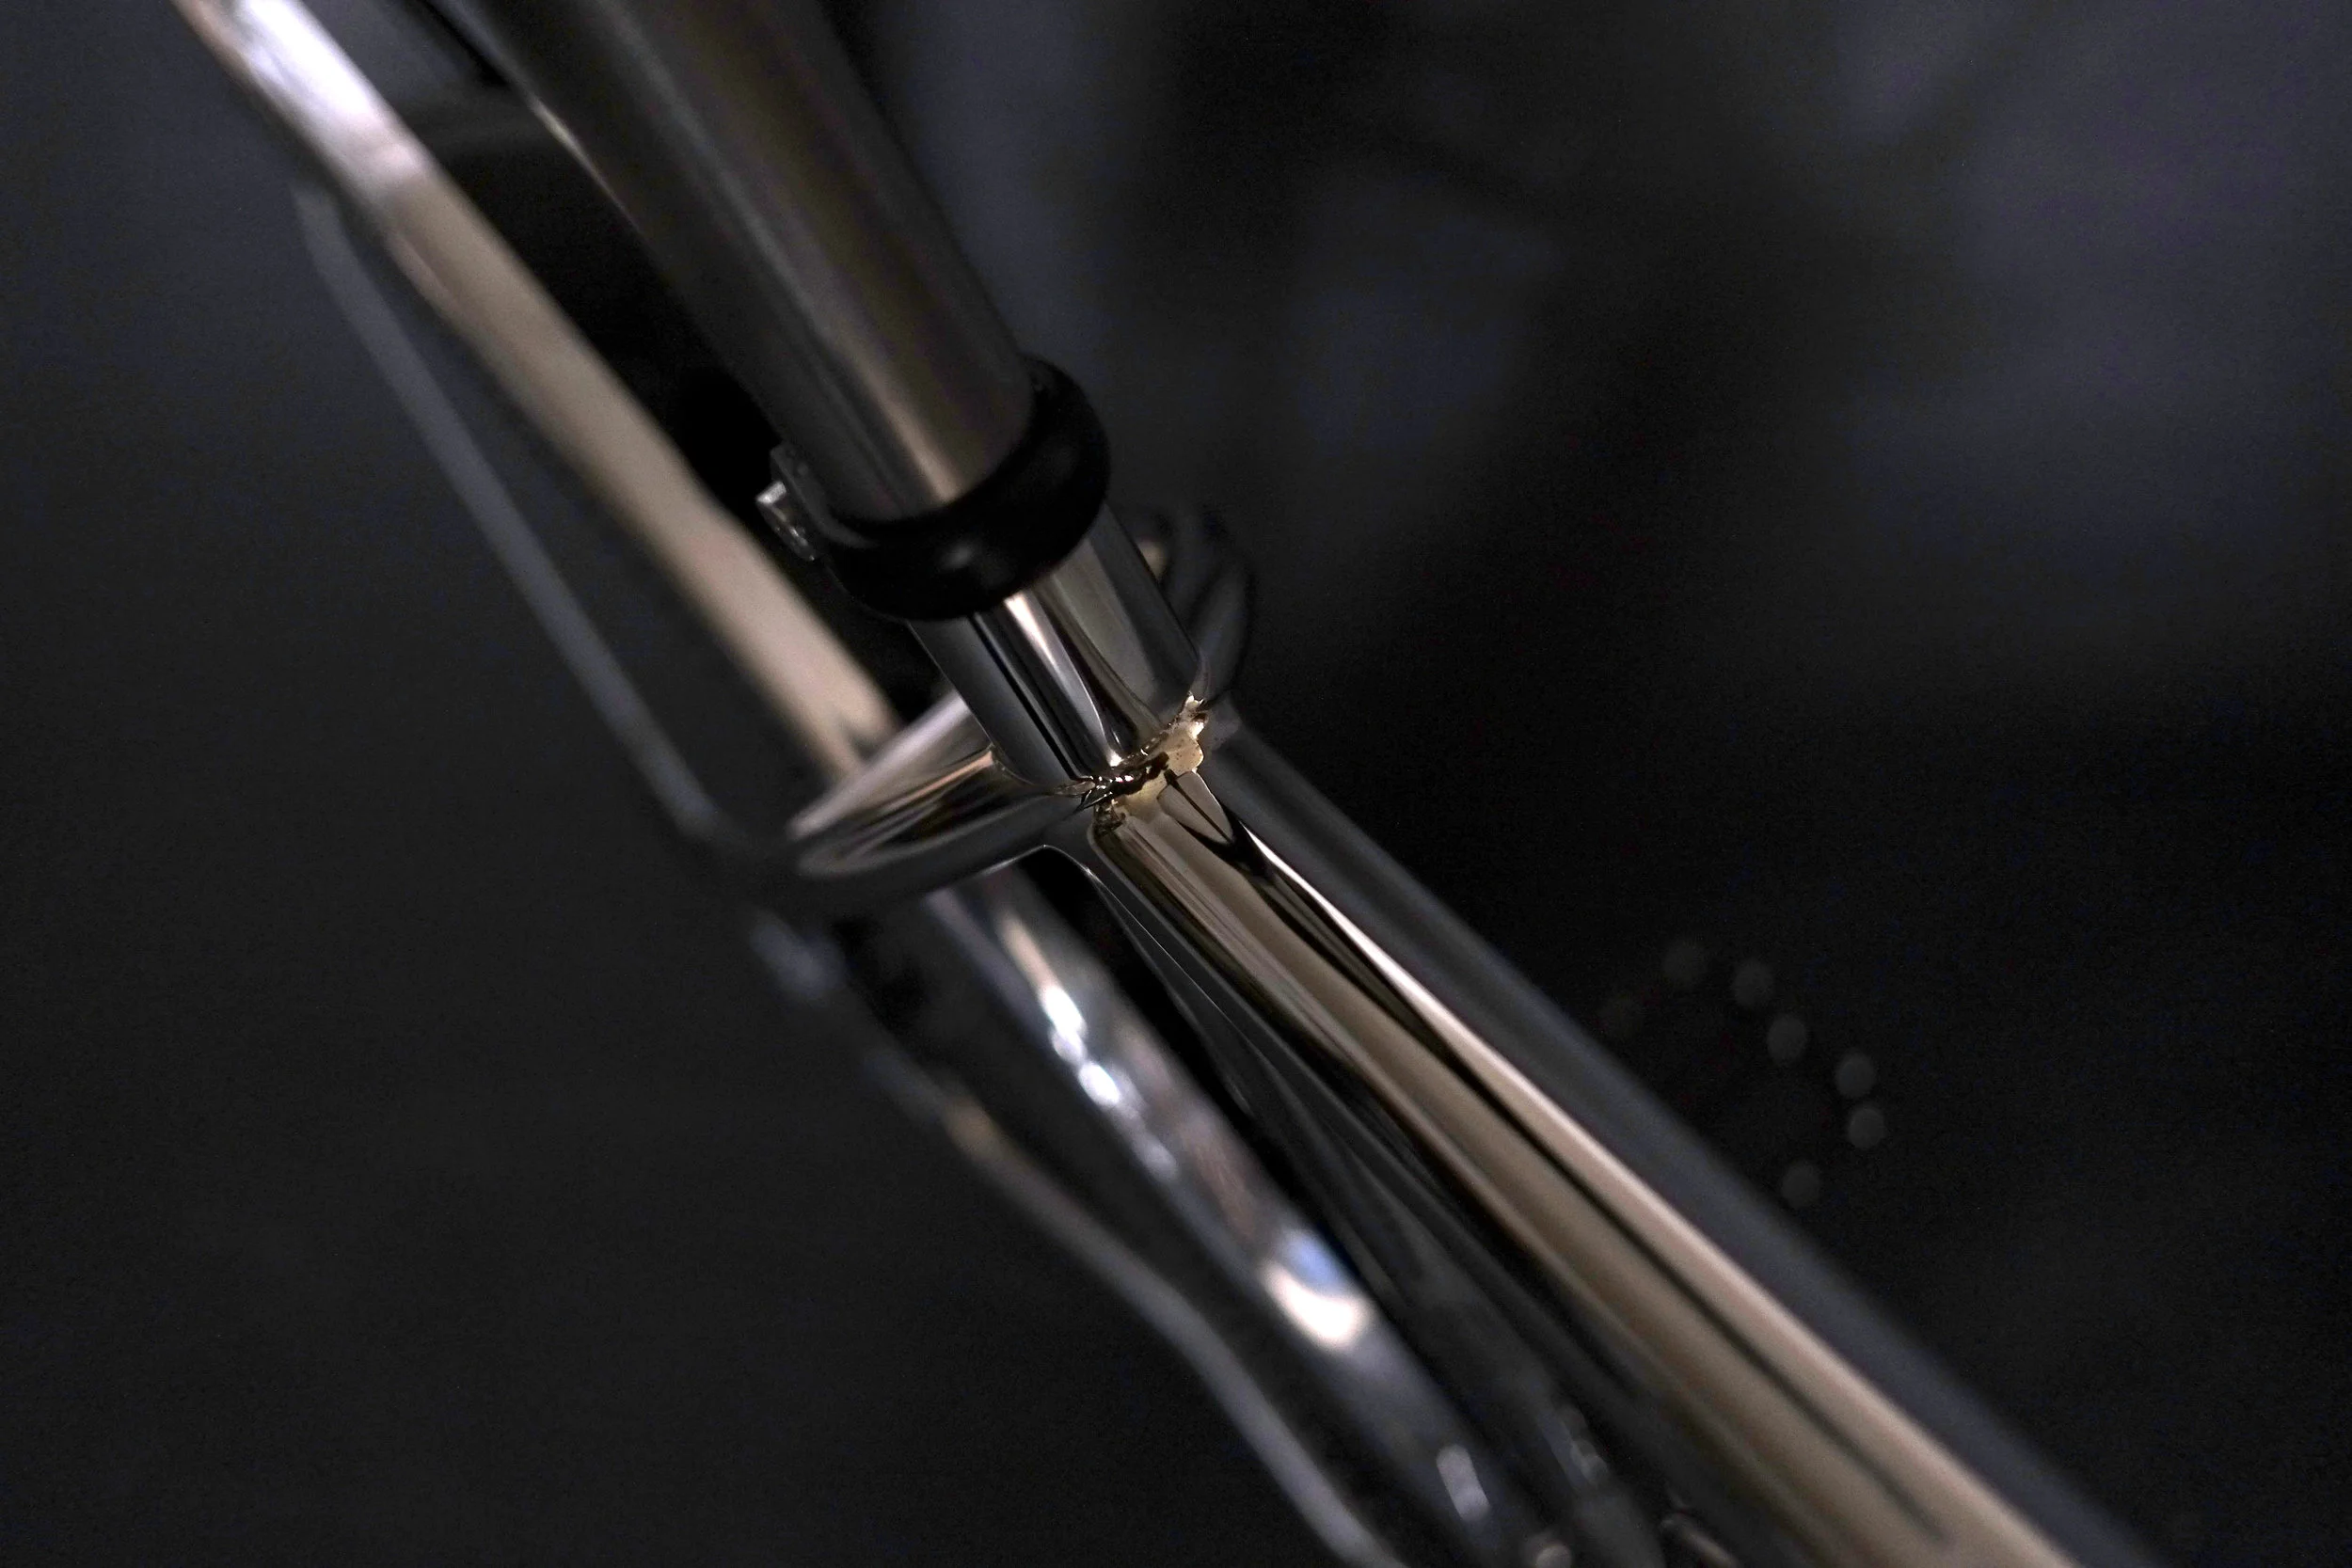
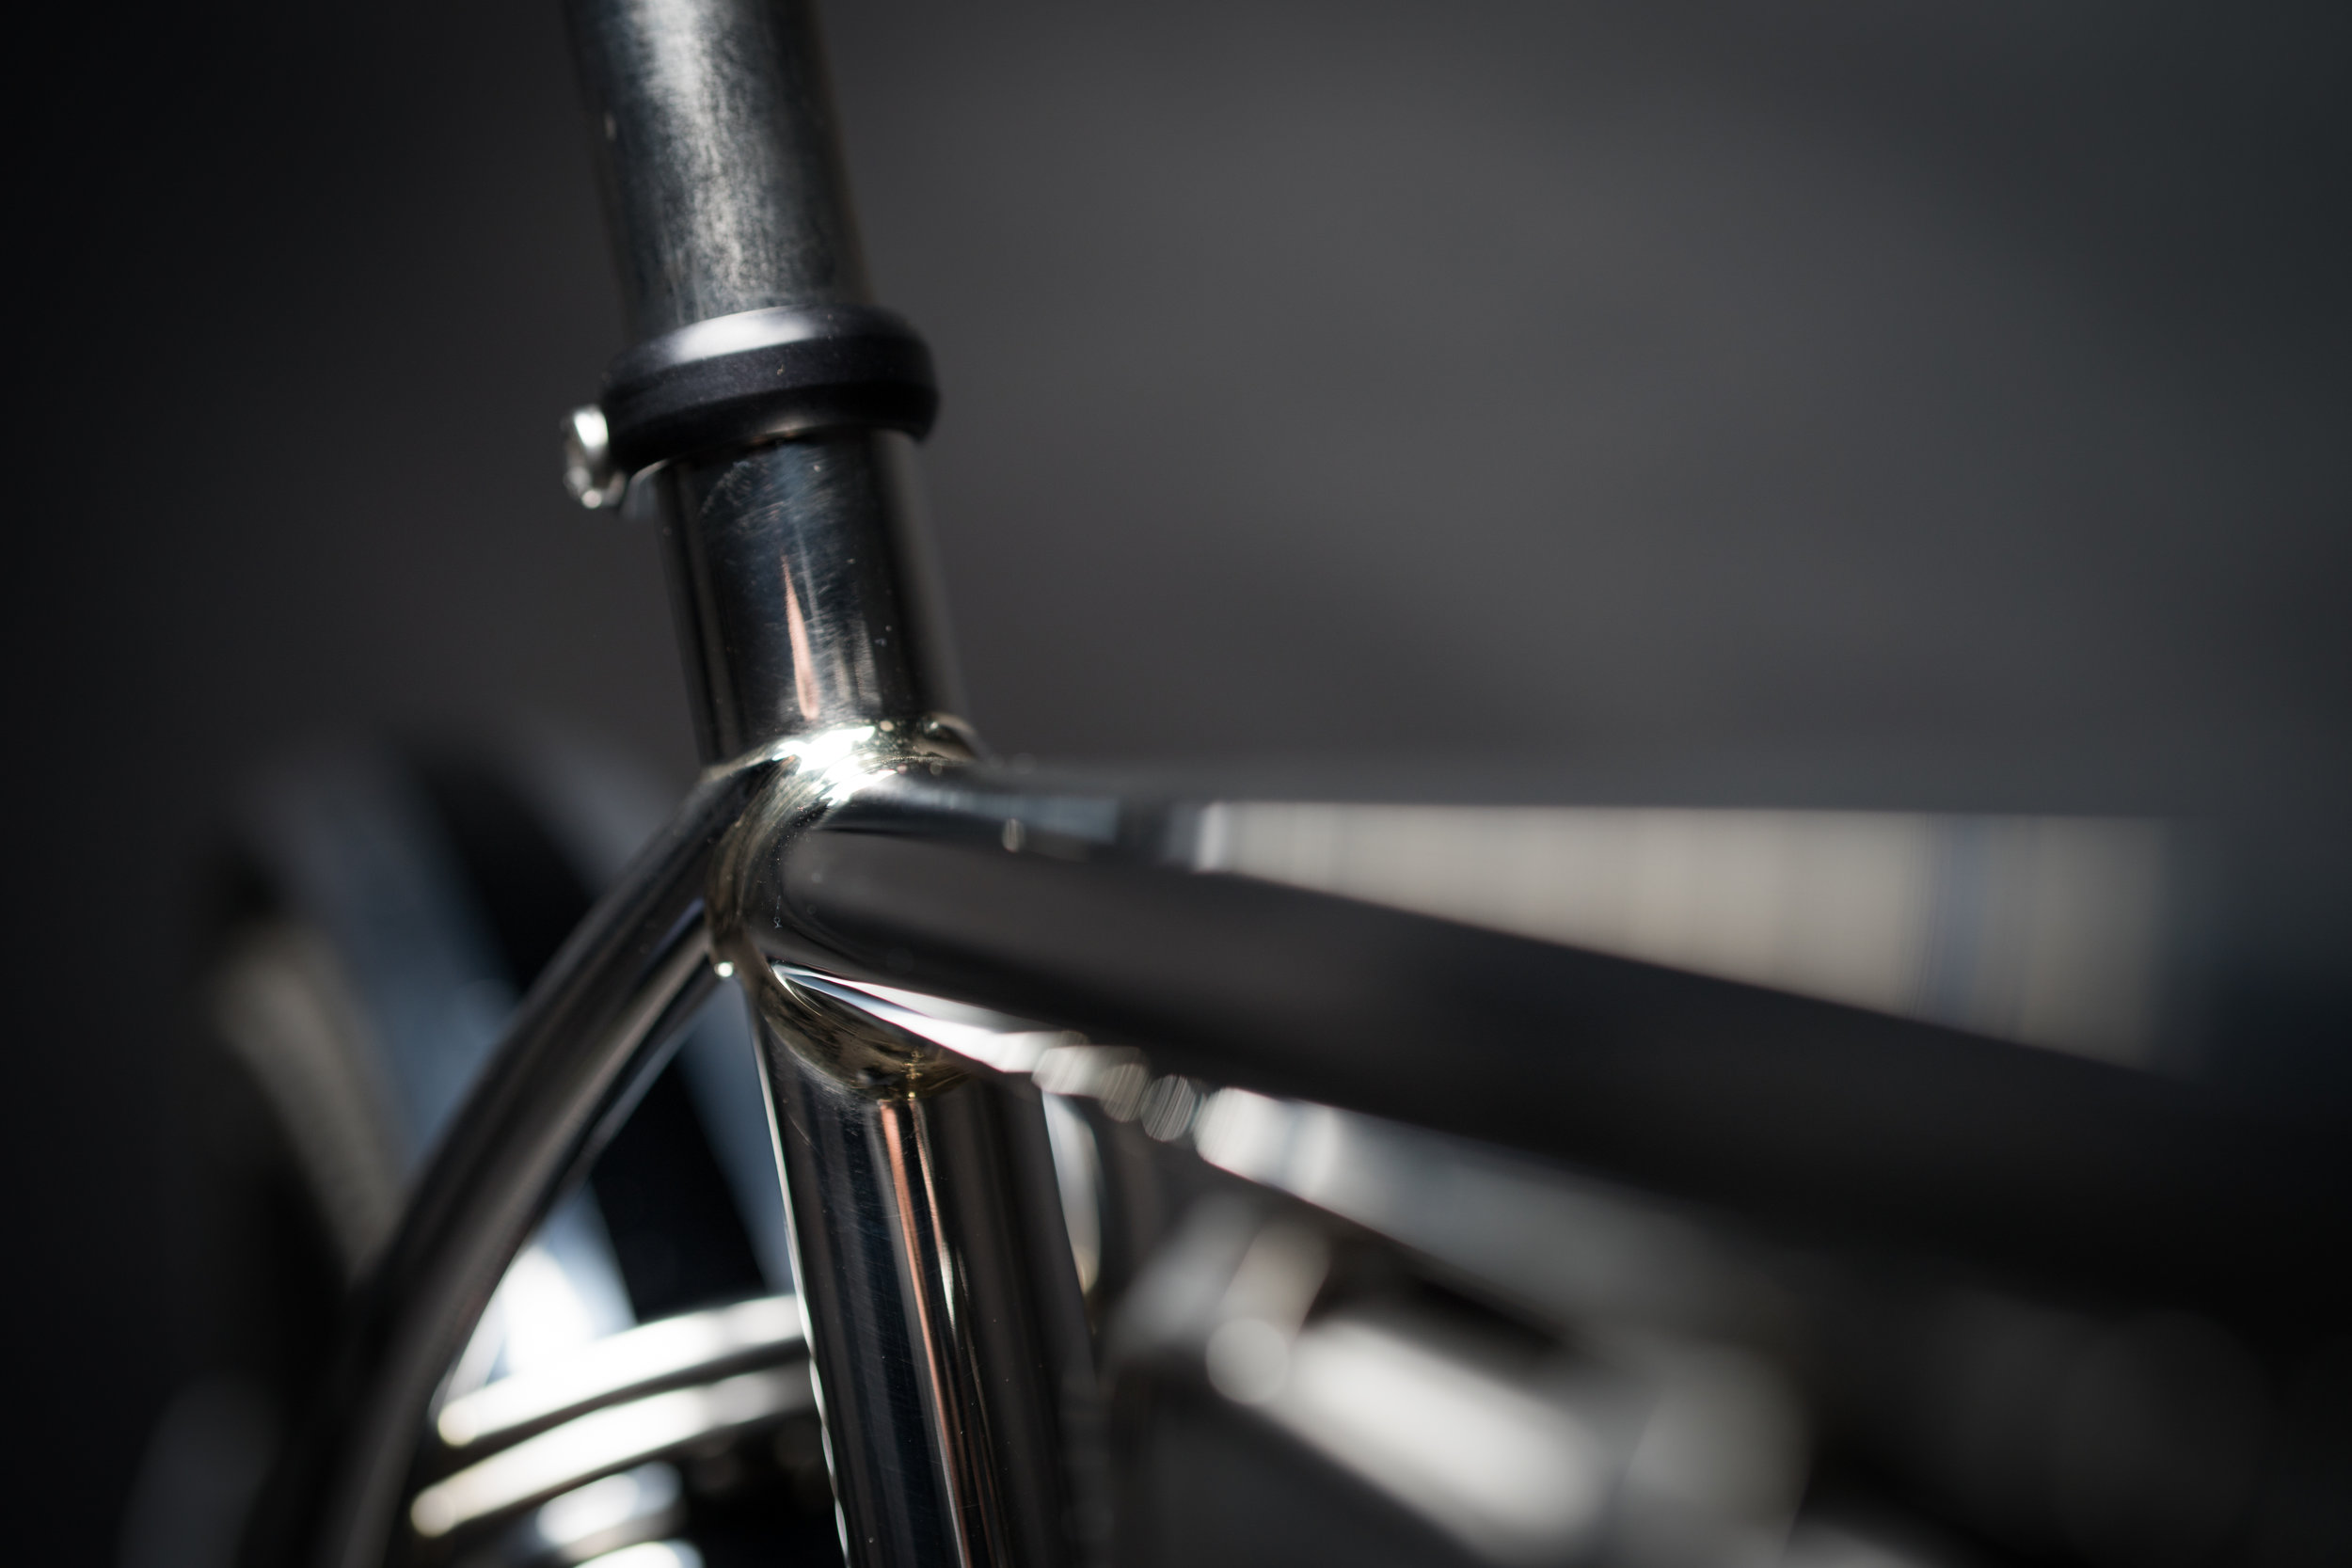
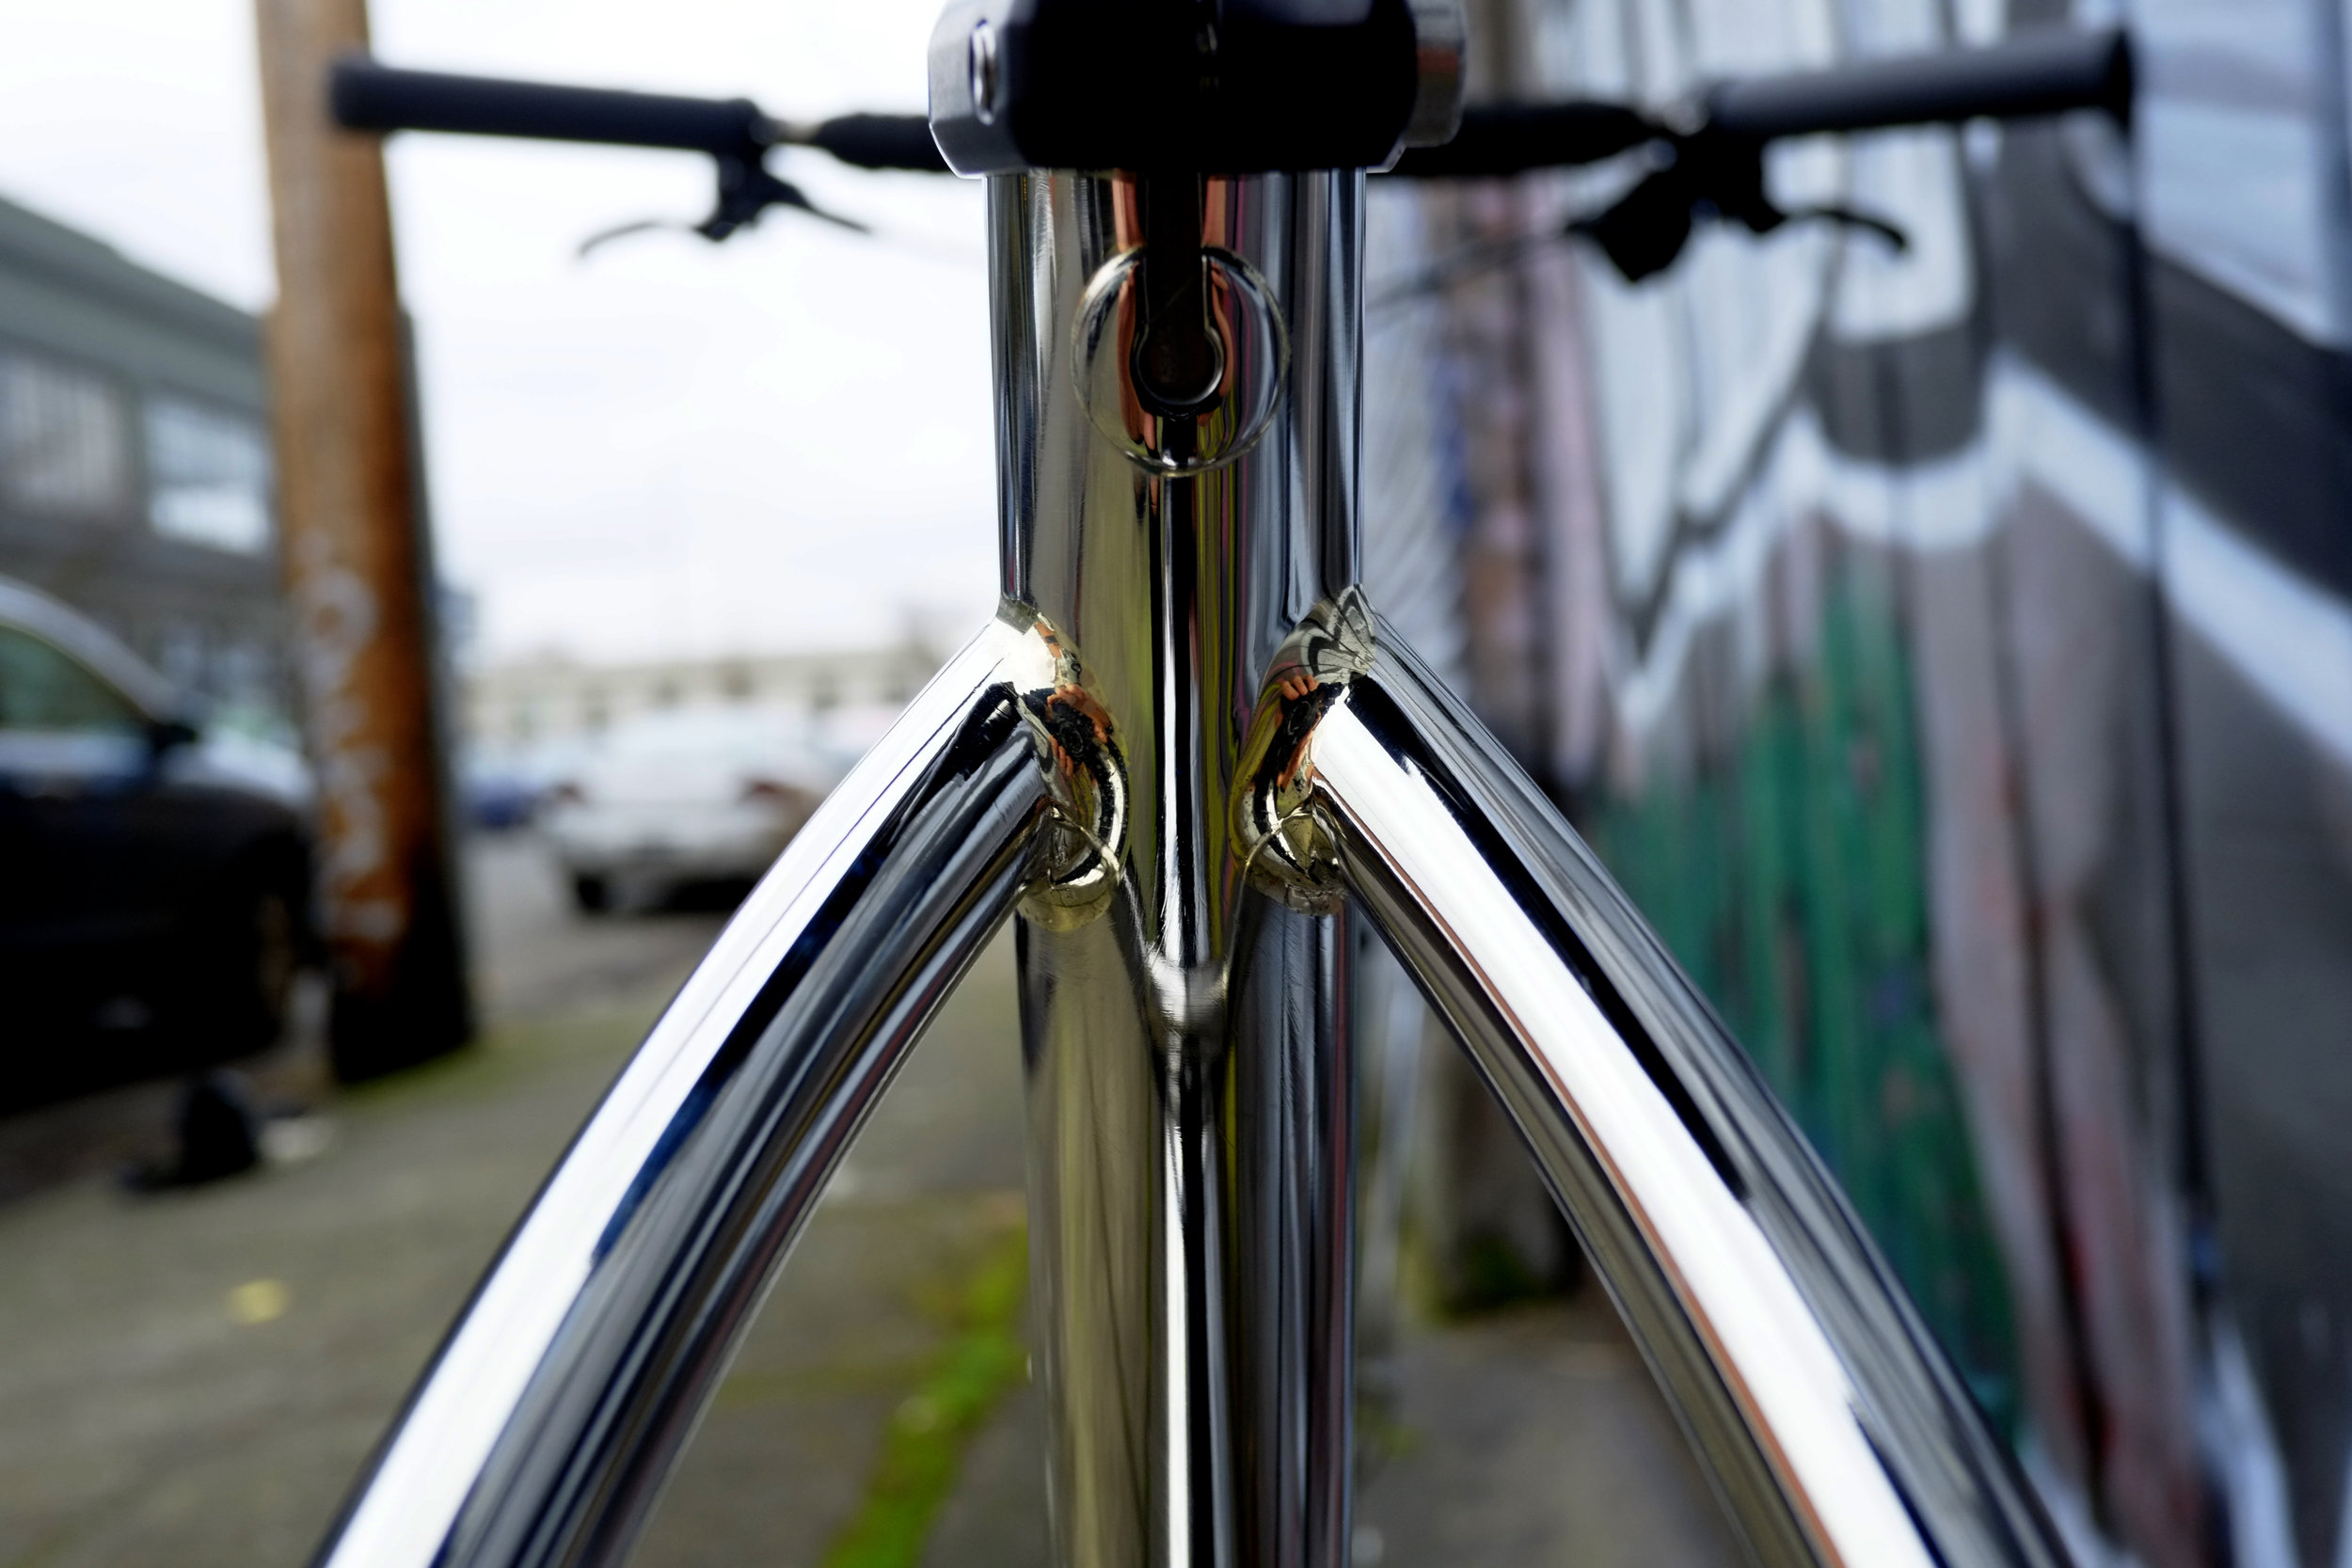
The last step of the construction was to install all the bridges and braze ons. Then, at last, it was time for the final polish of the frame and fork. I made the rack from chromoly, so after it was finished and polished I sent it to a chrome plater for treatment. After the final polish on the frame, it was time to strategically mask around the logos, and on the seat tube, and to give it a very light bead blast to etch in stripes and mark off panels. I did this with the help of Black Magic Paint, and the use of Dave Levy's blasting cabinet (Thanks Rudy! Thanks Dave!). Black Magic also masked and painted the stripe on the fenders, filled in the fork crown and painted the stem. After etching stars and panels, I went over the lower part of the frame and fork with a white Scotch Bright pad, burnishing it very lightly to tone down the mirror finish and giving it a subtle brushed appearance. And yes, I wore white cotton gloves throughout all of this.

Now it was time to install fenders, string up the internal wiring for the lights, and assemble the bike with parts. Much of this was accomplished with the help of Abraham of Abraham Fixes. I heard through the grape-vine that he recently became a father -- congratulations, Sir! With the bike now completed it was time to get some photos, which was way harder than I expected. I'm kind of a hack photographer, and I tried shooting the bike in several different settings, and with varying light levels, and had almost no success. Out of about 500 photos, I got maybe 6 shots that weren't terrible and washed out. I felt like this bike deserved better treatment, so I called in a professional, and Dylan VanWeelden took on the task. He basically had to make a black container around the bike, and to dim the lights way low. A majority of the photos you've seen here were taken by him, and many of them are still raw. I think you can agree, he did an amazing job of capturing this hard-to-shoot bike. I think a few of the shots are breath-taking. A big thanks to you, Dylan.

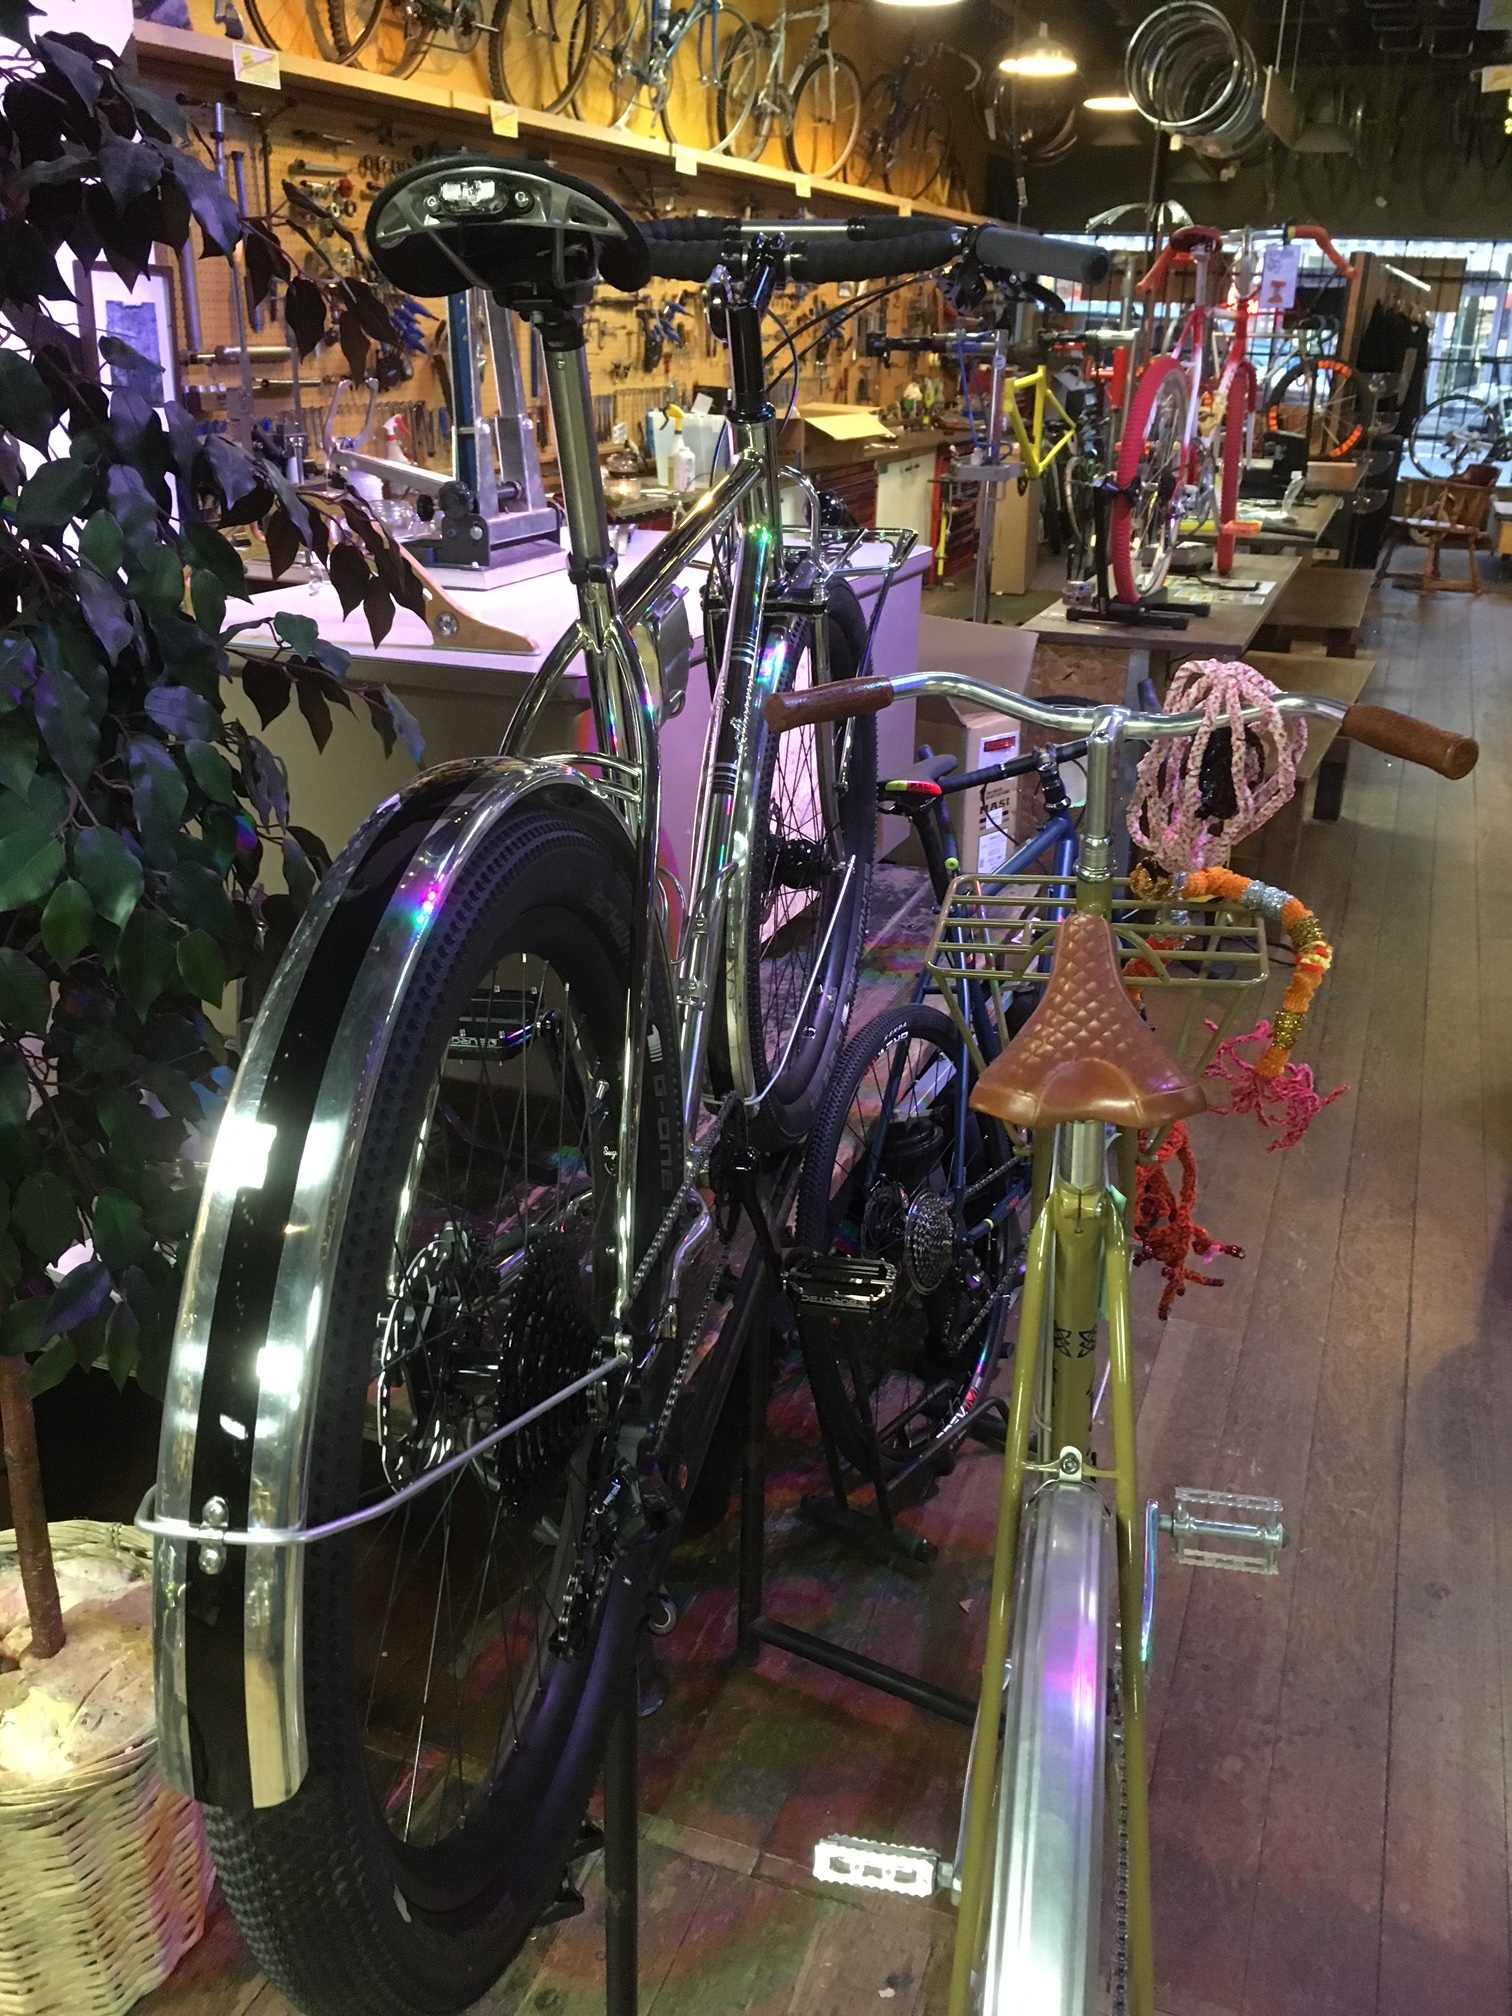
The owner of this bike is moving to Colorado in the next few weeks, and asked that I wait to ship it until he arrives. A wood crate is ready at the workshop, and I'll be zipping it up soon. I was grateful for the extra time with the bike to get the photos, and also because it allowed me to put it on display. I wanted to give people a chance to check it out in person. I got ahold of Sky at Velocult Bike Shop (sadly, their business is now closed) and he agreed to let me keep it there for a month or so. Thank you Sky.
The entire construction of this bike, including all the polishing and the final treatment of the frame, parts assembly, etc., took about six months. As a comparison, a regular, non-stainless version of this same bike would probably take me about two weeks to construct, would be at the painter for around a month, and would take a few days to assemble with parts. So you'll hopefully believe me when I tell you that I've had about a 12- 15% increase in my gray hair count over the course of this bike's conception and birth.

I love the craft of bike making, and if I didn't push my own boundaries sometimes, I'd eventually feel stagnant in what I do. But a bike of this magnitude takes its toll, as well: When I send this one out, I'll be sending out a piece of myself along with it. In a way, I think this is how a person like me stays in touch with the planet we live on, and how I search myself for my version of what it means to be alive.
To see the complete photo set, please head to the Ahearne Cycles Flickr page. Thanks for reading, and I hope you've enjoyed it.